Author:
Bobbie Johnson
Date Of Creation:
4 April 2021
Update Date:
1 July 2024

Content
Cross-country skiing is a popular winter sport and recreational activity. Differing from alpine skiing both in its technique and equipment, cross-country skiing allows you to cover large open spaces on flat snow or gentle slopes. They can be used to train the upper body as well as the lower one, as a means of transportation or as an opportunity to enjoy the winter landscape. Most people start with the traditional, classic way of cross-country skiing, but it will be easier to ski if you already have ice skating or rollerblading experience.
Steps
Method 1 of 2: Classic Cross-Country Skiing
 1 Practice on the paved track. Any cross-country skiing site should have smooth, well-groomed trails, often with two lanes for a pair of skis. This is the best way to learn cross-country skiing. Skiing off-piste or off-piste requires significantly more effort and is only recommended after you feel comfortable on the piste and have a powerful pair of skis.
 - If you are not in a prepared ski area, choose a flat area with powdery snow without any obstacles.
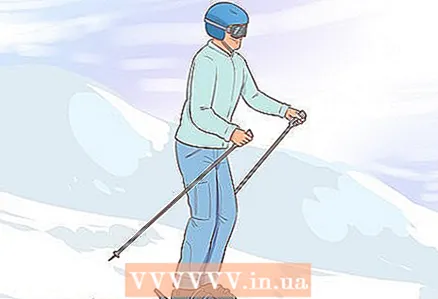 2 Get in the right position. Stand on a level surface with your skis parallel. Bend forward at the ankles and slightly at the knees. Keep your torso straight without bending your hips. This position helps to distribute the weight correctly on both legs.
  3 Slide your feet on the floor until you can move comfortably. Move sharply forward on one track at a time to feel how much force you need to apply for this, without losing your balance or bending above your hips.
 - Significant leg strength is required to convert this glide motion into a "push and slide" motion, described below. Many recreational skiers prefer to use only this technique to propel themselves forward.
- Significant leg strength is required to convert this glide motion into a "push and slide" motion, described below. Many recreational skiers prefer to use only this technique to propel themselves forward.
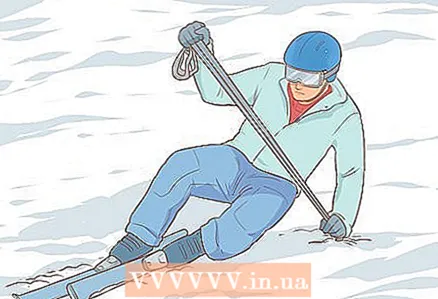 4 Learn to rise and fall. Every skier falls, so learn how to get up properly at the beginning of your workouts. Set aside the sticks after falling. Adjust your skis so they are parallel to each other, rolling on your back if you need to untangle them. Place your skis on the snow on one side of your body and crawl forward until your feet are behind you. Kneel down on the top of the skis and climb up using the poles.
 - If you fall on a hillside, lift your skis in the air and lower them on the hillside below you to get a more stable position. Crawl on level ground before going up. Keep the skis to one side as you crawl, not directly underneath you, otherwise you might push them down the hill with your weight.
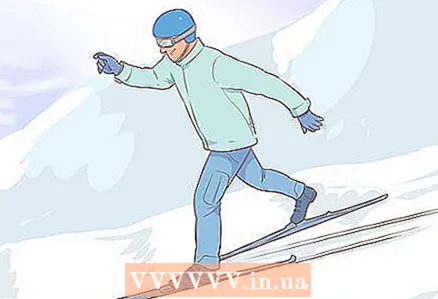 5 Practice a push-and-slide motion without ski poles. Set your ski poles aside at this point to practice this new movement without relying on arm strength. To start moving, push your right foot down into the snow, swinging your arms so that your right hand is in front and your left behind. Immediately transfer your weight to the left ski and lift the right ski slightly above the track, sliding forward, leaving the right ski behind. Bring your right foot back under you, then push off with your left foot and slide on your right ski. Alternate legs to keep moving. Try to find a rhythm where your legs alternate in wide strides and your hips move from side to side.
 - Press down on the snow as you step forward, rather than pushing backwards.
- Relax your body as you slide, leaning slightly forward to maintain speed.
- This can be exhausting and difficult for a beginner skier. If you are tired, take a break or return to the permutation movement.
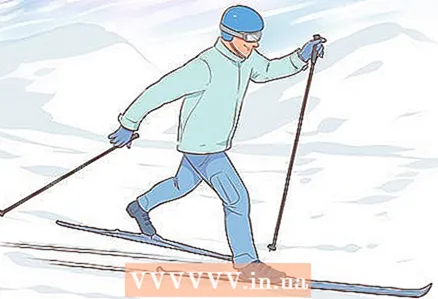 6 Push off with ski poles. After the push-and-slide movement is more or less automatic, take your ski poles. Immediately after pushing your right leg forward, transferring your weight to your left leg, thrust your left stick backward at an angle and push off with it to give your glide extra speed. Use your right stick to accelerate after pushing off with your left foot.
 - Stick the sticks closer to the body, practically without stretching your arms forward.
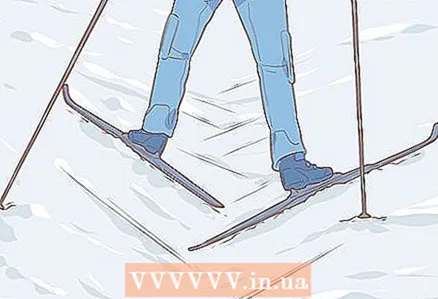 7 Use the herringbone method while climbing the mountain. Point your feet outward to create a V-shaped ski behind you, then tuck your ankles inward slightly to push the edge of the skis into the snow for a firmer grip. Raise one ski all the way off the ground and continue walking. Maintain your balance with a ski pole on the same side as the ski you are walking on. Alternate skis and poles on different sides.
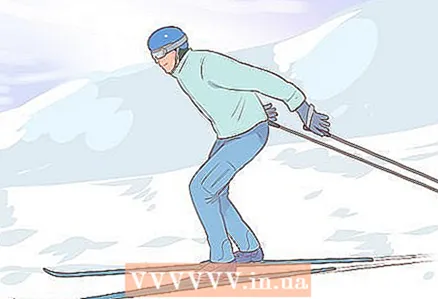
 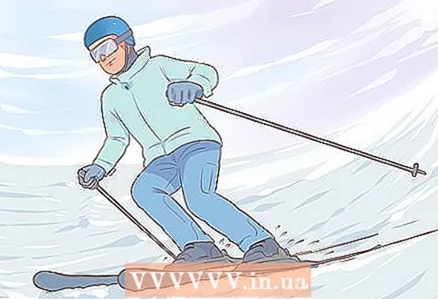 8 Slide or step down the slope. As a beginner, slide down only on gentle slopes that have ski tracks. Lean forward slightly over the skis as you slide to avoid falling on your back. If you are not sure what to eat over a certain area of the hill, point the tips of your skis in front of you and tilt them so that the edge closest to you sticks into the snow. [Walk down in small steps, keeping your balance.
 - If you need to stop suddenly halfway down a hill, sit low on the ground and lean back, letting the skis slide out from under you. Keep the sticks behind you at all times so that you do not hurt yourself or fall on top of them.
Method 2 of 2: Skating
 1 Consider learning the classic style first. The "classic" way of cross-country skiing described above shows how most people learn to ski. Skating is best for sports skiers interested in fast movement or racing, or people with experience in skating or rollerblading.
 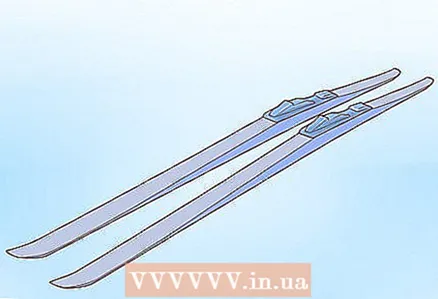 2 Ski on suitable surface and equipment. Skating consists of powerful, angular movements of the ski to increase speed. This is rarely possible away from pistes where there is a hard snow surface. Dedicated skis can also come in handy for added strength and handling, although skating can be done with regular cross-country skis.
 - Note: While most skiers skate on the ski slopes, you cannot ski on the ski tracks by cutting the slope. Ride on the surface of the track itself, next to the ski tracks.
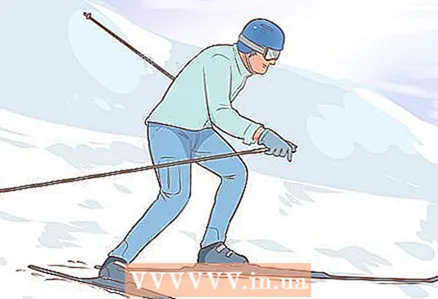
 3 Take a position. Bend at your ankles and knees, but keep your upper body straight and relaxed. Bend your elbows and keep your arms in front of you.
 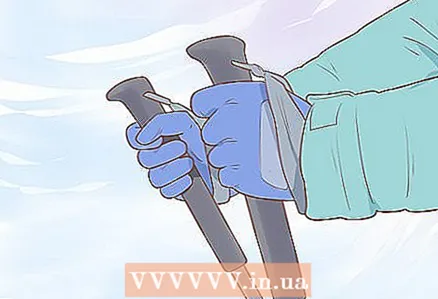 4 Put your ski poles aside. When you first get to know the technique, it is worth practicing without ski poles so that you can focus on your leg movements. Poles will add extra speed later, but should not replace strong leg movements.
 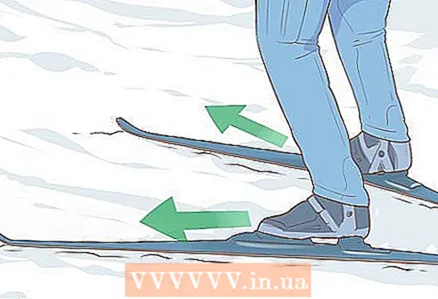 5 Point the toes of the skis outward and practice correct foot movement. The skis should be facing outward in front of you in position V. Rotate your right foot onto your little toe, placing the outer edge of the ski on the snow. Rotate your ankles as if you were applying light pressure to the snow so that the skis return to a horizontal position ready to slide forward. Return your right leg to its original position, and then practice this movement several times with each leg.
  6 Try to ride forward. Still without sticks, practice the same movement, but push harder and slide on the opposite track. Push off with your right foot, then lift it up, transferring all your weight to the left track to slide forward. Repeat the movement in reverse with your left foot, trying to keep your body directly over and in line with the ski that glides forward.
 - If you're having trouble keeping your balance, stop and work on it; try to stand steadily on each ski in turn, without moving.
 7 Try again with ski poles. Once you can repeat the glide motion, practice the "V-1" skating technique. To do this, stick both sticks into the snow, at the same time place one of your feet on the snow. The other leg pushes off the snow while the sticks are in the air.
 - Movement sequence V-1: "Raise 1st leg, 1st leg and sticks on the ground, triple take-off, raise 2nd leg, lower 2nd leg".
- You can time the stick to match your left foot or right foot, whichever is most comfortable for you.
 8 Learn about other riding methods if you want to race or move faster. The "V-1" technique described above will allow you to move faster than the classic cross-country skiing style. However, with experience, especially if you develop an interest in racing, there are a few other techniques you can learn. Perhaps the most common of these is the "V-2" style, in which you stick both sticks in and push off just before lowering each foot into the snow. Experienced skiers are more likely to use it on level ground to develop higher speeds and only resort to the "V-1" technique described above when climbing hills.
 - Movement sequence V-2: "Raise the left leg, stick in both sticks, push, lower the left leg, raise the right leg, stick in both sticks, push, lower the right leg."
Tips
- Start cross-country skiing on prepared snow that will glide smoothly over the surface without being too hard.In general, you should try skiing on ice-free powder snow, avoiding areas with rocks, roots, or other obstructions.
- Unlike alpine skiing, on cross-country skiing, only the front of the boot is fixed, leaving the heel to dangle freely. This gives you more freedom of movement for your feet.
- Snow reflects brightly the sun's rays, which can easily cause sunburn. Apply sunscreen and goggles before going skiing.
- Drive along the side of the road to let cross-country skiers and skiers descend right on top of you.
What do you need
- Cross-country skiing
- Ski poles


