Author:
Carl Weaver
Date Of Creation:
28 February 2021
Update Date:
1 July 2024
Content
- Method 2 of 2: Flossing Acrylic Nails
- Tips
- Warnings
- What do you need
- Soaking acrylic nails in acetone
- Removing acrylic nails with dental floss
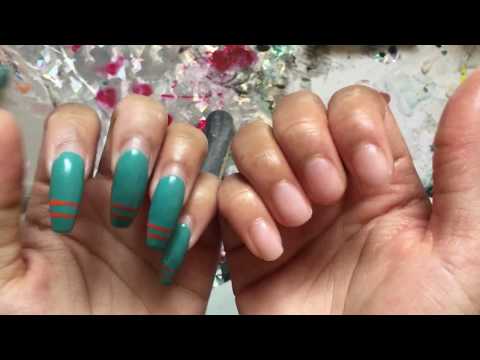
 2 File off the top of your nails. Use a fine nail buffer to file away the polish and remove as many nails as possible. Make long strokes along the entire length of the nail.
 - Be careful not to cut off part of your own nail.
3 Pour acetone into a bowl. Take a medium-sized glass bowl and half-pour the acetone into it. Never heat acetone in a microwave oven or use near heat sources. It is extremely flammable! - The room should be well ventilated, as acetone has very strong vapors.
- Never smoke near acetone.

Laura martin
Laura Martin is a licensed beautician based in Georgia. Has been working as a hairdresser since 2007 and has been teaching cosmetology since 2013.
Laura martin
Licensed cosmetologist
Professional trick: use warm water to speed up the process! Just be careful not to make it too hot, because you will have to soak your nails in it for a while.
4 Apply petroleum jelly to the skin around your nails. Acetone dissolves plastic but also harms the skin, so protecting yourself is essential. This will prevent your skin from irritating with acetone, especially if you have hangnails. - Don't put too much petroleum jelly on your nails, as the acetone needs to get to them and dissolve.
- Use a wooden cotton swab applicator to apply the Vaseline more precisely.
5 Apply acetone to your nails. Soak a cotton ball (one for each nail) in acetone and place it on your nail. Wrap tightly with a strip of aluminum foil. Let your nails soak for 30 minutes. - If you don't have foil, use duct tape, not plastic, to secure the cotton wool.
- You can also just dip your nails in a bowl of acetone if you know it won't irritate your skin.
6 Remove the foil and cotton balls from your fingers. The cotton wool should come off easily with the nail. - If you were just soaking your nails in acetone, gently lift your nails with an orange tree stick.
- If the acrylic nails are still firmly in place, repeat the process for another 20 minutes and then try removing them again.
7 Remove any remaining acrylic nails with a buffer. Acetone should have softened the acrylic, but if the acrylic begins to harden again while removing the remaining nails, soften it with a cotton swab dipped in acetone. 8 Shape your natural nails. Use nail clippers and a nail file to smooth the edges. Buff the nails lightly with a buffer, moving from the base of the nail to the tip. - To avoid damaging your nails, file only one way.
- Several top coats of natural nails could be removed along with acrylics. Be careful not to damage them further when polishing and filing.
9 Restore moisture to your hands. Acetone is very dry to the skin. Wash off residue with soap and water, dry your hands, and brush with body oil, olive oil, or moisturizing lotion. - Rub the moisturizer into your nails, cuticles, and skin.
Method 2 of 2: Flossing Acrylic Nails
 1 Find a partner. This method requires two people, as you need to thread the dental floss under the acrylic nail with both hands.
 - 2 Lift up the bottom edge of the acrylic nail. Use a cuticle stick and gently pry up the entire bottom edge.
- 3 Your partner should pry the floss under the edge. The partner should be facing you, pry the floss under the bottom edge of the nail and hold it by the ends with both hands.
- 4 Your partner should begin to move the thread back and forth under the nail and lift slightly to release the nail. Continue until the acrylic nail is completely removed.
- Your partner shouldn't move the floss too fast if you don't want to rip your natural nail along with the acrylic.
- Repeat this procedure for each nail until you have removed everything.
- 5 Polish your nails. Use a buffer to cleanse your natural nails, which may be slightly damaged from this procedure. Apply cuticle cream and moisturizer.
 6 Ready! There is no acrylic left on your nails.
Tips
- You can purchase a professional acrylic nail removal kit at your pharmacy.
- Don't put acetone in a plastic bowl. It will dissolve and the acetone will spill.
- You should only file your nails if they have grown enough so that you can see where the acrylic ends and the natural nails begin.
Warnings
- If your nails are in pain or won't come off, stop trying and seek help from a nail salon.
- The use of acrylic nails carries a small risk of infection if there is a gap between the acrylic and your natural nail. If your natural nails become thick and discolored, talk to your doctor or dermatologist.
What do you need
Soaking acrylic nails in acetone
- Nail clippers
- Nailfile
- Shallow buffer
- Acetone for nail polish remover
- Small glass bowl
- Aluminium foil
- Cotton balls
- Foil strips
- Orange tree stick
- Mild soap and water to wash your hands
- Moisturizer
Removing acrylic nails with dental floss
- Dental floss
- Nail clippers
- Nailfile
- Shallow buffer
- Moisturizer


