Author:
Virginia Floyd
Date Of Creation:
6 August 2021
Update Date:
1 July 2024
Content
- Method 2 of 2: Using colored pencils
- Tips
- Warnings
- What do you need
- With a pencil
- With colored pencils
 2 Draw the tattoo on tracing paper using a pencil. Use a soft pencil (e.g. 2M, 3M, 4M, and so on). Also, the degree of softness of the pencil can be denoted by the letter B (from the English blackness). Apply pressure to the lead as you draw with a pencil. You should have a brilliant sketch on tracing paper. The thicker the layer on the tracing paper, the more pronounced your tattoo will be.
 - Do not use a mechanical pencil, as you will not be able to achieve a dense layer on the tracing paper.
- If you don't have tracing paper, you can use parchment paper instead. You can also use plain paper, but you won't get the desired effect.
- If you don't know how to draw, print a small image and sketch it.
3 Cut out the image, leaving a small amount of space around it. It is much easier to attach a small piece of paper to your skin than a large, full sheet of paper. Don't worry about precision and accuracy at this stage; as long as you have a cutout image of a future tattoo, you won't have any problems. 4 Hold the cutout with the shaded side against your skin. Smooth the paper over your skin and hold it around the edges with your thumb and forefinger. 5 Place a damp cloth over the paper image. Soak a washcloth in warm water, then wring it out. Place the tissue on the paper and hold it there for about 20 seconds. Do not move the napkin after you apply it to the image of your future tattoo on paper. 6 Remove the damp cloth and then remove the sheet of paper. You should end up with a fuzzy image of your tattoo. At this stage, you can leave everything as it is, or get a clearer image. In this case, proceed to the next step below. 7 Cover the tattoo with eyeliner if you want to darken it. You can skip this step, but it will make your tattoo more realistic. You can use liquid eyeliner or pencil. If you want a tattoo that will delight you for a long time, use waterproof eyeliner. 8 Powder the tattoo with baby powder or talcum powder. Take baby powder or talcum powder and sprinkle it on your tattoo. Then take a soft, fluffy makeup brush (like the one you use to apply powder) and gently remove the powder. 9 Secure the tattoo with liquid bandage. Use a liquid bandage as a spray or solution with a brush. Thanks to the use of a liquid bandage, your tattoo will be protected from damage and will delight you for at least three days. - As a last resort, you can use hairspray. However, its effect will not last long.
- Take care of your tattoo. Do not wash or rub the tattoo. Otherwise, it will not last long.
Method 2 of 2: Using colored pencils
- 1 Pour hot water into a cup. You can pour hot water from the kettle. Alternatively, you can pour water into a mug and heat it up in the microwave. The water shouldn't boil, but it should be hot.
- 2 Dip the colored pencils with the lead down into the water and wait 5 minutes. This will make the lead softer so you can paint over your skin. If you are using watercolor pencils, you do not need to keep them in water for a long time; immerse them in water for a few seconds.
- 3 Draw a picture of your future tattoo. If you decide to draw, for example, an emoticon, sketch it out. Then add details. If you make a mistake, fix it with a cotton swab or simply wipe it off with your finger.
- When removing the pencil from the water, shake it, removing excess water from the lead.
- 4 Add details and outline the drawing along the contour. Add the finishing touches when you're done with the main work. For example, if you are drawing an emoticon, you can draw a mouth, eyes, and outline the drawing.
- If the lead becomes dry and it is difficult for you to draw with it, dip it in water again; however, do not leave it in water for a long time.
 5 Wait for the tattoo to dry. It only takes a few seconds. Be careful when touching the tattoo. Do not blow on the tattoo thinking that it will dry out faster. If you've used a lot of water while creating your tattoo, you can smudge it by blowing on it.
 - 6 Spray your tattoo with hairspray if you want it to last longer. Typically, this kind of tattoo will last until your next bath or shower. However, hairspray will protect the tattoo from damage.
Tips
- If you want to write something on the skin, write the letters in a mirror image.
- If you want to get a color tattoo, you can use regular colored pencils or watercolor pencils. Watercolor pencils should not be immersed in water for extended periods of time.
- You can do the same with plain paper and a gel pen. It's easier and faster.
- If you don't have eyeliner, you can use a highlighter or pen.
Warnings
- Do not tattoo in the eye area; the skin in this area is too sensitive.
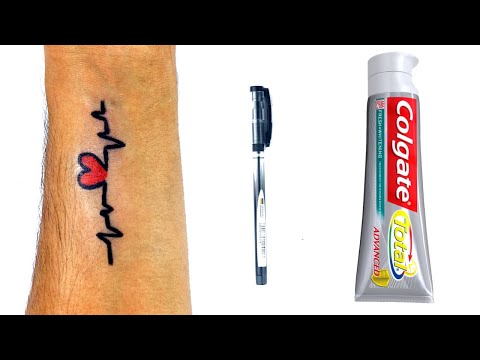
What do you need
With a pencil
- Soft pencil (such as 2M, 3M, 4M, and so on)
- Tracing paper or parchment paper
- Cloth napkin
- Eyeliner (optional; needed to darken the tattoo)
- Powder (optional)
- Fluffy makeup brush (optional to remove talcum powder or powder)
- Liquid bandage or hairspray (for fixing the eyeliner)
With colored pencils
- Mug
- Hot water
- Colour pencils
- Hairspray (optional but recommended)


