Author:
Gregory Harris
Date Of Creation:
10 August 2021
Update Date:
22 June 2024
Content
- Steps
- Method 1 of 3: Understanding the Basics
- Method 2 of 3: Dry ventilation
- Method 3 of 3: Wet ventilation
- Tips
- What do you need
Proper ventilation is an important part of a plumbing system. Every plumbing fixture, from the toilet to the shower, must be connected to a ventilation pipe. Outside air pressure drawn from the ventilation pipes helps push waste or used water through the downpipes. Ventilation pipes also run through the roof to remove harmful gases or unpleasant odors from the house. Try these steps to ventilate your piping / plumbing.
Steps
Method 1 of 3: Understanding the Basics
 1 Check local plumbing and building requirements. These will have restrictions on the size and material of your piping, the distance between some mounts and ventilation pipes, and the placement of the ventilation. Certain regulations also require permission or professional assistance for certain projects. Make sure you fully understand your local regulations before starting work, and contact your local plumber if you have questions or would like advice.
 - Building requirements, reflecting current knowledge of the safety and effectiveness of materials and building codes. Make sure you check the latest local regulations.
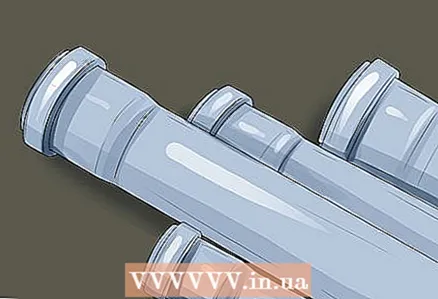
 2 Select the pipe material for your ventilation system. Consider which pipe material best suits your needs, budget, and any existing piping. Most ventilation systems use small pipes, less than ten inches (25 cm) in diameter, allowing the use of plastic pipes such as PVC or ABS.In certain situations, they may lack both power and strength, so copper, steel, or cast iron pipes are also available. When selecting pipes, consider strength, durability, flexibility, weight, corrosion resistance, and pipe joining methods.
 - Both PVC and ABS pipes are non-toxic and abrasion resistant. ABS pipes are easier to install than PVC, they are stiffer and stronger, but they also deform more often in the sun. PVC pipes are flexible but durable. Both types of plastic pipes are cheap compared to metal and other materials.
- Consider the class of pipe pressure. If you suspect that your pipes will have high pressure, buy pipes with a higher pressure class. For most projects, grade 160 or 200 PVC is sufficient. The difference in cost between these two classes is negligible, which is why people often choose the more powerful 200 kassa pipe.
 3 Consider the size limits. The size of the pipe, both for ventilation and for drainage or drain pipes, determines the number of clamps you can connect to the pipes. It also limits the distance between the mounts and their drains. Large pipes will give you more freedom in terms of spacing and number of clamps, but using only large pipes may not be necessary. Check local building codes for ventilation, drainage and drainage.
  4 Understand your home's drainage system. Drain pipes drain water and waste from the toilet. Your building has a large diameter central pipe that is the control center of the wastewater system. From here, waste is transferred to your sewer or waste tank.
 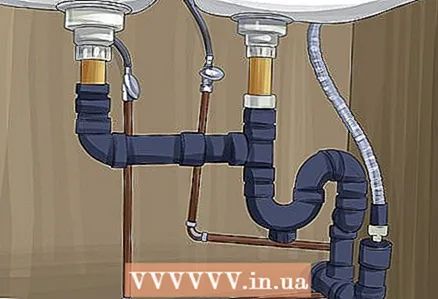 5 Learn about your home's drainage pipes. Drainage pipes carry water from sinks, showers, bathtubs, and other fixtures. They are often fitted with a P-trap, or a bend in the pipe directly below the sink, or other P-shaped connection. This traps water at the bottom of the "P", blocking pipes and preventing gases and odors from entering your home through the drain pipe. The water in the P-trap is refreshed every time water flows through the drain pipe.
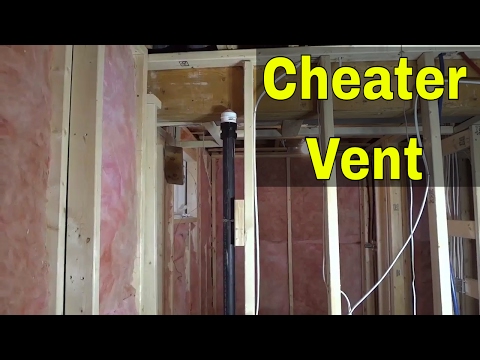
  6 Understand how ventilation pipes work. Ventilation pipes run upward from the waste or drain pipes, ending outside the building, usually protruding through the roof. This allows unpleasant and potentially harmful odors and fumes to safely escape the plumbing / sewer system, releasing harmful gases into the air outside. This lets air into the system, filling the vacuum left by the water that moves through the pipe. This allows water to flow quickly and smoothly through the pipes.
  7 Understand the overall layout of the pipeline. Ventilation and other vertical pipes should be as straight as possible to prevent condensation from the house in the pipes. Horizontal pipes should slope downward towards the joints so that gravity pushes waste and water through the pipes. They typically operate with a 0.25 inch (0.64 cm) slope for each horizontal pipe leg.
  8 Visit a hardware store to purchase pipes, fittings, and materials to connect and support your vent pipe. Measure the number of pipes you need before shopping and ask the store staff to help you cut the pipe to the correct size. Buy fasteners to connect pipe pieces together and create corners, and choose fasteners based on the type of pipe you will be using.
 - The employees at hardware stores are often aware of the various projects you can undertake and will answer questions or suggest something if you are unsure about something. They can also refer you to professionals who will help you more thoroughly with your project.
Method 2 of 3: Dry ventilation
 1 Understand dry ventilation. It is a simple system in which each connection has its own ventilation pipe.It's easy to plan and execute because you don't have to worry about placing different connections close together or using a pipe large enough for multiple branches. Each vent is a small, insulated conduit that you can work with separately. However, different ventilation pipes for each appliance means that you have many ventilation pipes running through your building and from your roof. This uses a lot of unnecessary pipes and you will be doing more work than you need to.
  2 Create dry ventilation by attaching a ventilation pipe to the drain. Depending on the attachment, the ventilation pipe can be quite small, but it should be located within 0.6 m of the connection. Check local building codes, sizing and spacing regulations for your vent pipe.
 - The overall layout should have a drain pipe horizontally from a sink or other device at a distance of up to 0.6 m. Then the drain pipe will be connected to the vertical pipe. Down from the joint, this riser acts as a drain for the jig. Up from the joint is ventilation for this fixture.
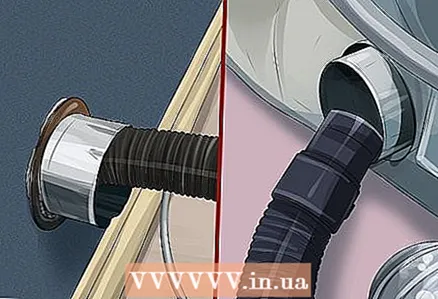
 3 Extend the ventilation pipe outside the building in accordance with building codes. Typically, the ventilation pipe should protrude 15 cm above the roof or 30 cm from vertical walls, but double check the building codes to be sure.
  4 Repeat the ventilation installation process with any other connections you make. Make sure each connection has a vent pipe connected to it to keep your entire plumbing system running quickly, smoothly, and safely.
  5 Vertical ventilation pipes called ventilation shafts allow air to circulate to any part of the plumbing system. Ventilation pipes can be operated in parallel with drain pipes to ensure adequate ventilation in high-rise buildings. Sub-ventilation can be branched together to go into one pipe, allowing only 1 ventilation hole in the roof.
Method 3 of 3: Wet ventilation
 1 Understand wet ventilation method where one ventilation device is another drain. Within this system, it is possible to install several different devices in the same pipe system, attached at different locations. While this system complicates the layout of your plumbing system, it reduces the total number of pipes and can save a lot of space and effort.
 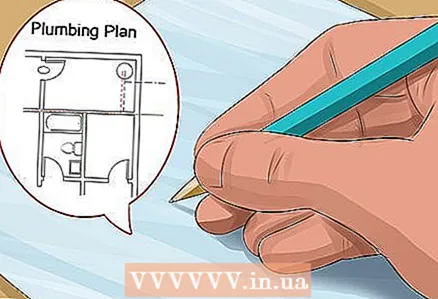 2 Design the locations and layouts of your pipeline. Consider getting a professional plumber to help you with this. As well as the size of the pipe required for each segment, the distance between the fasteners, and the locksmith requirements of each device. Make sure your plans fit into building codes, which can be more difficult for wet ventilation than dry ventilation.
 - An example of a bathroom layout is as follows. The sink has a 1.5 ”(3.8 cm) diameter drain pipe that connects to a vertical ventilation pipe. The toilet has a 3-inch (7.62 cm) drain pipe that forms a T- or Y-shape at the bottom of the vent pipe, so the vent pipe runs vertically upward from the horizontal drain pipe. Between the intersection of the sink drain pipe and the toilet drain pipe, the vent pipe acts as a sink drain and toilet vent, and should be 2 inches (5.08 cm) in diameter. Above the intersection with the sink, the vent pipe simply acts as ventilation for both fixtures and can be less than 1.5 inches (3.81 cm) in diameter.
 3 Agree on wet ventilation rules. For example, toilets should be installed below all other fittings so that nothing comes out through the drain.A wet ventilation pipe cannot be reduced in size - the pipe should never be smaller than other appliances connected to it. And all fixtures should be no more than the maximum allowable distance from ventilation, even if that means certain devices with a dry ventilation system.
 - See your local building codes for more detailed rules and double check to see if you are following all of them. Show your plans to a professional plumber or someone familiar with these codes if you are unsure of any of them.
Tips
- If possible, consider installing a vent line in the same wall as your water supply and drainage pipes. This configuration will save materials and make subsequent repairs easier.
- Ventilation areas that collect moisture or condensation, such as bathrooms, prevent mildew and rust.
- The use of a professional plumber is recommended for installing a ventilation pipe in a plumbing system.
- Check with your local building regulatory authority before beginning pipeline design. Make sure you meet all requirements or obtain all required permits before starting work
What do you need
- Plumbing and building codes and regulations
- Pipe configuration and layout
- Hardware store
- Roulette
- Piping materials
- Pipeline fixings
- Stairs
- A hammer
- Nails
- Hole saw


