Author:
Bobbie Johnson
Date Of Creation:
7 April 2021
Update Date:
1 July 2024

Content
- Method 2 of 3: Fresh flower wreath
- Method 3 of 3: Pine Cone Wreath
- Tips
- What do you need
- Additional articles
- Wire hanger
- Nippers
- Crepe ribbon for flowers
- Artificial flowers or leaves
- Ordinary tape
 2 Make a base for your wreath. Carefully shape the triangular wire hanger into a round one. 3 Then prepare the flowers. Artificial flowers are usually located on separate branches that extend from the main central stem. We need to separate these twigs with wire cutters where they are attached to the main stem. 4 Attach the flowers to the hanger. Start at the top of the hanger, not far from the hook, attaching the flowers with a flower ribbon.
 - Take the twig so that the flowers are directed to the left.
- Place it on the hanger at an angle of approximately 140 °.
- Pressing the twig against the wire, wrap a piece of flower ribbon around them.
- Place the second branch to the right of the first so that their flowers touch and the stems are one on top of the other. Wrap them with tape.
- Continue to attach the twigs to the wire clockwise until you have closed the hanger completely.
5 You can decorate the hanger hook if you like. Wrap the ribbon around the hook so that it blends in with the rest of the wreath. You can also make a satin ribbon bow. You can now hang your wreath. Method 2 of 3: Fresh flower wreath
- 1 Collect materials. You will need:
- Porous foam (piaflor) for the base
- Fresh flowers
- Leaves of trees or flowers
- Ribbon (about 2 meters)
- Scissors
- Floristic wire
- 2 Imagine your wreath. Before you start, think about what your wreath will be like. Sketch on paper and refer to it as you make your wreath.
- 3 Prepare the base for the wreath. Dip the whole piaflor into the water. It should be damp, but not too wet, or it will drip to the floor when you hang the wreath.
- 4 Make a wreath hanger. Before you start decorating your wreath, make a hanger for it. She will also show you where he has the upper hand.
- Pass the floral wire through the center of the piaflore.
- Connect the ends of the wire together, twist them, and bend them into a hook.
- You can hang your wreath on anything while you work. This way you will be able to see how it will look when you decorate your home with it.
- 5 Attach the leaves. The leaves will hide the piaflor and serve as a visual backdrop for the flowers.
- Separate each leaf from the stem.
- Begin to insert the stems of the leaves into the piaflor from the edge of the wreath inward.
- Try to keep all the leaves pointing in the same direction. Place them on top of each other so that the piaflor is not visible under them.
- Continue attaching the leaves clockwise until you have covered the entire base of the wreath.
- Make sure the leaves cover the piaflor around the edges of the wreath.
- 6 Start attaching flowers. Now you can really show your talent in all its glory.
- Cut the flowers to a length of about 8 cm. Remove all leaves at the bottom of the stem.
- Insert flowers into the wreath according to your sketch. Look for spaces between the leaves where you can insert the stems.
- Step away from your wreath from time to time and look at it from a distance. This will help you see the results of your work better.
- Continue to work.
- 7 You can add a satin ribbon to the wreath. Tie the ribbon neatly around the wreath and then tie it in a knot or glue it to the back of the piaflor to secure it in place.
Method 3 of 3: Pine Cone Wreath
- 1 Collect the material. You will need:
- Form for a vine wreath
- Pine branches with small to medium sized cones
- Glue gun (hot glue) with rods
- Paint color of your choice
- DIY glue
- Shine
- Paint brush
- Hanging tape
- 2 Imagine your wreath. Before you start making a wreath, think about how it will look for you. Sketch for yourself on paper a sketch with which you will refer.
- 3 Attach pine branches with cones to the wreath. Take a glue gun and apply a small amount of glue to the buds. Glue the twigs to the vine mold. Continue doing this until you cover the entire form with them. Let the glue dry.
- 4 You can color your wreath if you like. Once the glue is dry, you can paint your wreath. Take a brush and paint on the branches. Let the paint dry completely.
- 5 You can sprinkle glitter on the branches if you like. To make your wreath look more festive, sprinkle some glitter on it. Take a clean brush and dab some glue on the bumps. Sprinkle on top of the glitter. Let the glue dry.
- 6 Make a wreath hanger. Wrap the ribbon around the wreath and tie it in a bow. Your wreath is ready.
Tips
- If you are making a wreath for Christmas, then choose warm holiday colors for it: green, maroon, or cranberry.
- You can even tie some small ornaments to the wreath. Attach them to the wire along with the flowers, not when you are finished making the wreath.
- Alternate the angles at which you tie the material to the wreath to make it look more fun.
What do you need
- Wreath base (wire hanger, piaflor, or vine)
- Artificial flowers, fresh flowers, leaves, pine cones
- ribbon
- Floral ribbon
- Paint, glitter, brushes
- DIY glue
- Hot glue
- Nippers, scissors
Additional articles
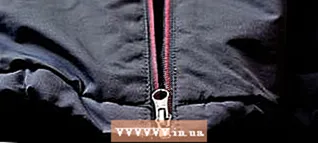 How to fix a zipper if the slider has come off completely How to make candles at home
  How to make and transfer an iron-on transfer to fabric How to restore the binding and cover of a book How to sew How to make a Chinese slip knot How to measure the length of an inner seam How to make dog hair yarn
  How to make a rubber band bracelet on a rainbow loom
  How to use thermal mosaic
  How to make perfume from flowers and water at home How to dye jeans black How to soften Playdough plasticine
  How to make your skin tighter


