Author:
Christy White
Date Of Creation:
5 May 2021
Update Date:
1 July 2024
Content
This wikiHow teaches you how to create a layer mask, which can be used to hide or show parts of other layers in Adobe Photoshop.
To step
 Open or create a Photoshop file. To do this, double-click on the blue icon with the letters "Ps ’ and then on File in the main menu.
 - click on Open... to open an existing document, or ...
- click on New... to create a new document.
 Click on the layer you want to mask. The layers panel is located in the bottom right part of the app.
 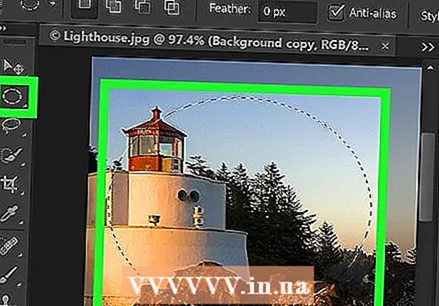 Select the area you want to keep visible. You do this as follows:
 - Use the Selection tool to select a larger area without exact edges. (The selection tool is the dotted line icon at the top of the tools menu. Press and hold the selection tool to display all options of this tool in a selection menu); or
- Use the Pen Tool to outline the outline of a more precise shape, such as the individual petals. (The Pen Tool is the icon of the tip of a fountain pen above the T. in the tools menu. Hold down the Pen tool for the various options of this tool in a drop-down menu).
 Click on the "Add Layer Mask" icon. This is a gray rectangle with a dark circle below the layers window.
 - Once you have used the Pen tool to make the selection, click the icon again after changing the label to "Add Layer Clipping Path".
 Save your changes. You do this by op File in the main menu, then click Save in the selection menu.
Tips
- Double-click the mask in the layers window to Density and Feather and make the mask more transparent, or soften the edges more.


