Author:
Clyde Lopez
Date Of Creation:
25 June 2021
Update Date:
1 July 2024
Content
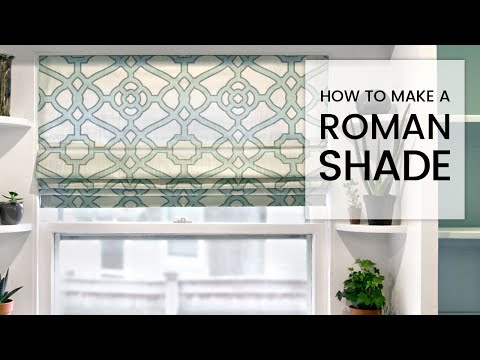
Various fabrics are usually used for Roman blinds. Some people use silk, cotton, linen, and more. The material is held in place using strips or metal pins. Roman shades fold into soft folds. The fabric can be very light or medium in weight. You can control it with a chain, and whenever you want you can raise or lower it. Compared to traditional curtains, it is much more convenient when you need to close or open a window. Installation of Roman blinds is quite simple. Basically, you can do it all yourself if you are confident in your measurement skills. Here are some steps to follow when installing Roman blinds.
- These curtains are easy enough to make and not waste a lot of time and effort. And at the end of the day, you have lovely customized Roman shades that match exactly what you want ... and at an affordable price.
Steps
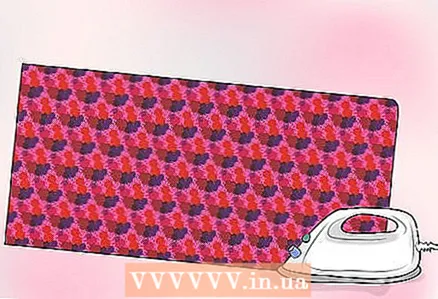
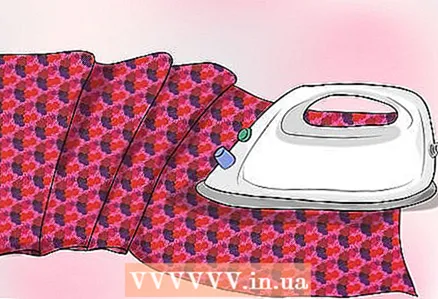 1 Iron your fabric well.
- Careful ironing will make your sewing project much easier!
- Always iron both fabric and lining.
 2 Measure the width and height of the inside of the window where you are going to hang your shade.
 3 Cut the fabric by adding 2 cm to the sides and 10 cm to the length.
 4 Take the lining and use the pins to mark the measurements for the curtain tape (see picture). below).
 - The first row of ribbons should be at least 12 cm away from the bottom.

- The next row should be at a distance of 20 cm; add three more rows 20 cm apart.

- The first row of ribbons should be at least 12 cm away from the bottom.
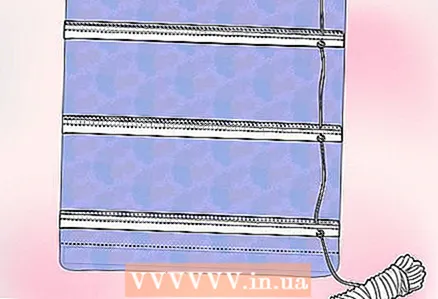
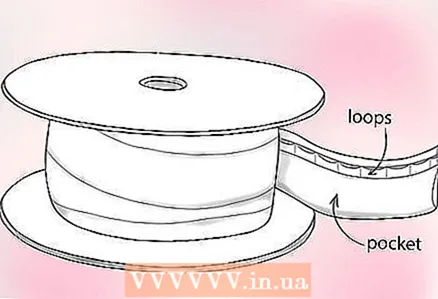 5 Keep in mind that the curtain tape is an amazing product, along the top of which there are small loops where you can slip a nylon cord (as shown above), and along the bottom of which there is a pocket (as shown below) where you can insert a bar.
- If you still don't know what exactly you are looking for, ask your fabric store for roman curtain tape and hopefully they will find what you are looking for.
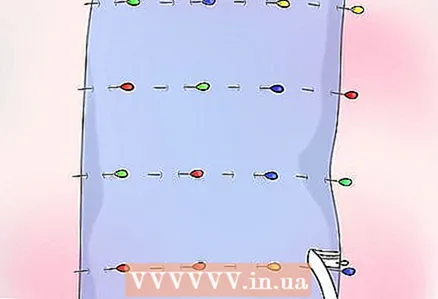 6 Pin the curtain tape with pins. Attach the curtain tape to the outside of the lining, starting from the bottom.
 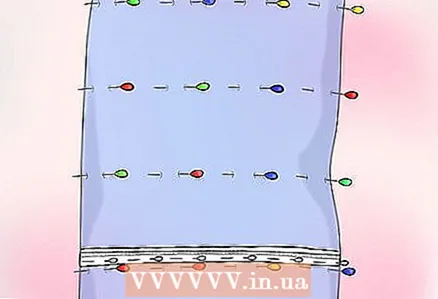 7 Pin the tape with the bottom, just above the measuring pins (as shown on the right). When securing the tape across the full width of the pad, remember to measure the distance to make sure you keep the tape straight.
 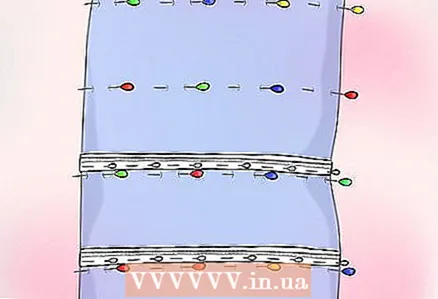 8 Attach the next row of tape, and again over the measuring pins (see picture). photo above). While pinning the curtain tape, measure 20 cm between the top edge of the top tape and the top edge of the tape below so you can make sure you continue to pin the pins straight.
 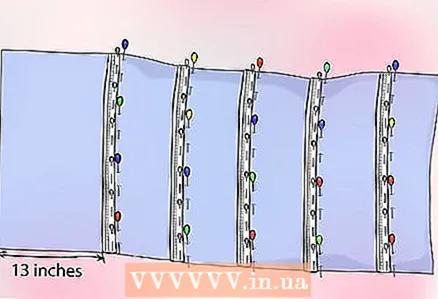 9 Continue laying and pinning the rows of tape until you have five finished rows. After five rows of tape, you should still have about 30 cm of fabric left. You don't need to get too close to the top of the fabric or the garment will look very unreliable at the completion stage!
  10 Sew the tape to the lining. You can use bright colored threads as in the instructions for demonstration purposes, but of course not required. Just make sure the stitches run along the top of the ribbon as you sew, and try not to sew through small loops.
  11 Sew the lining to the fabric! Sew the outside of the fabrics together, sew the sides and bottom of the fabric together, 2cm back from the edge, and leave the top open.
  12 Cut the bottom corners and turn them right side out, while gently pushing the corners out. When you see how your curtain is being assembled, you will feel like a professional seamstress! Smooth the corners of the curtain thoroughly with an iron.
 - 13 Sew the lining to the fabric! Sew the outside of the fabrics together, sew the sides and bottom of the fabric together, 2cm back from the edge, and leave the top open.
- 14 Cut the bottom corners and turn them right side out, while gently pushing the corners out. When you see how your curtain is being assembled, you will feel like a professional seamstress!
 15 Smooth the corners of the curtain thoroughly with an iron.
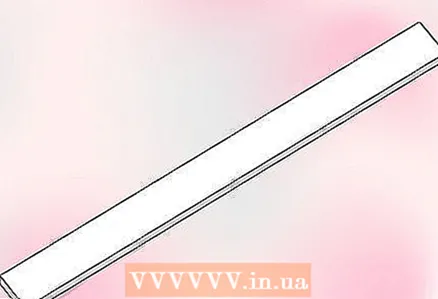 16 Find a strip or similar to stick into the bottom of the curtain.
- When choosing a plank, it is important not to forget that it must be strong but thin. For these special fabric curtains, my husband found slats from old blinds, and they fit just perfect! They are flexible but do not break - which cannot be foreseen when choosing a wooden plank. If it is too thin, it can be strengthened.
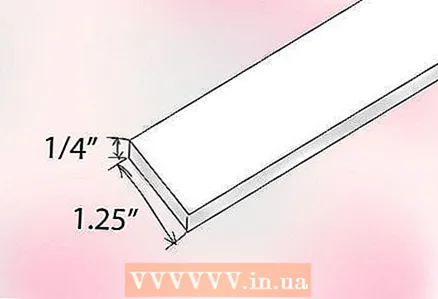
- A thickness of 0.5 cm is best suited.The width of the plank should not exceed 3 cm.
- When choosing a plank, it is important not to forget that it must be strong but thin. For these special fabric curtains, my husband found slats from old blinds, and they fit just perfect! They are flexible but do not break - which cannot be foreseen when choosing a wooden plank. If it is too thin, it can be strengthened.
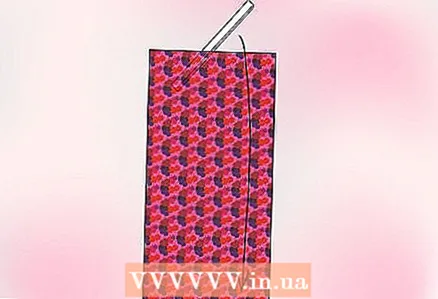 17 Insert a strip between the fabric and the lining and push it all the way to the sewn bottom. Sew the fabric to keep the bar in place; this can be done either by hand or with a sewing machine.
 - For these curtains, try using the zipper foot and machine sewing. This is the most difficult step (when using a sewing machine) because while sewing, you must be at a sufficient distance from the wall to accommodate the rail sticking out in front and behind you. Hand sewing will eliminate this problem, but it will take more time.

- For these curtains, try using the zipper foot and machine sewing. This is the most difficult step (when using a sewing machine) because while sewing, you must be at a sufficient distance from the wall to accommodate the rail sticking out in front and behind you. Hand sewing will eliminate this problem, but it will take more time.
 18 Sew on the tape again! This time, you are sewing all the fabric, so make sure the top and bobbin threads match the fabrics! (The thread of the bobbin should match the color of the fabric, and the upper thread should match the shade of the lining.) Again, tie the fabric and the ribbon together and make sure everything is smooth and even.
 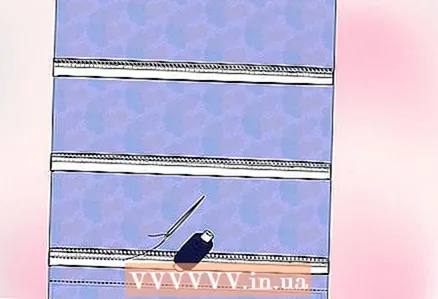 19 Sew the "groove" carefully as shown in the upper illustration. Thus, you, inadvertently, will not sew the loops.
 - Try pinning and sewing one row at a time, removing the marks before moving on to the next strip. This way, you will ensure that the fabric between the rows is stretched smoothly and ensure the best quality of the finished product.
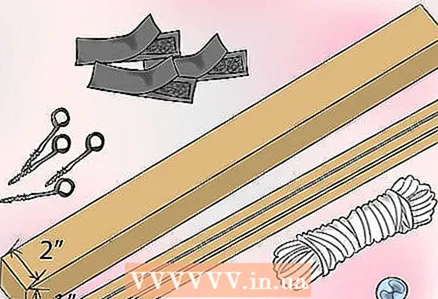 20 Take a board measuring 2.5 cm x 5 cm - measure and cut a bar to fit the inner width of the window (ours was 116 cm), rods, screws, Velcro, nylon cord and hanging cord.
 21 Wrap the rest of the fabric over the board 2.5 cm x 5 cm. To be honest, this part is optional.
 - The curtain will work just fine without the boarding ... it just won't look so good! Anyway, if you decide to cover it up ... wrap it the same way you wrap gifts ... just use staples instead of tape! Tuck the ends up and staple neatly too!
 22 Attach the "grippy" piece of Velcro along one side of the board. In this example, we've attached the Velcro right over the top of the staples that hold the fabric, and everything looks neat and beautiful.
  23 Sew the loopback part of the Velcro to the shade lining.
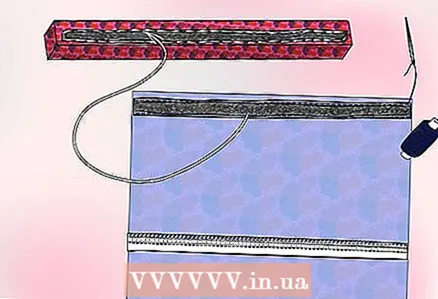 24 Fasten both pieces of the Velcro. Cut off excess fabric 1 cm from the Velcro as shown. Attach the Velcro to the Velcro curtain on the board.
 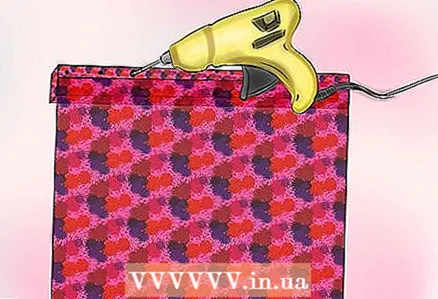 25 Measure and drill holes for the screws. Start by measuring 5 cm from each end. Drill. You want the screws to be approximately 25 cm apart. You can pre-drill a hole in the center of the board, and then again in the middle of both "sections". Everything should look something like the one shown in the picture.
 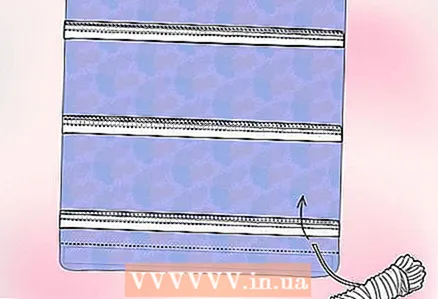 26 Tie everything together with a nylon cord. Decide which side your hanging cord will be on (the side that will lift the shade) and start working on the opposite side of the shade.
 - You will need to knit bulky knots - and this is important because you don't want the knot to accidentally slip through the loop of the curtain tape.
- You can tie it about three times and then thread the cord through a large blunt needle. Again, start on the opposite side of where the hanging cord will be. Measure 5 cm from the edge and pass the needle through the loop on the bottom row of the curtain tape.
- You will need to knit bulky knots - and this is important because you don't want the knot to accidentally slip through the loop of the curtain tape.
 27 Just to make sure the knot won't come loose in the future (nylon cords can be slippery), try sewing the knot with a regular needle and thread. Just sew a few stitches through the knot and save yourself headaches down the road.
 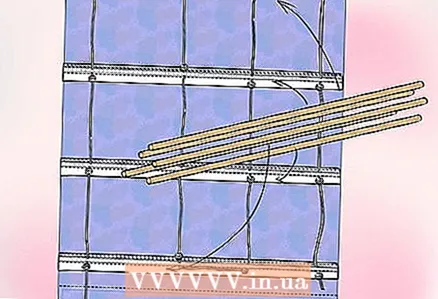 28 Insert the rods into the small pocket at the bottom of the curtain tape. You may need to trim the rods so that they fit neatly into the tape, which can be easily done with a regular utility knife.
 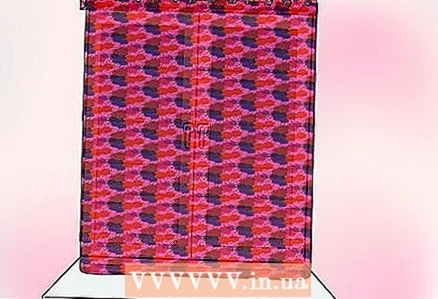 29 Raise the shade and adjust the pleats. It will take several days to "train" the fabric to lie down in beautiful folds, especially if the material is dense.
 - Try a light blocking pad.
Tips
- Here are some tips for quick measurement:
- Measure at multiple locations to determine any unevenness in the window and use the lowest number.
- Be aware that window handles and wall tiles can prevent the Roman shades from lifting and lowering.
- Always use a metal or wood ruler for best accuracy.
- Ask someone to help and hold the other end of the ruler.
- Always stand on something stable so you don't have to stretch.


