Author:
Virginia Floyd
Date Of Creation:
12 August 2021
Update Date:
1 July 2024
Content
- Steps
- Method 1 of 2: Method 1: Unglazed Terracotta Clay Pots
- Method 2 of 2: Method 2: Glazed Clay Pots
- What do you need
- Unglazed Terracotta Clay Pots
- Glazed Clay Pots
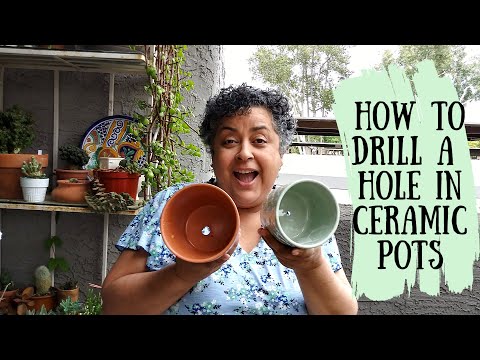
Some clay pots do not have drainage holes, which makes them difficult to grow outdoors as well as whimsical indoor plants. You can remedy this by drilling holes in these pots, but care must be taken not to destroy them.
Steps
Method 1 of 2: Method 1: Unglazed Terracotta Clay Pots
 1 Soak the pot overnight. Place a clay pot in a large bucket and fill it with water. Let the unglazed clay soak in the water for at least an hour, or rather leave the pot in the water overnight.
 - Water-soaked terracotta clay is easier to drill through. Water acts as a lubricant and also cools the material, making it easier to drill the drill without damaging the clay or overheating it.
- Once you've prepared everything for drilling a clay pot, remove it from the water and wait until excess water drains from the area where you are going to make the hole.
 2 Use stone drills. Stone drills containing carbide will easily drill through natural unglazed clay without harming it.
 - The size of the drill and its number depend on the diameter of the hole you want to make. If you are only going to make one hole to drain the water, a drill with a diameter of at least 1.25 cm (1/2 in.) For the stone should be fine.
- When drilling holes over 6.35 mm (1/4 in.) In diameter, use multiple drills to prevent the clay from cracking. Start with a 3.175 mm (1/8 inch) drill bit, then gradually expand the hole made with larger drills until you reach the required diameter.
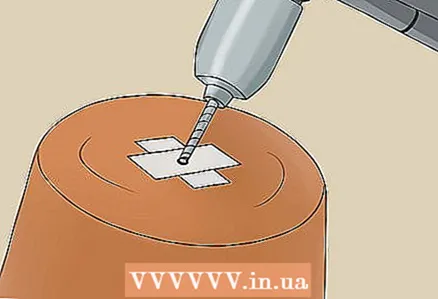
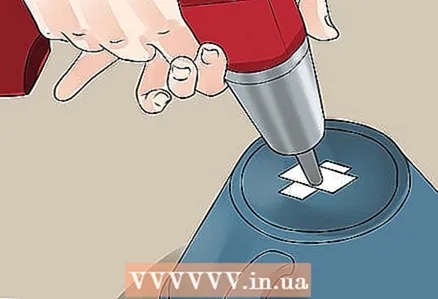
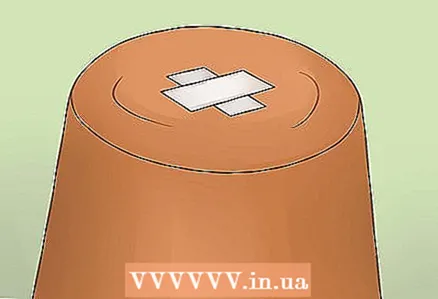 3 Place sticky tape on the clay. Glue at least one piece of masking tape or masking tape over the area you are going to drill.
 - The tape will help prevent slippage of the drill at the start of drilling. It does not need to be used for soft unglazed clay, but it can be useful here too.
- Better to stick not one, but several strips on top of each other. This will provide better grip and the tape will adhere better to wet clay.
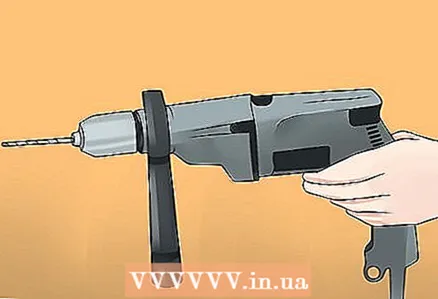
 4 Start small. If you are using multiple drill diameters, start with a 3.175 mm (1/8-inch) drill.
 - If you plan to use a drill of the same diameter, attach it to the drill.
- For better control, use a variable speed battery-powered drill.
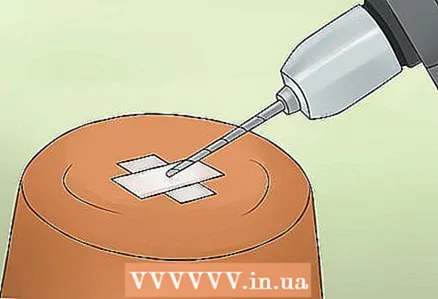
 5 Drill slowly. Move the drill to the center of where you want to make the hole and turn on the drill. Slowly push the drill deeper at a constant speed using as little force as possible.
 - It is imperative that the effort you put into it comes down to just keeping the drill in place. Let the drill do the work by digging into the clay.
- Applying too much force or drilling too quickly can cause the pot to crack.
- If the pot wall is thicker than 1/4 in. (6.35 mm), you may need to stop drilling halfway and clean the cut out of any chips and dirt. This will help prevent overheating of the drill.
- After you have drilled the initial groove, peel off the adhesive tape. You can remove the tape as soon as you feel the drill has gone a little deeper into the material, however this is optional.
- If the clay is soaked in moisture, you shouldn't have a problem with the drill bit overheating, but if you notice that the drill starts to smoke, immerse the pot in the water again for a few minutes to cool the material.
- With a battery-powered cordless drill, you can even dip the tip of the drill into water to cool it down. but not do this if you are using a corded electric drill.
 6 Increase the size gradually. After drilling the small hole, replace the drill bit with one that is 3.175 mm (1/8 in.) Larger. Continue working with the new drill in the center of the hole.
 - This way you will gradually widen the hole, applying slight stress to the clay.
- Continue drilling as you did before, applying minimal pressure and taking your time.
- Gradually replace the drills with thicker ones at the same pitch until you have reamed the hole to the diameter you need.
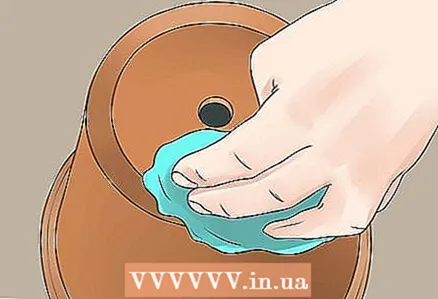 7 Clean the hole. Remove debris and dust from the clay surface with a damp cloth.
 - Examine the pot, making sure there are no deep cracks or chips in the clay.
- After that, the job is done.
Method 2 of 2: Method 2: Glazed Clay Pots
 1 Use drills for glass and ceramic tiles. Glazed clay pots are harder to drill than unglazed clay pots, but they can usually be drilled with glass and ceramic tile drills.
 - These drills have a pointed tip that allows them to cut into hard and brittle materials with less force. If you were using a regular stone drill, you would have to press too hard on it to bite into the hard icing, causing the pot to crack easily.
- The drill size must match the diameter of the planned hole. If you are going to drill a simple drainage hole in a medium-sized pot, a 1.25 cm (1/2 in.) Drill is sufficient.
- Although not required, you can also use different drill diameters to reduce the risk of cracking in the clay. Start with a 3.175 mm (1/8-inch) drill, gradually replacing the drills with larger drills until you get the hole you want.
 2 Place sticky tape on the pot. Apply one to four strips of masking tape or masking tape exactly where you are going to drill the hole.
 - The use of tape is especially important when working with glazed clay surfaces, as these surfaces are quite slippery. The adhesive tape will improve the grip of the drill and prevent slippage in the early stages.
- In most cases, one strip is sufficient, but several strips will improve adhesion and reduce the likelihood of the tape peeling off the surface.
 3 Choose a small drill. If you choose to use different drill diameters, you should start with a 3.175 mm (1/8 in.) Drill.
 - On the other hand, if you are going to be limited to one drill, attach it to the drill.
- The use of a variable speed cordless drill is highly recommended. This drill will give you maximum control when drilling, and it is safer to work in the presence of water compared to a corded drill.
 4 Wet the pot. Moisten the surface to be drilled with water. Try to keep it moist throughout the entire drilling process.
 - If you are drilling a hole in the recessed bottom of the pot, you can splash some water into the recessed area before starting work.
- If you are drilling a flat surface, continually wet it with water from a garden hose or tap.
- Water acts as a lubricant, making it easier for the drill to pass through the clay and reducing the force required to do so. It also cools the material, preventing the drill from overheating.
- For pots with a very thin glazed layer, water may not be needed, but it will not hurt in this case either.
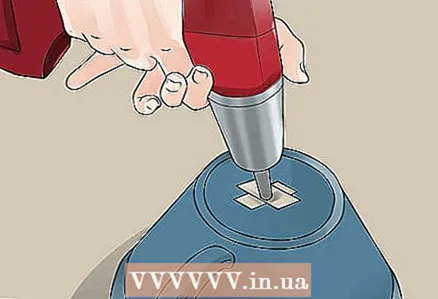 5 Drill slowly. Bring the drill to where you marked the hole and turn on the drill. Try to put as little pressure on the drill as possible, applying constant pressure to it.
 - The force applied should only be sufficient to hold the drill in place. Let the drill do its own thing, slowly biting into the clay without trying to speed up the process. This is especially important in the last step, as the clay layer on the back is thin and fragile.
- Drilling too fast can ruin the pot.
- When drilling a hole in the wall thicker than 6.35 mm (1/4 in.), It is helpful to stop midway through the process and wipe off debris and dust. This will help prevent overheating of the drill bit and the drill itself.
- Once the drill has penetrated the clay, you can interrupt and remove the previously glued strips of adhesive tape. If you don't want to stop, be sure to remove the strips after you finish drilling the original, narrowest hole.
 6 Increase the drill size if necessary. After drilling a small hole, replace the drill bit with a larger one with a 3.175 mm (1/8 in.) Diameter larger than the previous one. Expand the hole with a new drill.
 - Aim the new drill bit at the center of the already drilled hole and turn the drill back on. This is a reliable way to slowly enlarge the hole.
- As before, drill slowly and with as little effort as possible.
- Replace drills sequentially with new ones with a 3.175 mm (1/8 in.) Diameter larger than the previous one until you have reamed the hole to the desired diameter.
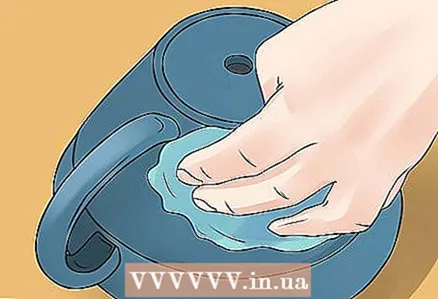 7 Empty the pot. Remove dust and debris with a wet rag, then inspect the area around the hole. Make sure there are no deep cracks, chips, or other signs of damage in the material.
 - This step is final.
What do you need
Unglazed Terracotta Clay Pots
- Large bucket of water
- Cordless drill
- Carbide drill bits for stone, from 3.175 mm (1/8 in) diameter to required
- Insulating tape or masking tape
- Damp rag
Glazed Clay Pots
- Garden hose, water tap, or other source of water
- Cordless drill
- Drill bits for glass and ceramic tiles, from 3.175 mm (1/8 in) diameter to required
- Insulating tape or masking tape
- Damp rag


