Author:
Virginia Floyd
Date Of Creation:
12 August 2021
Update Date:
1 July 2024

Content
1 Wash your hands. Before filing your nails, wash your hands thoroughly with soap and water to rinse off the sebum that will make filing difficult. 2 Dry your hands thoroughly. Before starting work, check if your hands and nails are dry. Liquid can damage the metal file, causing it to rust and break.
 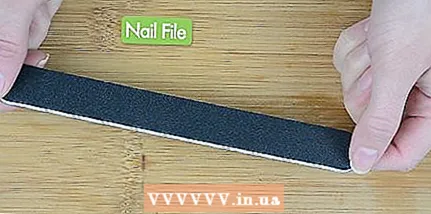 3 Choose a nail file. There are several types of nail files to choose from, but the most popular and effective are plastic-based nail files. Choose a 300-600 grit file for smooth nail edges.
 - Too hard files (80-100 grit) are used only for extended nails. If you file regular natural nails with them, the file will ruin them.
- Do not use metal-based nail files, because they can also ruin natural nails.
- Glass and ceramic nail files are very effective and easy to clean in the dishwasher.
 4 Decide which nail shape you want. There are many popular shapes, the main ones being oval, square, almond. Choose the shape that suits you best, depending on the natural shape of your nails and your taste.
 - The oval shape is great for growing nails and keeping them neat and healthy. In addition, this form is considered the most convenient, because in it the nails will not exfoliate and break. The oval shape implies a symmetrical rounding of the tips of the nails.
- The square shape is great for people with long nails. The square shape can be easily made by filing the tip of the nail in parallel movements to the root of the nail.
- The almond shape is a good choice if you want to make your fingers look slimmer. The essence of the shape is that the tip of the nail will be rounded in the same way as the root of the nail.
- Do you have very short nails that are almost impossible to shape? No problem! Start while working with what you have, apply a special strengthening oil to your nails every night so that they grow back faster and they can be shaped into any shape!
Part 2 of 3: Shape your nails
- 1 Before you start filing your nails, you need to trim them. If your nails are too long, trim them a little so they are the length you want.
- For example, if you want square nails, don't trim your nails too much, because only long nails can be square.
- If you are going to shape your nails into an oval shape, you can trim them. Again, trim your nails in an oval shape.
- If you want almond-shaped nails, trim the edges of the nails a little more than the tip.
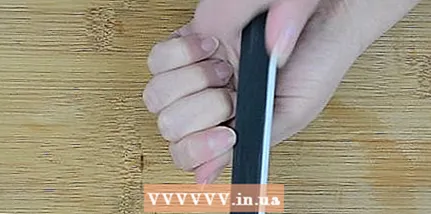
- 2 Keep the file parallel to one side of the nail. The file cover should be kept parallel to the nail you are working on. This way, you won't break your nail.
- Don't go too far by cutting off the side of the nail. Otherwise, your nails will become more brittle.
- 3 File your nails from the side of the nail to the center of the nail. It is important to file from edge to center in one direction with smooth movements. This way you get a smooth edge.
- No need to "cut" nails by moving the file back and forth. Otherwise, you will damage the structure of the nail, which will quickly break it.
 4 Hold the file firmly against the nail. When filing your nails from side to center, you need to hold the file perpendicular to the top of the nail. This will prevent the nail plate from weakening during the filing process.
 - If you start filing your nails while holding the file at an angle, the movement of the file will weaken the structure of the nail plate.
- If you already have thin nails, hold the file perpendicular to the surface of the nail, tilting it slightly "under the nail."
- 5 Finish filing by cutting the other side of the nail in the same way. Place the file on the other side of the nail, keeping it parallel to the edge of the nail plate.
- 6 Remove the file and then move it to the other side. You do not need to "cut" nails, moving "back and forth", just lift the file, remove it, and then return to the place from which you began to file.
Part 3 of 3: Completion
- 1 Remove from the nails "residues" that could not be removed during filing. If after filing the nails at the edges you can still see "residues", take a nail file, lightly place it under the nail and remove the "residues" with smooth upward movements.
- 2 Polish your nails. Give the nail plate a shine by polishing it after the manicure. Then your new nail shape will not go unnoticed!
- Buffer (polishing file) can be purchased at any cosmetics store.
- 3 Apply cuticle oil to your nails and moisturize the skin around your nails. Try to apply this oil regularly and moisturize your hands to keep your nails healthy and beautiful. Try to apply cuticle oil and moisturizer every time you wash your hands.
- Place cuticle oil and moisturizer next to soap to remind yourself of the procedure.
 4 Get a manicure every two weeks. You can file your nails every 2-4 weeks. Sawing your nails too often can damage them because they won't grow back properly.
Warnings
- Avoid trimming and filing your nails to make them too short, as this can cause pain and bleeding.
What do you need
- Nail file
- Buffer (polishing file)
")


