Author:
Gregory Harris
Date Of Creation:
15 August 2021
Update Date:
1 July 2024

Content
- Steps
- Method 1 of 6: Create a high bun on wet hair
- Method 2 of 6: Create two buns with side rolls on your hair
- Method 3 of 6: Roller using an elastic headband
- Method 4 of 6: Create a Low Ponytail Bundle
- Method 5 of 6: Weaving a four-strand braid
- Method 6 of 6: Prevent Damage to Wet Hair
- Tips
- Warnings
When you are late, you may not always have enough time to dry your washed hair and style it in the usual way.If it's time for you to run, but you absolutely need to look presentable, then you can style your wet hair in one of the following simple ways, which will not take you more than a few minutes.
Steps
Method 1 of 6: Create a high bun on wet hair
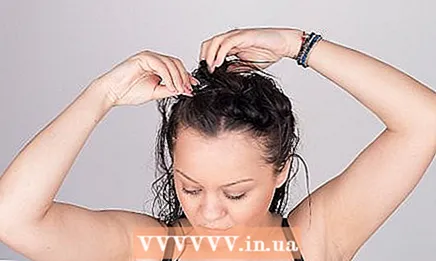
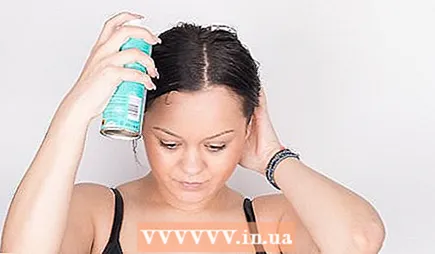
 1 Treat hair with a detangler. This product will soften the tangled areas of your hair so you can easily comb through it with your fingers. Bring the spray to your head (keep it about 15 cm away from your head) and spray it on your hair 4-6 times. If you have long or wavy hair, you can treat it a little harder with the product.
 - The tool must necessarily penetrate not only into the upper layers of the hair, but also into the inner ones.
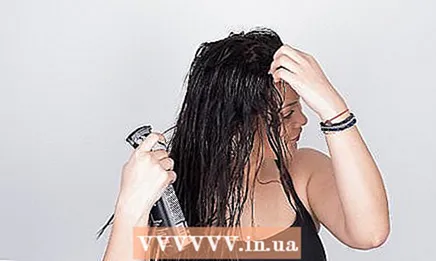
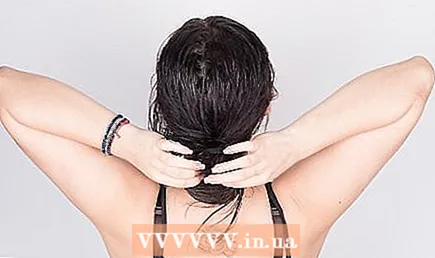
 2 Pull the hair back together so you can make a ponytail later. When your hair is more or less detangled, comb it back to collect it in a high ponytail at the top of your head. If your hair is still very wet, you can simply pull it up with your fingers.
 - Use a comb-brush to catch the strands falling out of the ponytail and smooth the cocks.
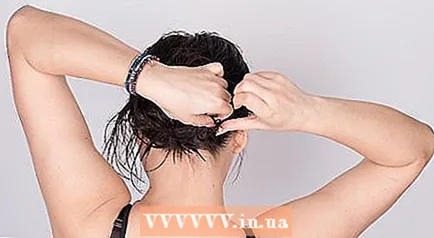
 3 Tie a ponytail. Take a hair tie and use it to tie a high ponytail. Twist the elastic around your hair as many times as necessary to secure the ponytail in place. However, the tail should not be tied tighter than necessary. When the ponytail is done, comb through your hair again with your fingers to straighten it.
 - If tying a ponytail makes your look overly slick, pull the front of your hair out from under the elastic a little. This will make you look more natural.
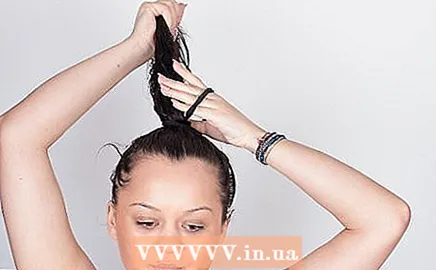
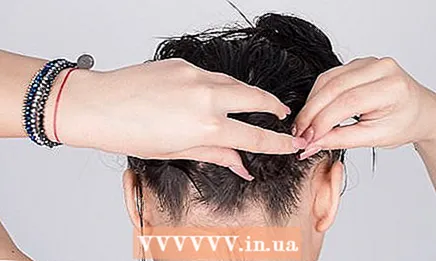
 4 Twist the ponytail into a bun. Twist the ponytail in one direction, starting at the base and ending with the tip. When you get to the ends of your hair, continue curling it. The tail itself will gradually begin to curl into a bun. Finish styling your hair into a twisted bun by wrapping it around the elastic in the direction of the naturally formed spiral.
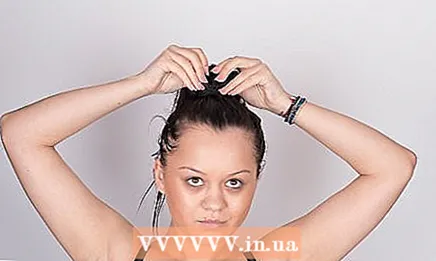
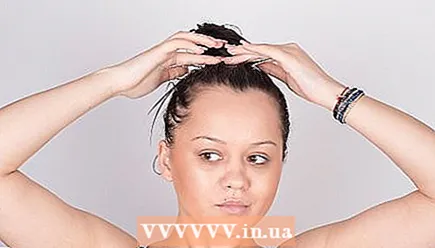
 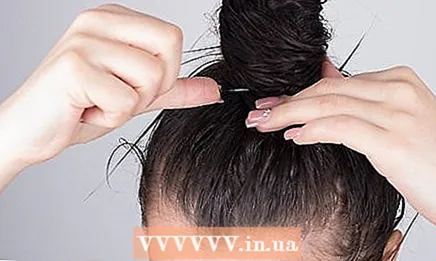 5 Fix the beam. When the ponytail is finished, grab the ends of your hair. Secure the bundle with a hairpin, hooking the tip of the tail with it and sticking it deeper into the center of the bundle.
 - For additional fixation of the beam, you can use several more pins.
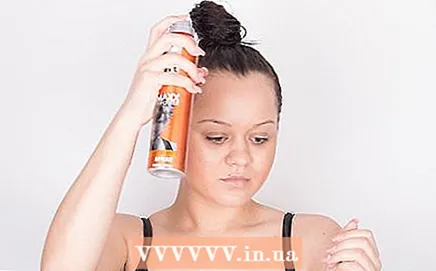 6 Spray your hair with hairspray. Lightly spray the top layer of your hair with hairspray to help keep the hairstyle in place and prevent frizz. Run your hands lightly over your head to smooth your hair.
 - Also, don't forget to spray the back of your hair to prevent shorter strands from falling out of the bun.
Method 2 of 6: Create two buns with side rolls on your hair
 1 Part your hair with a center part. Use your fingers or a flat comb to part the center of your hair. Then separate the front part from both obtained sections of hair to subsequently make two side rolls going behind the ears to the tufts. Pin up this hair temporarily to keep it out of the way.
 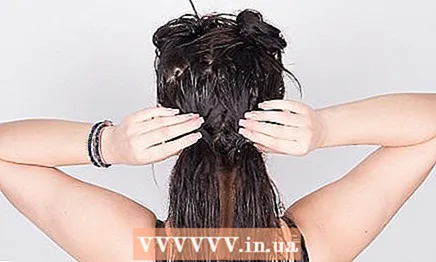 2 Tie off two ponytails from the loose hair of each section. Taking the bottom of the hair in each section (the hair that was not pinned up by you), tie two identical ponytails just above the base of your neck. The tails should be close enough to each other so that there is no parting between them.
 - Use fine hair ties to tie your ponytails.
 3 Twist the ponytails into bunches. Twist each ponytail sequentially from base to tip. When you get to the tip, continue curling the tail so that it begins to curl itself into a bun. Finish the bun by wrapping the curled hair around the base of the ponytail and tucking the ends of the hair under the elastic to hold it in place.
 - Twist the hair of the second ponytail, curl it into a bun and secure it. You should have two overlapping beams.
 4 Form two side rolls. Loosen the previously pinned hair and twist the side rollers out of them one by one. Start moving away from the forehead and move towards the tufts of hair. Run the curled hair over the top of the buns and then tuck it under the buns (if your hair is long enough).
 - Form a second side roll, again run the curled hair over the buns and the first curled section.
 5 Secure your hair with hairpins. When both side rollers are ready, and the twisted strands will bend around two bundles, fix them with several hairpins.
Method 3 of 6: Roller using an elastic headband
 1 Let your hair naturally part. Gather up all of your hair and grab the ends with both hands. Pull up the gathered hair so that it breaks down in a natural parting. With your fingers, straighten the hair in the parting area and, if necessary, shift in the right direction any strands that are out of order.
  2 Tousle your hair. When the natural parting is formed, shake the hair to separate the clumped strands and add texture to the hair.
 - To give hair extra texture, if desired, you can treat it with mousse from the middle of the length to the ends.
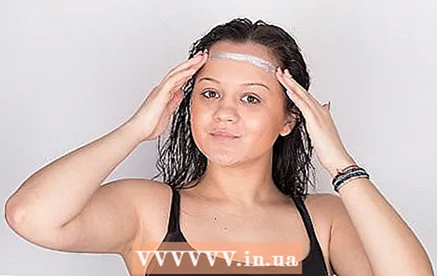 3 Cover your head with an elastic headband over your hair. Stretch it with both hands to slide it over your head in the same way you would normally wear a hat. Adjust the front of the bandage to fit the way you like it. The back of the headband must be over the hair.
  4 Tuck your hair up and tuck the ends under the headband. When the headband is in its correct position, start taking small strands of hair, curling it over the top of the headband, and tucking the ends under it. It will be more convenient to start moving from the middle of the hair to the sides towards the ears.
 - The tucked strands don't have to be perfectly the same. When the strands are slightly uneven (some are curled tighter and some are looser), the hairstyle takes on a pretty texture.
- If your hair is not very long and some strands do not have enough length to turn under the headband, secure it with hairpins.
Method 4 of 6: Create a Low Ponytail Bundle
 1 Part your hair with a center part. Draw a central parting on the head, using the first tooth of a flat comb for this purpose. Make sure that the parting is exactly in the center.
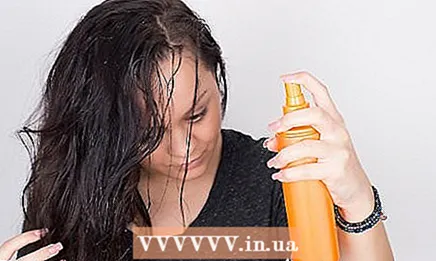
  2 Use a shine product. Spray the shine on your hair and use the comb from roots to ends. If you have thick or wavy hair, you can treat it with a little emollient gel.
 - A shine or emollient gel will leave your hair smooth and manageable. With them, your bun will turn out as neat as possible.
 3 Tie a low ponytail and in the last step form a loop out of it. Gather your hair at the base of your neck. Start tying the ponytail with a hair elastic. On the last turn of the elastic, pull the tail out of it only halfway. This will create a loop of hair, the ends of which remain fixed under the elastic at the base of the ponytail.
 - The length of the hair ends sticking out from under the elastic should be 5-8 cm.
 4 Wrap the ends of your hair around the elastic. Use one hand to hold the loop of your hair, and with the other hand, wrap the loose ends of your hair around the elastic to mask it. Take two or three hairpins, hook them to the ends of your hair and stick it under the elastic.
 - Cross-pinning of the bundle with pins gives it additional fixation strength.
 5 Spread out the bun and treat it with a shine. Finish your hair with a light spray of shine. Run your hands through your hair to straighten it as evenly as possible. This hairstyle will look best if you try to keep your hair sleek and shiny.
Method 5 of 6: Weaving a four-strand braid
 1 Use a little styling product. You will need a product to make your hair more manageable as you braid. The exact type of product you use will depend on the texture of your hair. If you have fine, soft hair, a little shine will be enough. If you have thick, wavy or coarse hair, spread some mousse or styling gel over it.
  2 Divide your hair into four sections. Pull your hair back so that it is all behind your shoulders. Divide them into four equal strands: two of them will be located on the sides, and the other two will be in the middle. For weaving, it will be useful to number the strands in the following order: 1, 2, 3, 4.
  3 Braid your braid. After dividing your hair into four strands, grab the center left strand (the second in a row) with your right hand. Sweep it to the right over the two right strands (numbered three and four). Continue to hold this strand (numbered two) to the right.
 - Take the two leftmost strands (numbered one and three) with your left hand and twist them together so that the third strand lies on top of the first and becomes the leftmost strand.
- Repeat the above process in a mirror image, starting from the right side. Grab the first strand on the right (strand four) and drag it to the left over strands three and one. Continue to hold this strand in the extreme left position.
- Take the two rightmost strands (numbered one and two) and twist them together so that the first strand lies on top of the second.
- As the braid lengthens, a rope weaving pattern will begin to be seen on it. Braid all the way to the end.
 4 Lock the tip of the braid. Tie the end of the braid with a hair elastic. Finish your hair by spraying a small amount of shine on the braid.
 - If any strand at the base of the braid begins to sag on its underside and spoil the appearance of the hairstyle, take the hairpins and secure it so that the braid becomes tidy again.
Method 6 of 6: Prevent Damage to Wet Hair
 1 Don't leave the house with a wet head in freezing weather. If the temperature outside is freezing, the hair can freeze and break. To prevent this from happening, you must dry your hair before going outside in sub-zero temperatures.
  2 Change your cotton hair towel. If you are used to wrapping a wet head in a towel, then this can damage your hair without even knowing it. Try replacing your old cotton towel with a microfiber towel that is gentle on your hair.
 - It will be safer for your hair if you gently blot it with a towel rather than curling it into it.
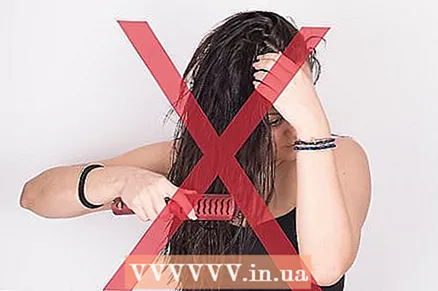 3 Try not to brush your hair when it is wet. When hair gets wet, it becomes weak and easily injured. Therefore, it is better not to use a comb-brush to detangle wet hair. Instead, use your fingers to detangle the strands, or (if necessary) use a wide-toothed comb. This will do less damage to wet hair.
  4 Be careful when using hair ties. Tying a ponytail with a rubber band can also damage hair if not careful. Be sure to use a safe type of hair tie and try not to tie the ponytail too tight, especially when wet.
 - Never use hair ties made of rubber, as they damage your hair a lot.
- Always use seamless ponytail bands to prevent hair from snagging.
- By regularly tying a ponytail in the same area, you put increased stress on certain areas of your hair. To avoid damage to your hair, try changing the position of your ponytail more often.
- If your hair is completely wet, then hair ties can damage it even more.Ideally, it is best not to use rubber bands until your hair is slightly dry. Tying wet hair with a rubber band is fine. If you don't have time to dry your hair at all, then instead of elastic bands, you better turn your attention to hairpins and hairpins.
Tips
- Use elastic bands that are free of metallic threads. They severely damage and break hair. Lean towards elastic bands made from soft fabrics or silicone.
- The thickness of your hair product will affect how long it dries. If you want your hair to dry quickly, use a product with a light texture. If you have the whole night ahead of you, you can use a creamy hair moisturizer.
- If you leave your hair to dry on its own, try to twist it slightly with your fingers so it doesn't dry out in a straight line and frizz too much.
Warnings
- Do not use a hairbrush to spread the hair product through your hair. You will only further entangle your hair.
- After swimming in chlorinated water, be sure to shower and condition your hair. The chlorine present in swimming pools is extremely drying hair.


