Author:
Janice Evans
Date Of Creation:
3 July 2021
Update Date:
1 July 2024

Content
- Method 2 of 4: Making a braided headband from an old T-shirt
- Method 3 of 4: Decorating a regular headband
- Method 4 of 4: Making other types of headbands and headbands
- Tips
- If you opt for an elastic band with beaded or sequin embellishments, make sure it is on one side only. This will prevent them from clinging to your hair.
- When you have a choice, try to purchase exactly an elastic band, woven using rubber veins, so that the future bandage is more comfortable. To test the webbing, pull it in different directions and see if it stretches. If it stretches well, then most likely it has rubber streaks. However, a less stretchable elastic band without rubber streaks can be used for the production of the bandage without any special problems.
 2 Buy a simple sewing gum. Most fabric and craft stores usually sell a variety of sewing elastic bands in a variety of colors and widths. You will need a sewing elastic band, which will be somewhat of the elastic band you have already chosen, so it is very important to know the exact dimensions of the latter.
 - Sewing bands are most commonly available in black and white, but sometimes other colors are also available. When choosing an elastic band, remember that the back of the headband will be made from it, but at the same time it may remain partially visible from under the hair.
 3 Cut the braid and elastic. Next, you need to cut the tape and elastic so that the tape is enough for almost the full girth of your head, with the exception of about 10 cm, which the sewing elastic will take and connect the ends of the piece of elastic tape. Attach the materials at your disposal to the head to determine the correct length on site.
 - Wrap the elastic of your choice around your head, across the top of your forehead and the base of your neck, or as you intend to wear a headband. Place your fingers around where the ends of the braid will begin to overlap, and mark there with a pen or tailor's chalk.
- Step back 12.5 cm from the marked mark and cut the tape at this point.
- Then cut off 10 cm of the sewing elastic. It will connect the two ends of the braid. It is very important to make a piece of elastic by 2.5 cm less than the existing gap in the braid so that the future bandage fits the head tightly enough and does not slip. If you need a tighter band, you can always use a slightly shorter piece of band.
4 Sew together an elastic band and a sewing elastic. Take a needle and thread and sew small joining seams between the tape and elastic. To do this, first fold the edge of the tape and hem. Then, using the same thread and a needle, sew the elastic to the braid from the wrong side of the hemstitch just made. - If you have taken a tape that is difficult to tuck or does not need to be tucked, then you can skip the hemming seam on the tape and just immediately sew the ends of the tape and elastic together.
- Remember to tie a knot in the threads to prevent the seam from coming apart.
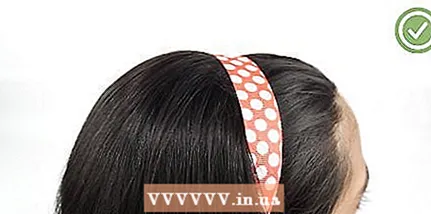 5 Try on a new bandage. Once the seams on the braid and elastic have been sewn, your dressing is complete. It can be worn under the hair or in the popular bohemian fashion - over the forehead and over the hair at the back.
 Method 2 of 4: Making a braided headband from an old T-shirt
- 1 Find an old T-shirt. Look for a relatively large T-shirt made from a fairly stretchy jersey. If you don't have anything like this at hand, then in the second-hand you can buy exactly what suits you very cheaply.
- 2 Mark and cut the fabric into strips. You will need sharp scissors to cut five long strips of fabric from the shirt.
- Measure the circumference of your head so that the tape runs across the top of your forehead and the base of your neck. Then use this measurement to cut five strips of fabric from the shirt, the same length and about 1 inch wide.Also cut out an extra strip that is 7.5 cm wide and ⅓ of the head circumference.
- 3 Sew together the ends of five identical strips. Use a needle and thread to secure the fabric before weaving, or use your sewing machine to sew the ends of five identical strips of fabric together. Be sure to align the ends of the strips before doing this. To do this, simply stack them evenly on top of each other.
- 4 Interlace the stripes. Once the fabric strips have been sewn from one end, you can start braiding. You will be doing a five-strand weave, which is not so easy. For convenience, the stitched ends of the strips can be glued to some surface with tape so that they do not move during weaving.
- Start by interweaving three stripes on the right. Then gradually move to the left side and include the left stripes in the weaving. Continue working back and forth until you have braided the entire length of the fabric.
- Tighten the weave by pulling up the strips when they reach the left side. At the very beginning, the weaving will turn out to be somewhat crumpled, but it will straighten as the work continues according to the given pattern.
- 5 Sew the ends of the strips from the other end. When you reach the end of the weave, sew the remaining ends of the fabric strips together. Use a needle and thread or a sewing machine to sew the stripes just like you did at the beginning. This will hold your braid in place.
- 6 Connect the ends of the dressing with an additional strip of fabric. The finished braid will shrink to ⅔ the circumference of the head, but the headband itself must be slightly longer to fit you. In addition, it is necessary to somehow connect the ends of the weaving in order to make a bandage out of it. To do this, take an additional 7.5 cm strip of fabric and sew the ends to the ends of the weave. To do this, use a needle and thread.
 7 Try on a bandage. Now your dressing is ready and you can try it on. Position the headband so that the non-woven part is at the back under the hair.
Method 3 of 4: Decorating a regular headband
- 1 Cover the headband with fabric. An easy way to give an old worn headband a second life is to cover it with fabric. To do this, you only need a small piece of fabric and a little glue to glue it on.
- Measure the length and width of the headband, and then take a piece of fabric that is at least the same length but twice as wide. Cut out a rectangular piece according to the appropriate measurements.
- Wrap the headband with fabric and secure it to the inside of the headband with textile glue. Also try to gently tuck the fabric at the ends of the headband to make them smoother.
- 2 Wrap the headband with yarn or thick thread. There are many pretty tones of yarn and floss. Find among them the options that you like the most, and wrap them around your headband.
- Cover the entire headband with a thin layer of glue.
- Then start working from the inside of one of the ends of the headband and start wrapping it in tight turns of yarn or thread.
- Continue working until you have wrapped the entire headband, then cut off the excess thread.
- Secure the ends of the winding with extra glue.
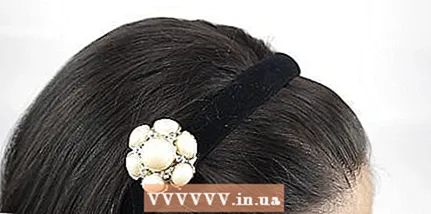 3 Decorate the headband with an applique made from beads or a bunch of feathers. Find a beautiful brooch, fabric applique or feather arrangement and match it to a suitable location on your headband. Then use hot glue to secure the jewelry in place.
 - Be careful when using hot glue! You can also use textile glue if you prefer.
Method 4 of 4: Making other types of headbands and headbands
- 1 Try a bow headband. It is perfect for the day when you want to complement your favorite outfit with something girly. Just take scraps of beautiful fabric and a regular headband to turn it into a cute bow accessory.The size of the bows and their number can be determined at your own discretion.
- 2 Try making a flower headband. Flower headbands have become popular due to the rise of Indian fashion influence. Just learn how to make fake flowers out of fabric and beads to decorate your hair band with, creating a floral wreath effect.
 3 Make a hippie headband. If you are looking for a headband that is less useful than a stylish one, try making a cute hippie-style headband that adorns your forehead. This accessory is worn over the head over the hair and allows to accentuate the face.
  4 Try a flashy headband. To add glamor and shine to your hair, make a catchy shimmery headband. Use sequins, sequins or beads for her to add shine to her hair.
 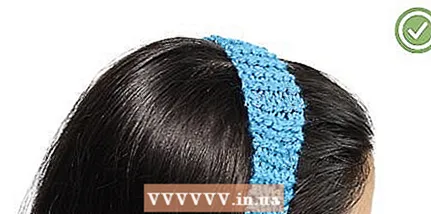 5 Tie the headband yourself. If you enjoy knitting and want to keep unruly frizzy hair out of your sight, put your talent into practice and tie yourself up with a hair band. Pick a yarn color you like and spend some time making a useful knit accessory that will brighten your hair.
Tips
- For inspiration, consider the types of headbands and headbands sold at your favorite stores to make your own.
- Before purchasing new headband materials, try to track down old scraps of fabric or tape to save money on this project.
- Wear a headband on days when your hair isn't looking its best, is tangle-free, or isn't clean enough to make your look more preppy.


