Author:
Joan Hall
Date Of Creation:
2 July 2021
Update Date:
1 July 2024

Content
- Steps
- Method 1 of 3: Installing the oven
- Method 2 of 3: Work Safety
- Method 3 of 3: Smelting brass
- Tips
- Warnings
- What do you need
Brass has a relatively low melting point compared to iron, steel, or gold, but it still needs a special furnace. Those who are just trying to smelt metal usually start with aluminum, but brass is usually the next step. Observe all safety precautions to keep children and animals away from the work area.
Steps
Method 1 of 3: Installing the oven
 1 Consult a specialist. In this article, you will find general recommendations, but there are many nuances to consider when installing the oven. Get the help of a professional to help you find a furnace that suits your budget, the volume of metal you plan to melt, and the types of metal you intend to use.
 - One of the popular forums dedicated to this topic is called IForgeIron. Professionals and amateurs will be able to answer your questions.
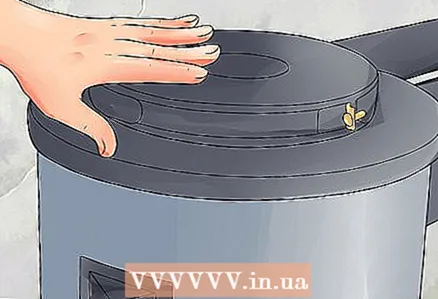 2 Prepare the oven. Smelting brass requires serious preparation. In a special furnace, the brass has time to melt before the metal components oxidize. Buy a heat-resistant oven that can heat up to 1100 degrees Celsius. Typically, brass melts at 900ºC, but stock is good because you might be making a mistake. It also makes it easier to pour brass.
 - Find a furnace that can hold the crucible and all the copper you need to melt.
- Consider what kind of fuel you will be using. Waste oil is an excellent fuel, but the stove will cost more. Propane stoves are cleaner, but you will have to buy fuel more often. The cheapest stoves are solid fuel; It is even cheaper to make a stove on your own, but with frequent use, fuel will be consumed quickly, and you will have to clean the stove often.
 3 Choose brass for melting. You may already have items that you want to melt, but if you need a rougher material, check out used stores for real finds. If nothing works for you there, try looking for production waste. Remove brass from other items, especially non-metallic items such as glass, plastic, paper and cloth.
  4 Clean the brass. Wash brass with soap and water to remove surface contaminants such as oil and oxidation products. If the brass is lacquered, it will need to be cleaned off with acetone, lacquer thinner or thinner.
 - Rinse off the varnish only with gloves in a ventilated area, especially when working with a solvent.
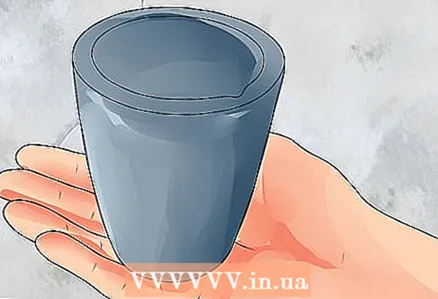 5 Buy a crucible. Metal is placed in the crucible, which is then melted in the furnace. If you have an alloy, a graphite crucible is for you - it is reliable and heats up pretty quickly. Crucibles are also made from other materials. Make sure yours can handle the right temperature.
 - Before using a new graphite crucible for the first time, heat it to 95ºC and hold at this temperature for 20 minutes, then let cool. This removes moisture from the walls, which can lead to the formation of bubbles.
- Each crucible can only be used for one type of metal. If you also plan to smelt aluminum, iron, and other metals, you will need a separate crucible for each.
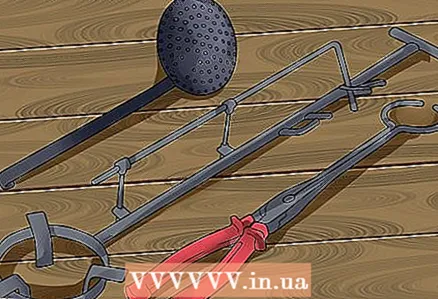 6 Collect everything you need. You will need tongs, a large spoon, and a casting ladle. Steel tongs are used to grip the crucible, place it in the oven and remove it. A steel spoon is required to remove slag from the surface. Hold the crucible in place with a casting ladle and tilt it to pour out the metal.
 - If you know how to work with welding, you can make these items yourself from what you find.
- Optionally, you can buy a pyrometer to measure the high temperature, so that it is easier for you to determine when it is time to pour the metal.
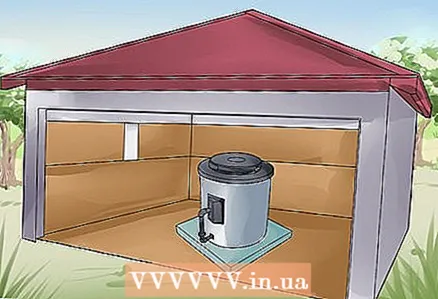 7 Place the oven in a ventilated place. An open area outdoors is best, as it will be difficult to get rid of toxic fumes indoors. An open garage or similar location will do.
 - Even if you are working with other metals, make sure the area is ventilated. Furnaces require a lot of air and can produce carbon dioxide and other gases (depending on the fuel used).
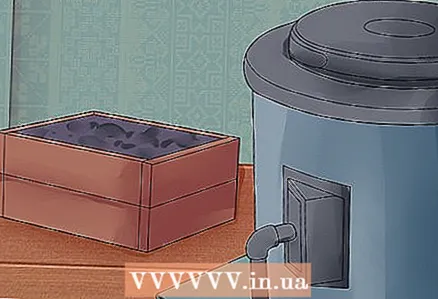 8 Take a box of dry sand. Even if materials appear dry, especially concrete, moisture can remain in them. If a drop of liquid metal comes into contact with moisture, the liquid will turn into vapor and begin to expand rapidly, spraying the metal. To prevent this from happening, place a box of sand next to the oven. Transfer and pour metal over sand.
 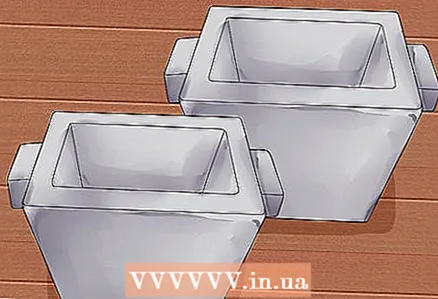 9 Select molds. The easiest way is to pour metal into metal molds (molds). If you need to get a more complex shape, this will require special preparation. If you want to create a piece of art or mold parts of a device, look for information on sand casting and other materials. It is better to cast such items under the guidance of a specialist, since it will be difficult for beginners not to make mistakes.
Method 2 of 3: Work Safety
 1 Wear heat-resistant gloves, an apron, and boots. Remember that metal smelting is a hobby with potential injury, but nothing bad will happen if you take care of your safety. Leather gloves, boots and a heat-resistant apron will protect you from most minor oversights. They can often be purchased from the forging equipment department.
  2 Wear cotton or wool clothing. You should wear long sleeves and long pants under the apron so that drops of molten metal do not get on your bare skin. On wool and cotton, the fire goes out quickly. Do not wear synthetics, because this material burns for a long time and can burn the skin.
  3 Protect your face and eyes. Put on a mask to protect your face from molten metal droplets. Before heating the metal to 1300ºC and above, wear a welder's mask or dark glasses to protect your eyes from ultraviolet radiation.
  4 Prepare a respirator. Brass is an alloy of copper and zinc, sometimes mixed with other metals. Zinc has a relatively low melting point (907ºC), and this temperature is usually reached before the brass is completely melted. This causes zinc to burn and produce white smoke that, if inhaled, can cause temporary flu-like symptoms. There may be other metals in the alloy (for example, lead), which lead to irreparable consequences if inhaled frequently. A metal vapor respirator (with P100 filter) will protect you from this.
 - Children are more at risk of lead poisoning than adults, so they should not be allowed near the oven when it is in operation.
 5 Eliminate clutter in your workplace. Remove all flammable and damp objects as they can cause a fire and steam explosion if moisture touches a hot metal. Get rid of all unnecessary items and tools so that nothing lies on your way to the stove.
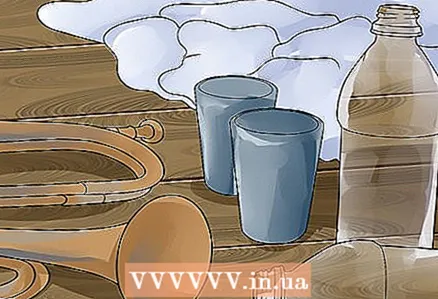
  6 Know where the nearest water source is. Keep moisture away from the oven, but have a source of cold running water nearby, or at least a bucket of cold water. If you get burned, immediately immerse the affected area in water without removing your clothes.
Method 3 of 3: Smelting brass
 1 Heat the molds and spoon. It is important to warm up the molds to 100ºC to get rid of moisture, otherwise the molten metal will splatter during pouring. Remove them from the oven and place them on dry sand. Do the same with a spoon for the same reason.
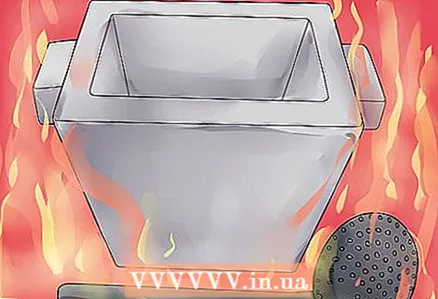
 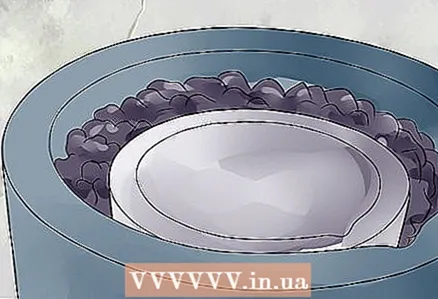 2 Place the crucible in the oven. In solid fuel stoves, coal is usually placed around the crucible, but it is still worth reading the instructions for your stove.
 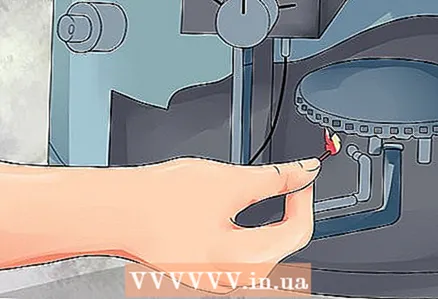 3 Light up the stove. Follow the instructions for use or the advice of the experts who helped you build the oven yourself. Usually you need to put solid fuel inside or turn on the gas, and then ignite everything with a burner.
 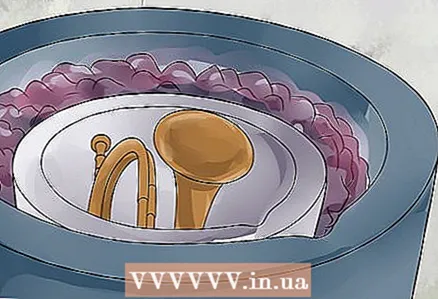 4 Place the brass in the crucible. After 10-30 minutes, place the metal in the crucible, taking care not to damage the walls. Allow the oven to warm up by half - this will quickly melt the brass, and the zinc will not have time to separate and burn out.
 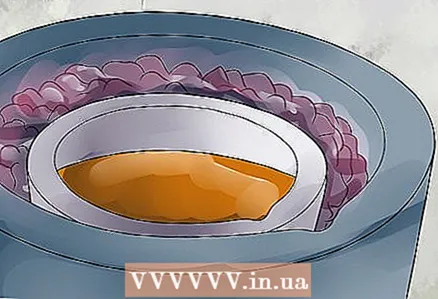 5 Heat the stove until the brass is completely melted. The time it takes to do this usually depends on the capacity of the oven. If you have a pyrometer for measuring high temperatures, remember that brass usually completely melts at 930ºC, but ranges of up to 30ºC are acceptable (it all depends on the type of brass). If you do not have a pyrometer, move on to the next step when the metal glows orange or orange-yellow, or when the color becomes almost indistinguishable in daylight.
 - Try not to inhale the smoke that comes out of the stove, and do not forget about protective equipment.
- Bringing the metal to a temperature above its melting point will ease the pouring process, but excessive heat is associated with a number of risks, including oxidation. Over time, it will become easier for you to determine when the metal is ready to pour.
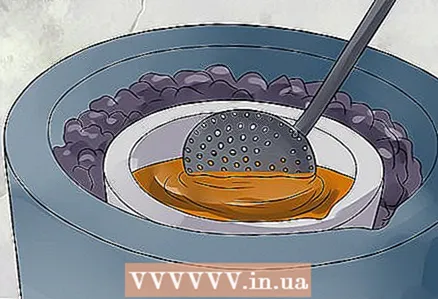 6 Use a spoon to remove any slag from the surface. Take a steel spoon and remove discolored particles and oxidation products from the surface, then dip them in the sand. This will also help you understand if the brass is completely melted, but try not to stir the metal too deeply with the spoon - this will create air bubbles in the metal, which will not allow you to mold a beautiful shape.
 - Remember that some metals (such as aluminum) give off vapors, and they need to be stirred to get the vapors out of the metal.
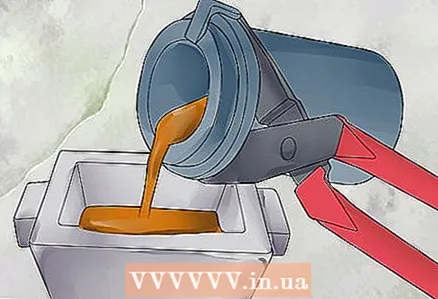 7 Pour the molten metal into molds. Remove the crucible with steel tongs and place it in the ring of the casting ladle. Using a ladle and tongs, lift the crucible and pour the metal into the molds. You may be splattering some metal, so it's important to do this over the sand. Now you can put a new batch of brass in the crucible or let the furnace cool down.
 - The oven can cool down for many hours, but the molds will cool down much faster.
Tips
- Keep a fire extinguisher nearby just in case.
- Practice on a small amount of brass first before tackling more challenging tasks.
- You can assemble the stove at your summer cottage. Before deciding on this, consult with experts.
Warnings
- Smelting brass is dangerous to humans. Dangerous vapors are generated during the melting process. In addition, the risk of explosion is not excluded. Read the safety instructions before starting work.
What do you need
- Furnace for metal
- Fuel
- Crucible
- Brass items
- Steel tongs
- Manual casting ladle
- Protective gloves for welding
- Heat-resistant apron
- Protective face mask
- Molds for casting
- Dry sand
- Pyrometer (optional)


