Author:
Joan Hall
Date Of Creation:
25 July 2021
Update Date:
1 July 2024

Content
- Method 2 of 3: Making a pencil case from a zippered envelope folder and tape
- Method 3 of 3: Sewing a fabric pencil case
- Tips
- What do you need
- Making a pencil case from a cardboard tube from paper towels
- Making a pencil case from an envelope folder with a zip fastener and tape
- Sewing a pencil case from fabric
- If you need a smaller pencil case, you can use a cardboard toilet roll tube. However, you will only be able to store small items in such a pencil case, such as rubber bands or wax crayons.
 2 Glue a one-piece zipper about 25-30 cm long to the cut (depending on the length of the tube). First, apply a strip of hot glue to the left side of the cut. Press the left half of the zipper with a length of 25-30 cm to this edge. Repeat the entire process with the right side of the cut and the right half of the zipper.
 - Choose a zipper to match the fabric you will be using for your pencil case, or opt for a contrasting color for the zipper.
- Only the zipper tape should be in contact with the cardboard, and its teeth should be in the middle between the edges of the cut cardboard. You should be able to open and close the tube with a zipper.
- If the zipper is too long, cut it off from the top edge, and then coat the cut ends of the zipper halves with hot glue to keep the zipper from flying off.
3 Transfer the contours of the ends of the straw to the fabric of your choice for the pencil case. Spread the fabric out on a flat surface with the wrong side up, and then attach the top of the straw to it. Use a pencil or pen to trace the circumference of the tubing, then repeat the procedure for the other end. - Leave at least 1 inch (2.5 cm) between the two circles to allow for seam allowances.
- It is best to use burlap for making a pencil case, but you can also use cotton fabric.
- The fabric can be plain or patterned. But if you take a light cotton fabric for work, then the cardboard tube may show through it.
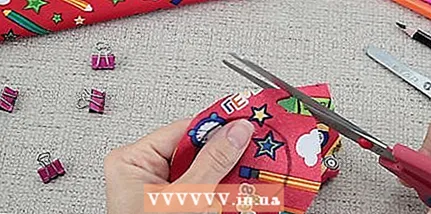 4 Cut out circles from the fabric with a seam allowance of about 1 cm. In other words, when cutting, simply step back outward from the drawn lines 1 cm around the entire perimeter. If necessary, first draw a second enlarged circle around the first, then cut out the enlarged circles from the fabric.
 - This pencil case does not require sewing, but you still need seam allowances so that you can glue the circles from the ends of the pencil case.
5 Create 1 cm deep cuts around the entire perimeter of the circles. The cuts themselves should be about 1 cm apart and 1 cm deep. Thanks to them, it will be easier to glue the circles to the ends of the tube. They will also allow you to avoid ugly gathering of fabric at seams. - Don't make cuts deeper than the outlines of the smaller circles you drew first, otherwise there will be holes in the pencil case.
6 Glue the cloth circles to the ends of the straw. Apply a strip of hot glue from the end of the straw in a circle, and then place the first circle inside out to the end of the straw and press it against the glue. Be sure to make sure that the end of the tube is exactly aligned with the drawn outlines of the circle on the round part. Then apply additional glue to the end of the tubing and press the notched allowances against it. - Repeat this step for the second round piece and the other end of the tube.
- Use a low melting hot melt glue for this step to prevent it from burning your hands through the fabric.
- Be sure to make sure that the right side of the fabric is facing outward and the wrong side is facing the tube.
7 Cut out a rectangular piece of fabric that is 2 cm larger than the tube on both sides. First, measure the length and circumference of the tube, and then add 2 cm to these measurements. Draw a rectangle of the appropriate size on the fabric and cut it out. - Use the same type of fabric that you used for the ends of the straw. However, you can take a fabric of a different color or pattern.
- If desired, the rectangle can be cut out even larger relative to the circumference of the tube. This will give you a little more room to correct potential mistakes later on.
8 Fold over the edges of the rectangle 1cm and secure them with hot glue. Lay the fabric with the wrong side up. First fold over 1cm and hot glue the fabric allowance along the short sides of the rectangle. Repeat the same for the long sides. - If desired, you can iron the folds of the fabric first to get tidier folds. Do it before hot glue application.
- Consider temporarily leaving one long edge unfolded and not glued. This will allow you to adjust the depth of the last fold when you wrap the fabric around the tube.
9 Wrap a rectangle of fabric around the tube and glue it. First, hot glue one longitudinal edge of the rectangle to the zipper tape on one side. Then apply hot glue to the short sides of the fabric rectangle and wrap it around the tube. When you get to the other side of the zipper, apply hot glue to the second longitudinal side of the fabric rectangle and press against the zipper tape. - Make sure to glue the fabric to the tube with the wrong side of the fabric and the right side of the fabric facing out.
- Please note that the folded edges of the fabric on the sides should be flush with the ends of the tube.
- If you have left one side of the fabric unfolded before, remember to fold it up before gluing. You may need to tuck it more or less than 1 cm for a good fit.
Method 2 of 3: Making a pencil case from a zippered envelope folder and tape
 1 Find an A5 envelope folder with a zip fastener. There are many varieties of bags and files with zip fasteners, but for making a pencil case it is best to take an A5-size envelope folder made of denser polyethylene. It will be even better if the folder clasp is additionally equipped with a slider. Such a fastener is more convenient to use, as it is similar to a classic zipper.
 - Avoid using files that are too small, as they may not be large enough to hold pencils and pens.
- 2 Place two strips of opaque sealing tape on the face of your future pencil case. Cut two strips of sealing tape 5 cm longer than the length of the case. Place the first strip horizontally on the sleeve, just below the zip fastener. Stick the second strip directly under the first.
- For greater durability of the pencil case, glue the strips with an overlap of about 5-10 mm.
- Make sure that the stripes are centered when gluing and that the extra 2.5 cm of allowances protrude on both sides of the envelope folder.
- You can use plain or patterned tape.
- 3 Wrap the excess tape over the back of the case. First turn the sleeve over the other side and straighten the plastic if necessary. Roll the excess tape over this side. Do this first on the right side and then on the left.
- Do not cut off excess tape strips. It must wrap around the side edges of the envelope folder. This will make your pencil case more durable.
- 4 Repeat the last two steps from the back of the pencil case. Take the next two strips of duct tape and stick them to the back of your pencil case. Then turn the pencil case upside down and wrap the excess strips over it.
- If on the front side you glued the tape with an overlap, then on the back side you must repeat the same overlap.
- 5 Cut the bottom of the sleeve 2 cm below the second strip of tape. Use a ruler and permanent marker to draw a line along the entire envelope 2 cm below the tape you applied. Cut the sleeve along this line and discard the bottom.
- It is not necessary to strictly observe a distance of 2 cm. It can be slightly less than 2 cm, but not more.
- 6 Place the next strip of tape on the bottom edge of the case and wrap the extra width over the back. Cut a strip of tape the same length as the pencil case. Stick it in such a way that the bottom edge of the strip protrudes about 2.5 cm beyond the edge of the case. Then turn the case over to the other side and wrap the remaining width of the tape over it. This will seal the bottom of the pencil case.
- If, after gluing the bottom of the pencil case, you notice gaps between the last strip of adhesive tape and the previous ones, stick another strip of adhesive tape on the front and back of the pencil case, aligning them along the lower edge.
- If excess tape is protruding from the sides, trim it off.
- 7 Decorate the bottom and sides of the pencil case with tape in a contrasting color. Cut two strips of tape equal in length to the height of your pencil case and wrap them around the side edges of the case. Then follow the same procedure with the bottom edge of the pencil case. This will allow you to get a beautiful edging with a width of 2.5 cm around the perimeter of the pencil case, and also additionally strengthen its sides.
- If you have previously used patterned tape in your work, use plain tape to process the edges of the pencil case.
- If you pasted over the pencil case itself with plain tape, then for edging its edges you can take tape of a contrasting color or with some interesting pattern.
- For a more elegant pencil case, you can decorate it with curly stickers cut from scotch tape.
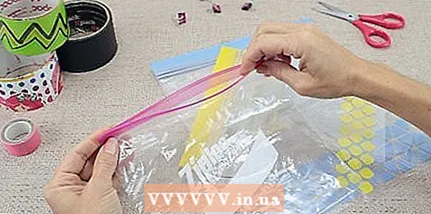
- 8 If desired, attach a transparent insert pocket with information about its owner to the pencil case. Cut a rectangle out of heavy, clear polyethylene. Cut a strip of tape 2.5 cm wide and wrap it around one of the longitudinal sides of the future pocket. This will create a nice edging on it and make the pocket more durable. Then prepare three strips of duct tape 1 cm wide and use them to secure the three remaining sides of the pocket in front of the pencil case.
- Make the pocket 2.5–5 cm larger than the card with your contact information.
- Cut out a rectangle to create a pocket from another transparent envelope folder. Don't try to make it out of opaque shopping bags or trash bags.
- 9 Punch holes in the bottom of the case if you want to place it in a ring binder. To do this, you need to use a classic hole punch with two or three holes (depending on the folder in which you are going to attach the pencil case). If you do not have a hole punch, take an existing sheet with holes for rings and attach it to a pencil case. Align the side with the holes with the bottom edge of the pencil case. Use a permanent marker to mark the position of the holes, and then punch them with a handy tool (such as a single hole punch).
- It is likely that your pencil case will not be wide enough to fit into folders on three rings, in which case create only two holes in it at the right distance from each other.
Method 3 of 3: Sewing a fabric pencil case
- 1 Cut four rectangular pieces out of the fabric, measuring 25 cm x 16.5 cm. You will need two rectangles for the outside of the case, and two more for the lining. You can use the same color fabric for all four rectangles, or use different fabric colors for the outside of the case and lining.
- For example, cut out 2 dark blue rectangles for the front of the pencil case and 2 light blue rectangles for the lining. You can also combine plain and patterned fabrics.
- It is better to use burlap in your work, as it looks interesting and is strong enough. However, it is permissible to use ordinary cotton fabric.
- 2 Pins in a 25 cm zipper between the first pair of rectangles (from the front of the pencil case and its lining). Take one rectangular piece from the outside of the pencil case and place it face up on the table. Lay a 25cm zipper face down on top, aligning with the 25cm edge of the fabric. Finally, place a rectangle of face down lining fabric over the zipper. Secure all three layers with tailor's pins.
- The zipper can be in tone with the fabric or in a contrasting color. Use a one-piece dress or classic zipper.
- The zipper should be nested between the two fabric pieces. The front sides of the parts should face the zipper and the wrong side out.
- 3 Use the sewing machine with the zipper foot attached and stitch along the top edge of the aligned pieces (along the zipper). Set the sewing machine to a straight stitch and remember to remove the pins from the fabric as you sew. Be sure to bartack at the very beginning and end of the stitching. The color of the threads can match the color of the outer fabric, lining or zipper.
- If you do not have a zipper foot, try stitching to half the length of the zipper from the bottom edge, then stop, raise the foot, pass the zipper to the already sewn section, and then continue sewing to the end.
- The bartack consists of several machine stitches in the opposite direction. The bartack prevents the stitching from unraveling spontaneously.
- 4 Unscrew the sewn-on fabric from the zipper and iron with an iron. At this stage, the fabric parts cover the zipper. Unscrew both pieces away from the zipper, exposing the front. Iron the fabric in the folded area on both sides.
- Use an iron temperature setting suitable for the fabric you are working with. In most cases, the "Cotton" temperature setting is suitable for burlap and cotton fabrics.
- Fold the fabric so that the fold forms exactly in the area of the previously laid stitch.
- 5 Stitch the seam if desired. Use a spool of thread to match the outer fabric and a bobbin of thread to match the lining for topstitching. Place the topstitch on the right side as close to the fold of the fabric as possible. A distance of 3 mm will be more than enough.
- This will also prevent the fabric from gathering and accidentally getting caught in the zipper.
- 6 Repeat the process of sewing the rectangular pieces on the other side of the zipper. Reinsert the zipper between the lining and outside parts. Secure everything with tailor's pins, and then sew along the longitudinal edge with the zipper nested inside the parts. Remove the pins, unscrew the fabric from the zipper, then iron the folds with an iron.
- 7 Open the zipper and pin the two outer parts of the pencil case together with the front sides inward. Grasp the two outer parts of the case and line them up so that the wrong side stays outside. Split the pieces along two side and one longitudinal sides, and then repeat the same with the lining pieces.
- Unscrew the zipper stitch seam allowances on the lining part.
- Be sure to leave the zipper half open. This is very it is important, otherwise it will be very difficult for you to turn out the pencil case on the front side, since opening the zipper from the inside is very difficult.
- 8 Stitch around the outer perimeter, leaving only about 7.5 cm unstitched on the bottom of the lining. Sew the outer parts first, overlap with 1 cm seam starting and ending at the zipper. Then sew the lining details. Begin zipper stitching and stop at the bottom on the right and left sides. Leave an unstitched hole, about 7.5 cm wide, on the lining at the bottom.
- Do not forget to bartack at the very beginning and at the end of each line, and also remove the tailor's pins in time.
- Change the bobbin and bobbin as needed to match the thread to the fabric you are sewing, be it the outer piece or the lining piece.
- It is very important to leave a 7.5 cm hole in the bottom of the lining, as you will need it to turn the pencil case to the front.
- 9 Cut the seam allowances diagonally at the corners of the parts, and then turn the pencil case through the hole. Cut the corners of the seam allowances as close to the stitches as possible without damaging them. Then, twist the pencil case onto the right side of the fabric through the hole you left earlier.
- You will have a pouch made of one fabric on one side of the zipper and another fabric on the other side.
- 10 Sew the hole in the bottom of the lining by hand, and then insert the lining into the case. Use a needle and thread to sew the bottom of the lining with blind step stitches. Then place the lining inside the outer parts of the pencil case. You may need to open the zipper wider to do this. When you complete this operation, you will have a pencil case in your hands, made from the outside of the fabric of one color, and inside - of another.
- If necessary, use a pencil, wooden stick or knitting needle to better straighten the corners of the pencil case. This will make your product even more neat and beautiful.
Tips
- Decorate your pencil case with stickers, appliqués or designs to make it even more unique.
- Do not allow cardboard or duct tape to get wet, or they may deteriorate.
- A pencil case can be smaller if you want to store shorter items such as wax crayons. You can also make a pencil case larger to accommodate longer items such as rulers.
What do you need
Making a pencil case from a cardboard tube from paper towels
- Paper towel roll
- Burlap or cotton fabric
- Zipper length 25-30 cm
- Hot melt gun (for low temperature glue)
- Hot glue sticks (low melting point)
- Pen or pencil
- Ruler
- Scissors
Making a pencil case from an envelope folder with a zip fastener and tape
- A5 envelope folder with zip fastener
- Sealing tape
- Ruler
- Scissors
- Hole puncher
- Stickers (optional)
Sewing a pencil case from fabric
- Cotton fabric or burlap in one or two colors
- Zipper length 25 cm
- Tailor's pins
- Sewing machine
- Zipper foot
- Fabric scissors
- Needle
- Threads


