Author:
Eric Farmer
Date Of Creation:
3 March 2021
Update Date:
1 July 2024

Content
- Steps
- Method 1 of 3: Paper cover
- Method 2 of 3: Paper bag cover
- Method 3 of 3: Using duct tape
- Scotch tape cover
- How to put a cover on a book
- Tips
- Warnings
- What do you need
Textbooks can cost a lot, and this has a significant impact on student budgets. Why expose such valuable items to the risk of being spoiled? The pennies spent on paper covers will save you a lot of money down the road, so don't wait - protect your book covers now!
Steps
Method 1 of 3: Paper cover
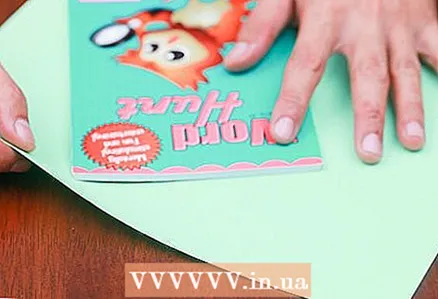 1 Get a sheet of paper that is enough for one cover. To make such a simple and inexpensive cover, you need a simple piece of paper. The sheet should extend beyond the edges of the book. If this does not happen, you have taken too small a sheet.
 - You can use different types of paper for the cover. Colored cardboard covers are considered the thickest and most reliable, but decorative paper (for example, for wrapping gifts) looks better.
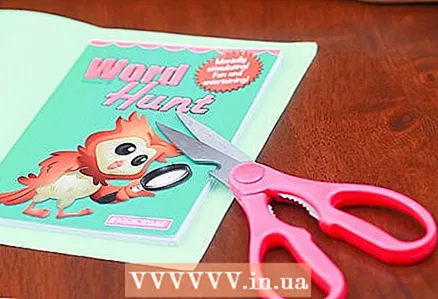 2 Cut the paper so that it only slightly extends over the edges of the book. Measure 2.5-5 centimeters along the long edges and 5-7 centimeters along the short edges. This will allow the cover to hold firmly to the book without sacrificing convenience.
  3 Cut out the trapezoid shapes at the spine. A spine is a binding covered with a cover. Cut out two trapezoidal or triangular shapes at the top and bottom of the spine (that is, in the middle of the long sides).
 - If you don't, you will have problems at the next stage, when you need to put the excess paper somewhere. It is impossible to wrap paper where there are pages, so your cover will wrinkle and tear as you open and close the book.
 4 Fold the edges. Start wrapping the book with the front or back endpaper. First fold the long edge of the paper so that it fits snugly against the book. Then fold the remaining edges of the sheet inward on the sides, trying to make everything even. Then fold the short edge of the sheet inward.
 - Secure the edges with tape after you finish folding the sides.
 5 Close the book and do the same on the other side. When you have finished covering the cover on one side, close the book, open it on the other side, and do the same. Remember to tape the edges.
 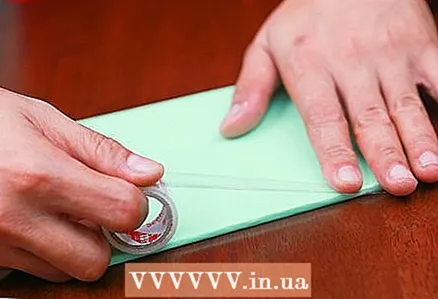 6 You can glue tape along the spine of the book. Hooray! Here is the cover and ready! Now you can add anything you want. Try tape over the spine when the book is closed. Usually the spine is subjected to the greatest stress, and the tape will protect it from wear.
 - Thick duct tape works best for this, although colored tape will work as well.
 7 Decorate the cover! Before you take your book with you to class, decorate a boring cover. How you do this will depend only on you. The main thing is not to damage the book. Below are some tips, but you can think of something of your own:
 - Drawings and squiggles (use pens and markers that will not leave marks on the book itself)
- Stickers
- Decorations made of colored tape
- Decorative cutouts on the cover
- Rhinestones, sequins and more
Method 2 of 3: Paper bag cover
 1 Get a paper bag of the right size. In this example, we are using a simple paper bag that any store can give you. Before you start, make sure there is enough bag to cover the entire book. We will cut the package at the edges, so do not take too much large. If the edges of the bag remain around the open book, then the bag is large enough.
 - It is best to use thick paper. Look for heavyweight cardboard bags, although beautiful laminated bags will work as well.
 2 Cut the bag so that it becomes one large sheet. Start at the bottom of the bag and cut along the fold lines.Remove handles if your bag has them. Then make a vertical cut along one of the edges. Now you have a large rectangular cardboard in front of you.
 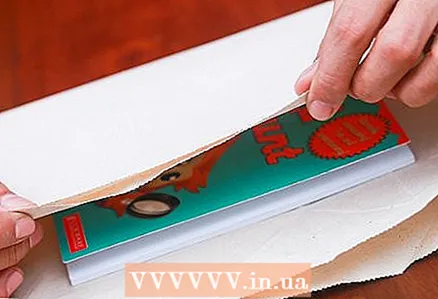 3 Fold the cardboard like a regular paper cover. After the bag is cut, it will be easier for you. Do everything as described in the first paragraph of this article, using a cut bag instead of a sheet of paper.
 - Ignore the fold lines on the bag. You don't have to bend the cardboard along these lines, so bend it as you need it.
Method 3 of 3: Using duct tape
Scotch tape cover
 1 Place the tape on the table, sticky side up. When it comes to durability, an adhesive tape cover will outperform all other covers. However, this is not about sticking tape directly to the book - this will harm it. First, you need to make a "canvas" of duct tape, which will be smooth on both sides. This is not as difficult as it sounds, but it can take a long time. Unroll a long piece of duct tape first and place it sticky side down.
 - The strip should be several centimeters longer than the book. After the first strip is ready, you can use tape of a similar length, but millimeter accuracy is not needed here.
 2 Take the first strip.Very neat place another strip on top of the first sticky side down so that it overlaps the first by about half. Press and smooth without wrinkling.
 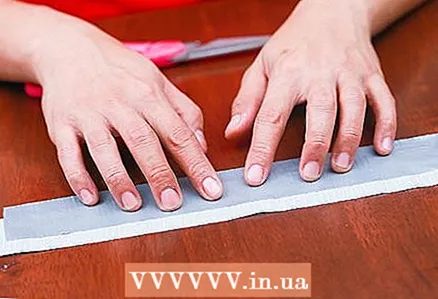 3 Fold the first strip. Take the first strip, fold it and glue the two pieces together. You will have a smooth tape with a straight edge. This strip will become the edge of the cover. You will need to continue gluing the tape in the opposite direction.
  4 Turn over and repeat the same. Place the third strip of tape on top of the sticky side up. Do not skip areas or leave the sticky side uncovered - these areas will press against the book and damage the cover of the book.
 - You can even step a little further than necessary to completely cover the sticky part.
 5 Continue gluing on new tapes until you have made a canvas that is larger than the open book. You should have a canvas that will be sticky side down. When the canvas is larger than the book, keeping the padding in mind, create a second edge on the cover by folding the edge and hiding the adhesive side.
  6 Trim the edges to keep the canvas flat on all sides. Open the book and place the cover on the linen. Use a ruler and pen to measure the indents and cut out a straight rectangle. You can use scissors, a razor blade, or an army knife.
 - You should now have a flat rectangular canvas that protrudes a few centimeters from the book.
How to put a cover on a book
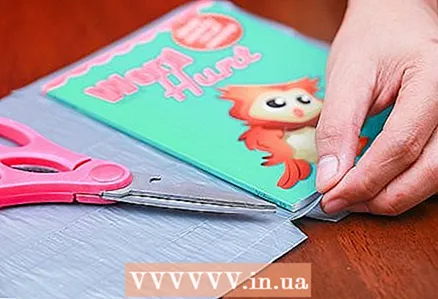 1 Cut out triangular or trapezoidal shapes near the spine. Compared to how you made the canvas, everything else will be simple. Open the book and place the cover on the tape. Cut the tape at the top and bottom to prevent the book from closing. Gaps at the spine level will appear below and above the scotch tape.
 - This is done for the same reasons as in the first paragraph of this article. Without this, the cover at the spine will be exposed to a lot of stress, which will cause it to wrinkle and tear.
 2 Mark the fold lines. Fold the edges over the short side and mark the lines. Do the same for the long edges.
 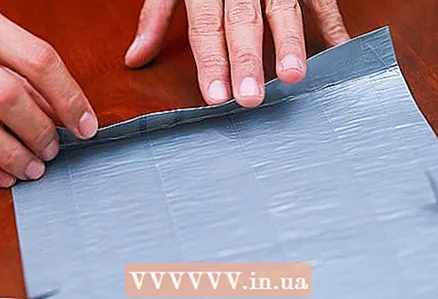 3 Press these lines down. Remove the book. Fold the cover along the marked lines. Fold the cover over the lines and press them down. Place a heavy object (such as a large textbook) on top and let sit for a few minutes to flatten the cover.
  4 Put on the cover. Fold the cover along the lines, return the book to the linen and wrap the book with it using the folds. Bend the long edges first and then the short ones (fold diagonally). Use small pieces of tape to secure each fold.
  5 Decorate the cover as desired. Here is the cover and ready! Now you can start decorating. Pencils and pens will not write well on tape, especially dark tape, so try making jewelry out of multi-colored tape, adding rhinestones or something else.
 - You can glue white duct tape to the front of the cover and sign the book. This will help you better navigate books with the same covers.
Tips
- Make a themed cover. Draw an old map for the cover of a geography textbook, and decorate a Russian textbook with a drawing of an inkwell and a pen.
- Try laminating the cover with regular tape after you decorate it. This will make the cover sturdier.
- Ready-made covers can be bought in large hypermarkets and stationery stores (especially in early fall).
Warnings
- Do not glue the sheets together. Such covers will wear out faster at the junction of sheets or canvases. Even if they are glued together securely, they can tear over time.
What do you need
- Textbook or book
- Cover paper or cloth (see tips)
- Duct tape
- Scotch
- Marker or other decorating tools (optional)


