Author:
Mark Sanchez
Date Of Creation:
5 January 2021
Update Date:
1 July 2024

Content
- Method 2 of 4: Making adhesive tape stickers
- Method 3 of 4: Making self-adhesive paper stickers
- Method 4 of 4: Making stickers in other ways
- What do you need
- Adhesive Stickers
- Stickers with scotch tape
- Self-adhesive paper stickers
- Draw a self-portrait or portraits of your friends or pets.
- Cut out graceful images and phrases from magazines and newspapers.
- Print pictures from the Internet or images on your computer. For best results, print on thin printer paper rather than photo paper.
- Use ready-made sticker templates from the Internet that you can print.
- Make pictures with decorative stamps.
- Decorate the image with sparkles.
 2 Cut out the stickers. Use scissors for this. Make the stickers as big or as small as you like. Use curly scissors to create the patterned edges of the stickers, which can be used to create an interesting cut pattern.
 - Try using curly punches to make hearts, stars, and other curly shapes out of patterned paper.
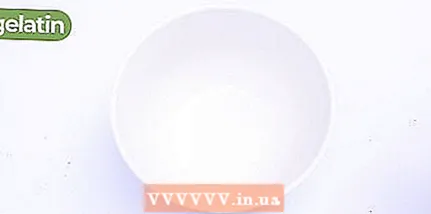 3 Prepare the glue. This glue is safe for children, similar to the one used on envelopes. It will provide adhesion of the sticker to most types of surfaces, but at the same time it does not contain harmful chemicals. To make the glue, mix the following ingredients in a bowl until smooth:
 - a packet of simple gelatin;
- 4 tablespoons of boiling water
- 1 teaspoon sugar or corn syrup
- a few drops of peppermint or vanilla extract for flavor.
- Use different types of extracts for different flavors! Apply different scents to different kinds of stickers, make stickers for your friends with amazing scents, or use certain holiday themed scents for New Years, Valentine's or Easter.
- When you prepare the glue, store it in a medicine bottle or in an airtight container in the refrigerator. The glue will turn into a thick gel overnight. Place a container of glue in hot water to liquefy it.
- This glue can also be used to seal envelopes.
4 Apply glue to the stickers. Lay the decals back up on a sheet of waxed paper or aluminum foil. Take a paintbrush or baking brush and brush the back of the stickers with glue. When finished, let the glue dry completely. - There is no need to completely saturate the stickers with glue, just apply it in a thin layer.
- Make sure decals are completely dry before using.
- Store your finished decals in a plastic bag or plastic box until you are ready to use them.
 5 Lick the back of the sticker to attach it. When you're ready to stick your decal to a surface, simply lick the back of it as you would with stamps, then press the decal briefly to the desired surface. Homemade glue is strong enough, so be careful when applying the sticker.
 Method 2 of 4: Making adhesive tape stickers
- 1 Cut out images from magazines or print your own sticker designs. For this method, you need images that have been printed on paper with waterproof ink. You can use glossy magazine or book pages, or you can experiment with your printer's ink and try to print options from your computer. If you are printing pictures, make a test copy first to pre-wet it for resistance testing before starting to make the labels themselves. Cut out images and phrases you like using scissors.
- When selecting images, do not forget about the width of the tape. Each sticker must fit within the width of one of its stripes. This means that the picture should not be wider than the tape.
- If you want to make a larger sticker, you will have to line up the two strips of tape. It may not be so easy. You need to align the tape so that its strips overlap quite a bit, and the paper does not show through between them. If you fail, your sticker will be damaged. If successful, only the seam where the stripes meet will be visible on the sticker.
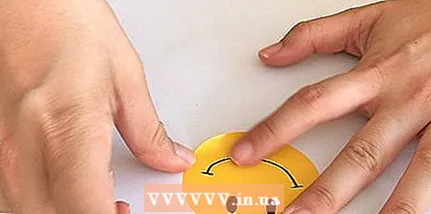
- 2 Cover the sticker designs with tape. Cut a piece of clear tape large enough to completely cover the cut-out decal design. Stick it to the front of your cut or printed design. Press down on the tape so that it adheres well to the drawing.
- Be careful when applying tape to the image. It is worth changing its position, and the picture will tear. Also, try to make sure that no air bubbles or wrinkles form when you apply the tape.
- Consider using double-sided tape. Double-sided tape is available in various forms: in rolls, sheets and even as part of special machines for the production of stickers, for example, the Xyron brand.
- Consider using washi tape. It is similar to scotch tape and is great for making stickers because it sticks when you want it and also easily peels off if you need it. Japanese paper duct tape is available in a variety of colors and patterns. If you want to make more durable stickers, you can use sealing tape.
- 3 Rub the face of the decal. Take a coin or use your own fingernail to press down on the face of the sticker and rub the surface to get the ink on the paper to bond with the adhesive on the tape. Continue rubbing the decal for a few minutes to make sure the ink will bond with the adhesive tape.
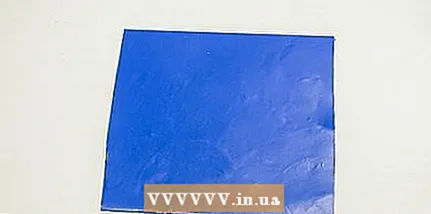
- 4 Rinse decals in warm water. Take the stickers one at a time and rinse them under water, placing the paper side under the stream until the paper starts to fall off. The ink will not be washed off with the water and the paper will completely dissolve. You can speed up the process by rubbing the paper.
- Make sure to wet the entire surface of the adhesive tape, not just a portion of it. If you concentrate your efforts on only one area, then only this area will be visible on the sticker.
- If the paper does not fall off, continue to soak the decal under warm water.
- Alternatively, submerge the decals in a bowl of warm water. Submerge the decals completely in water and leave to soak for a few minutes.
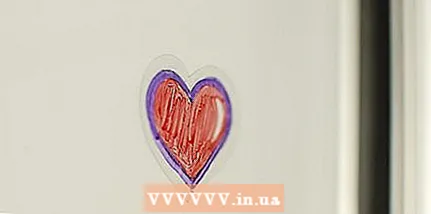
- 5 Let the decals dry. After removing the paper, allow the decals to dry completely so that the adhesive tape becomes tacky again. Use scissors to cut off any excess tape around the decal design, then stick the decal onto the surface of your choice.
Method 3 of 4: Making self-adhesive paper stickers
 1 Buy self-adhesive paper. In handicraft or office supply stores, you can find paper that has an adhesive layer on one side. It is usually protected by a backing that is removed when the paper needs to be glued.
 - Alternatively, double-sided adhesive sheets are available. They will allow you to stick your pictures on one side of them, and then use the back side to attach stickers. This is a great option for those cases when you want to use ready-made pictures or images cut from magazines for stickers.
- Buy self-adhesive paper that works for your printer.
- If you don't have a printer, you can hand-draw the stickers on the surface of the self-adhesive paper, or cut and paste images from magazines and books to it.
- 2 Design your stickers. Draw stickers on your computer, or use markers or pens to draw pictures directly on the surface of the self-adhesive paper.You are only limited by the size of the paper. You can even make an A4 sticker if you want!
- Draw stickers on your computer using Adobe Photoshop, Paint, or another graphics program. You can simply use photos from your personal album or from the Internet as stickers. When finished, print the images on self-adhesive paper.
- If you have a printed photo or drawing that you want to make a sticker from, simply scan it or download a digital image source to your computer. Process this file in Photoshop, Paint, Word, or Adobe Acrobat, and then print on self-adhesive paper.
- Draw pictures directly on self-adhesive paper using pens, pencils, or paint. Just do not wet the paper too much, otherwise you may damage its adhesive layer.
- 3 Cut out the stickers. Use scissors to cut out printed sticker designs. You can cut the stickers in simple rectangular shapes, or use curly scissors to create interesting patterned edges. Your decals should be spaced about three millimeters apart on the sheet so that you do not accidentally damage adjacent decals when cutting one decal.
- When using double-sided adhesive sheets, simply tear off the protective backing to expose the adhesive layer of the sheet. Place the stickers back to the adhesive layer. Press down on them so they adhere well. Then peel off the adhesive backing from the second backing - your decal is now sticking to the back. Glue it to any surface of your choice. You need to stick the sticker on right away as you removed the protective backing from it.
- You can position the labels further apart on the sheet so that you can create white borders around the images, or you can cut the labels without these borders. People who are already experienced in creating stickers sometimes do not leave borders at all and cut out the stickers with a clerical knife.
- 4 Remove the protective backing from the paper. When you're ready to use your decals, peel off the backing backing and adhere the decal to your chosen surface.
Method 4 of 4: Making stickers in other ways
 1 Make reusable stickers. For stickers that can be glued on and removed, purchase a special temporary glue that can be found in craft stores or purchased online. After you prepare and cut out the stickers, apply some temporary adhesive to the back of the stickers. Let the decals dry completely. Then you can stick on the sticker, tear it off and stick it on again!
 - 2 Use postage paper as stickers. Draw pictures, shapes, or write words on lettering paper. It can be found in office supply stores. Cut out the sticker and then peel it away from the backing. If you don't want to use the decal right away, place it on wax paper.
 3 Make stickers with double-sided tape. Draw the picture on any paper or cut out pictures from magazines. After cutting out the image, glue double-sided tape to the back of the image. Cut the tape so that it does not stick out from under the image. Place the decal onto the waxed paper until you are ready to use it.
 - 4 Make stickers out of contact copy paper. Draw the image on the shiny side of the pinned copy paper using sharp objects. Cut out the drawing. Peel off the backing and stick the decal to the surface of your choice.
- Contact paper labels are transparent. It's a good idea to glue them on colored cardboard for modeling.
 5 Use a sticker making machine. If you have a lot of stickers to make and are willing to spend a certain amount of money, you can purchase a special sticker-making machine at a craft store or online. Place your decal (drawing, photo, or even tape) into this machine and then swipe through it. In some machines you need to pass the decal through the crankshaft, in others you need to insert the image on one side, and then the machine will give you the finished decal with an adhesive layer on the other side. After passing through the machine, the decals are ready to use: just peel off the protective backing and stick on.
What do you need
Adhesive Stickers
- Thin paper
- Scissors
- Gelatin
- Boiling water
- Corn syrup or sugar
- Peppermint or Vanilla Extract
- Brush
Stickers with scotch tape
- Magazines or books with waterproof ink
- Scissors
- Transparent tape
- Warm water
Self-adhesive paper stickers
- Self-adhesive paper
- Printer (optional)


