Author:
Bobbie Johnson
Date Of Creation:
4 April 2021
Update Date:
1 July 2024

Content
This guide walks you through the process of making a wagon wheel using waste wood and simple assembly techniques. Keep in mind that this wheel can only be used as a decorative element, and not as a wheel for a real carriage.
Steps
 1 Prepare a work table or other surface large enough to accommodate a full-size wheel. For a wheel with a diameter of 91 cm, you need about 100 cm in the length and width of the working surface.
 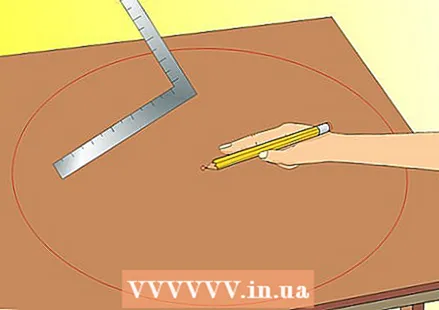 2 Mark the center of the work surface and use this point to draw the outline of the wheel circle around it.
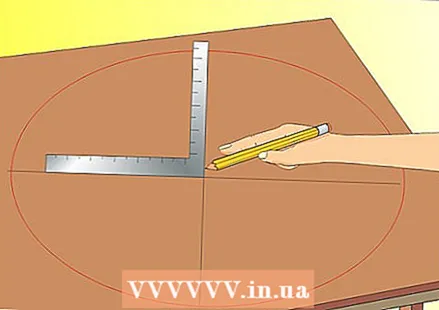 3 Divide the drawn circle into 4 equal segments using a square and drawing lines from the center, or dividing the circumference by 4 and marking arcs of that length on the circumference.
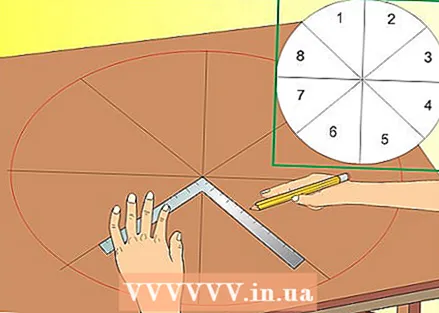 4 Divide each arc in half to get a circle divided into 8 equal segments. Be as specific as possible.
 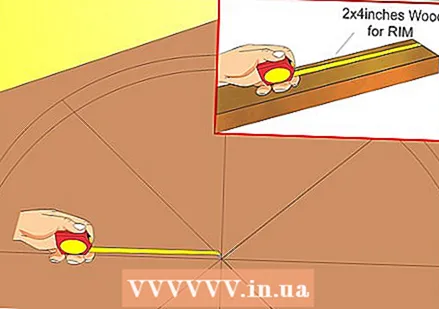 5 Mark the distance from the circle to the center equal to the desired thickness of the rim.
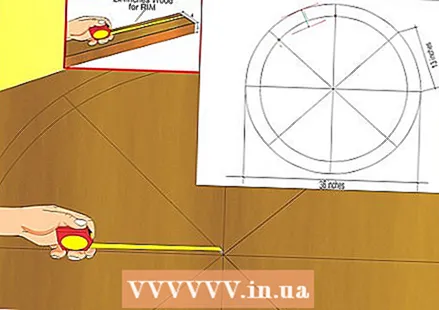 6 Measure the length of the segment that extends from one end of the segment arc to the other. For a wheel with a diameter of 91 cm, this length will be approximately 33 cm.
 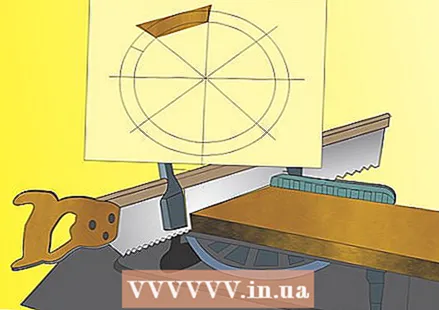 7 Use a miter saw to cut 8 boards to the length determined in the previous step, cutting each end at a 22.5 degree angle so that the "long ends" are on one side of the board.
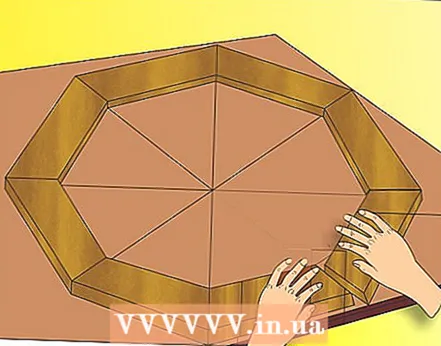 8 Lay the boards along the drawn circle. Make sure the planks fit snugly together and that the joints between the planks are along the drawn corners. After laying the boards, secure them together using wood glue and countersunk bolts.
 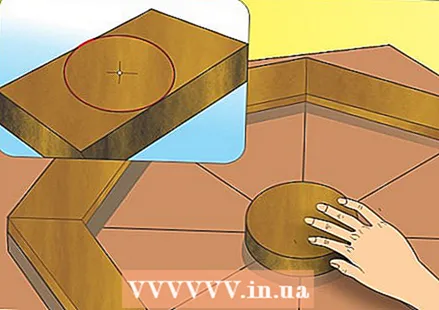 9 Make the "center" of the wheel by cutting out a circle of the desired diameter from the board and placing it in the center of the work surface. Secure it with a bolt to temporarily lock in place.
 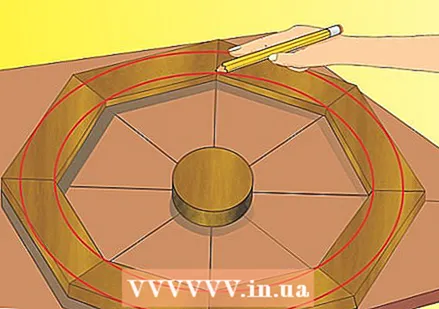 10 Also lock the octagonal shape around the center.
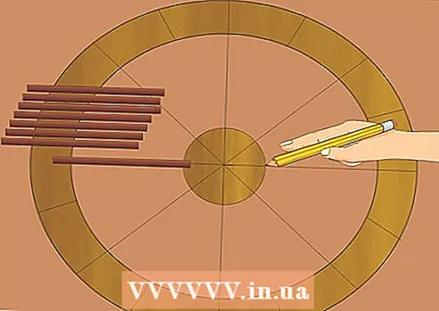 11 Draw the outlines of the future rim on the workpiece.
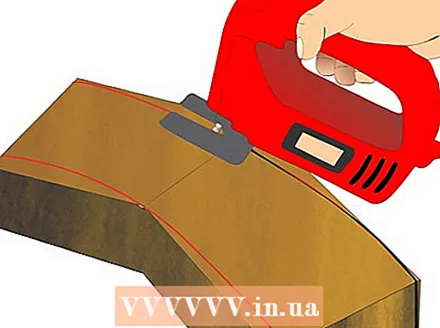 12 Use a jigsaw or band saw to shape the wheel and its center.
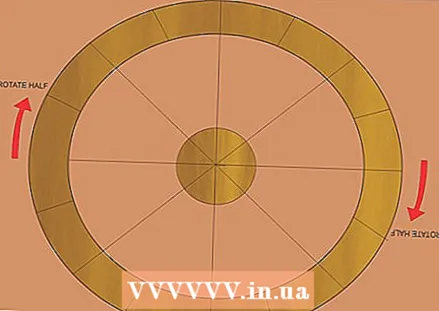 13 Place the rim and center of the wheel in their positions according to the markings and rotate them half the length of the segment. In this position, mark the spokes that should be equidistant from each other between the rim and the center of the wheel.
 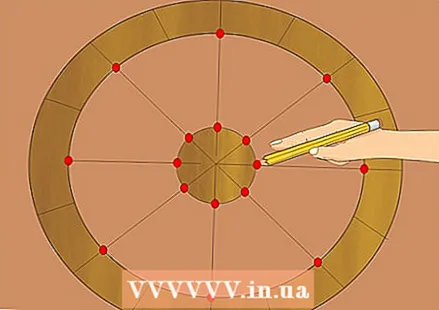 14 Mark each point where the end of the spoke should be on the rim and center of the wheel. Make sure these points are opposite each other.
 - 15 Punch through holes in the rim to fit the spokes. Also make holes in the center of the wheel about 2.5-3.5 cm deep.
 16 Cut the spokes just long enough to fit through the rim and secure in the center of the wheel. You can take a longer length and trim the excess after assembling the wheel.
 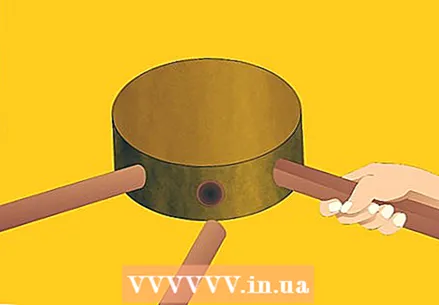 17 Insert the spokes through the rim into the center of the wheel, securing them with glue. Make sure everything fits correctly and the wheel is symmetrical.
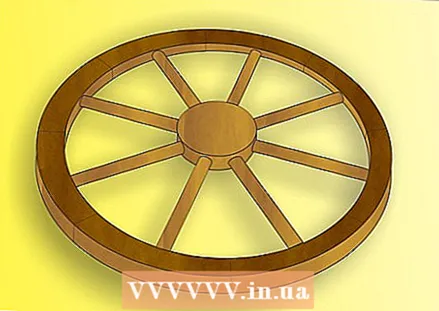
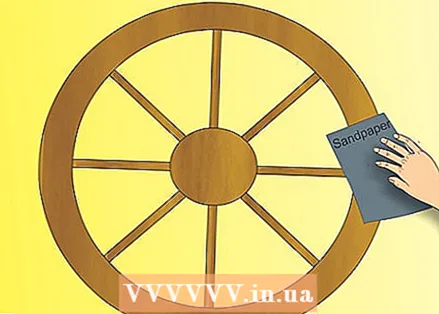 18 Sand down any sharp corners, trim off excess spokes to the outside diameter of the rim, and decorate the wheel however you like.
Tips
- You can use a circular saw to cut sections for the rim if you don't have a miter saw.
- This project can be carried out using old unnecessary boards, as for a wheel with a diameter of 91 cm you will need boards no more than 38 cm long. Old mops can be used for the spokes.
Warnings
- Do not forget about safety precautions when working with power tools.
What do you need
- Wooden planks for rim and center. Wooden knitting needles are 1.3-2.5 cm in diameter.
- Miter saw or other miter saw
- Drill and drill
- Wood glue
- Wood screws or other fasteners
- Measuring meter, pencil
- Working surface


