Author:
Clyde Lopez
Date Of Creation:
24 June 2021
Update Date:
1 July 2024

Content
- Ingredients
- Shea butter soap with coconut milk
- Shea butter soap for face
- Steps
- Method 1 of 2: Shea Butter Soap with Coconut Milk
- Method 2 of 2: Moisturizing Shea Butter Facial Soap
- Tips
- Warnings
Shea butter is organic, non-toxic and untreated and can be used in cooking. It is also known to moisturize and rejuvenate old skin, making it look and feel more elastic. Shea butter can help with skin problems such as cracks, sores, small wounds, eczema and dermatitis, as well as soothe muscle soreness. Since shea butter renews the skin, you can use it in the bath as part of your everyday soap to help treat stretch marks and age-related skin changes. Purchased shea butter soap is quite expensive, but its counterpart can be made at home for less.
Ingredients
Shea butter soap with coconut milk
- 135 grams of shea butter
- 180 grams of coconut oil
- 360 grams of olive oil
- 90 grams of castor oil
- 135 grams of palm oil
- 200 grams of distilled water
- 97 grams of coconut milk
- 123 grams of lye
Shea butter soap for face
- 110 grams of distilled water
- 61 grams of lye
- 155 grams of olive oil
- 127 grams of coconut oil
- 91 grams of sunflower oil
- 50 grams of castor oil
- 36 grams of shea butter
- ½ teaspoon (2.5 ml) jojoba oil
- ½ teaspoon (2.5 ml) vitamin E oil
- 1 teaspoon (5 ml) zinc oxide
- ½ teaspoon (2.5 ml) rose geranium essential oil
Steps
Method 1 of 2: Shea Butter Soap with Coconut Milk
 1 Use tools and bowls specifically designed for soap making. Do not take tools and utensils that you use to prepare and store food, as this can be hazardous to your health. Copper and aluminum objects can react chemically with lye. Choose from tempered glass, porcelain, or stainless steel. Also, be aware that lye can dissolve some types of plastic.
 - Styrene or silicone spoons work well and you will only use them for soap.
 2 Look for original soap molds. Choose a suitable soap dish at your local craft store or silicone bakeware at a kitchen supply store. You can easily get ready-made soap from silicone molds.
  3 Prepare not only the ingredients, but also the necessary tools. In addition to mixing bowls and spoons, you will need ½ and 1 liter glass jars, a stainless steel thermometer that can measure temperatures in the 30–95 ° C range, newsprint and an old towel.
 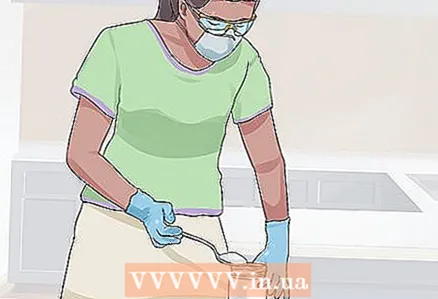 4 Dilute the lye, taking precautions. Wear protective goggles and gloves, and cover the work area with newspaper to protect the surface from lye. Wear a mask to protect against liquor vapors that are formed by reaction with water. Pour water into a 1 liter glass jar. Take ¼ cup (60 milliliters) of lye and slowly pour it into the water. Stir until clear and let stand.
 - Use cold distilled water. Distilled water can be purchased at a supermarket or pharmacy.
- Purchase lye from a pharmacy or hardware store, or order it online.
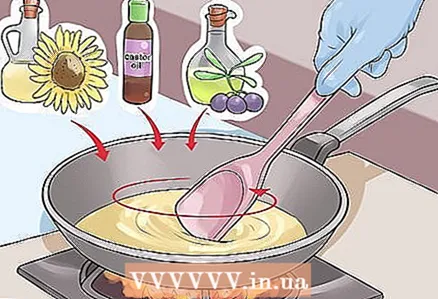
 5 Mix oils and heat. Pour all the oils into a half liter jar and stir. Then preheat the jar in the microwave for about one minute. You can also heat the jar on the stove in a pot of water. In this case, the temperature of the oil mixture should rise to 49 ° C.
 - Use olive oil or coconut oil if you want to make a mild or hard soap that lathers well. Grape seed oil, almond oil and sunflower oil have a similar effect.
 6 Mix oil and lye at a suitable temperature. The liquor solution and oil should cool to about 35–40 ° C. Do not allow them to cool to a lower temperature, or they will thicken and can easily crumble. Stir the lye slowly with a spoon when it has cooled to the desired temperature. Pour the lye and oil into a bowl and stir the ingredients for about 5 minutes.
 - If you have a hand blender, use it to thoroughly mix the lye and oil. The result should be a thick and light mixture that resembles vanilla pudding dough in appearance and consistency. After that, you can add essential oils and herbs.
- Wait for the lye to thicken before adding the coconut milk and water. Then pour in the lukewarm coconut milk.
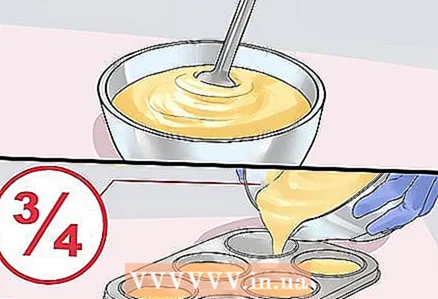 7 Continue stirring the solution until it begins to resemble a medium thick emulsion. Mix the ingredients well and pour ¾ of the solution into a soap dish or silicone baking dish.
 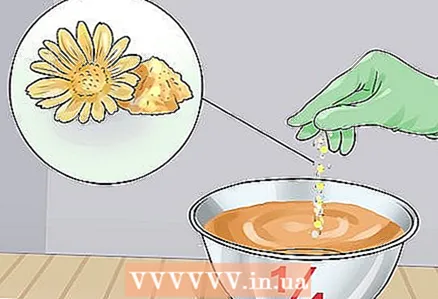 8 Add ground calendula flower petals to the remaining ¼ of the solution. After that, mix the solution with the petals and pour it into the shapes in a zigzag pattern.
 - To make the colored soap fill the molds evenly, pour the remaining flower petal mixture from different heights. Raise and lower the bowl of solution so that the petal-colored mixture penetrates to different depths of the already poured white soap.
 9 Apply patterns with a spatula or other tool. Make curls or other patterns on the surface of the shea butter soap until it is stiff.
 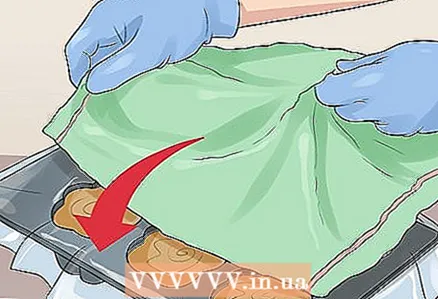 10 Cover the molds with plastic wrap and an old towel. Cover the molds with a towel to trap any remaining heat. This will help the soap to harden properly.
 - This process of solidifying the ingredients is called saponification (saponification).
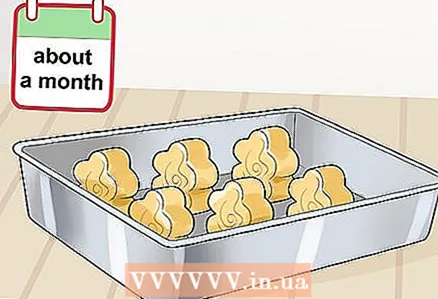 11 Let the soap sit. Test the soap every other day (24 hours). If it is still soft or slightly warm, wait another day or until the soap hardens and cools. After that, remove the plastic wrap and soak the soap for about a month. When doing this, turn the soap once a week or place it on an oven grate so that the entire surface is in contact with the surrounding air.
Method 2 of 2: Moisturizing Shea Butter Facial Soap
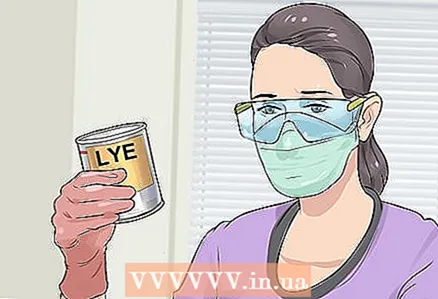 1 Use protective equipment when handling lye. Wear gloves and safety goggles before handling lye. Pour lye (NaOH, or sodium hydroxide) into the water. Fill a heat-resistant pyrex or polypropylene mug with water and add a little lye to it, stirring thoroughly. Do not inhale the vapors that are released when mixing lye with water, and be aware that the solution will get hot.
 - Do not add water to the liquor, as this will cause a strong chemical reaction with the release of heat and vapors. Pour the lye into the water slowly to control the reaction.
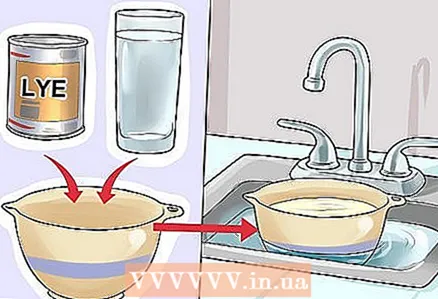 2 Cool the aqueous lye solution. To speed up the process, place the container with the mixture in a bowl of water or just in the sink. Prepare the solution and keep it in a well-ventilated place. For safety, it is best to make shea butter soap outdoors.
 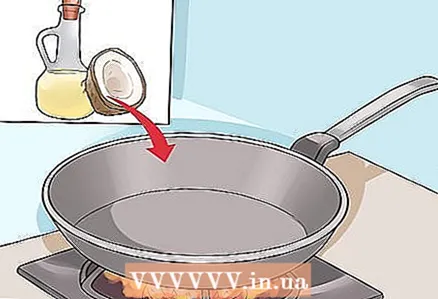 3 Heat the coconut oil. Measure out the correct amount of coconut oil and pour it into a saucepan. Do not use utensils in which you cook food. Bowls and other stainless steel or tempered glass utensils, and enamel utensils will do. Do not use objects made of copper or aluminum, as these metals react with lye. In addition, lye dissolves some types of plastics.
 - Take styrene or silicone spoons and use them exclusively for making soap.
 4 Stir the oils thoroughly. Mix zinc oxide with one tablespoon (15 milliliters) of liquid oil. When the coconut oil is melted, stop heating it and add the castor oil, sunflower oil, and olive oil. Using a digital thermometer, check that the temperature of the mixture is around 30–32 ° C. Measure the temperature of the aqueous liquor solution and also bring it to 30–32 ° С. Continue stirring the liquor and oil solutions in separate containers until they reach the desired temperature.
 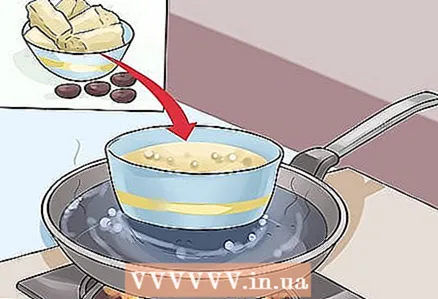 5 Melt the shea butter. Use the steamer method for this: put the shea butter in a heat-resistant container and place it in a pot of boiling water.
 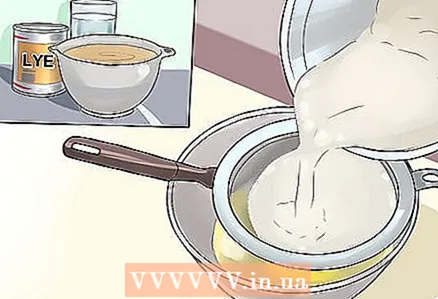 6 Mix an aqueous solution of lye with oil. Strain the liquor solution through a sieve into a container with a mixture of oils. In this case, make sure that the temperature of both solutions was approximately the same and amounted to 30–32 ° С. The sieve is necessary so that the lye does not end up in the soap. Use a whisk to gently mix the resulting solution.
  7 Use a hand blender to remove air bubbles. Use a blender to mix the liquor, water and oils solution near the side of the container with short pulses. In between, stir the liquid with the turned off blender so that it begins to thicken. As a result, the lye will completely mix with the butter, and the solution will begin to resemble vanilla pudding dough in consistency.
 - It may take a while for the mixture to thicken as you work at low temperatures. Continue to briefly turn on the blender and stir the solution.
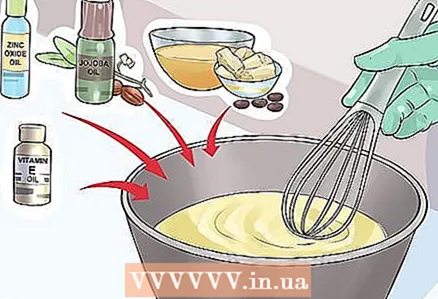 8 Add remaining ingredients. Pour the mixture of zinc oxide butter, jojoba butter, melted shea butter and vitamin E butter into the solution and mix with a whisk.Stir the ingredients vigorously as the soap thickens quickly and becomes difficult to work with.
  9 Pour the soap into suitable containers. Stir the solution thoroughly and pour it into a soap dish or silicone baking dish.
 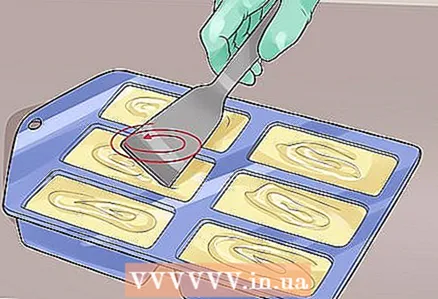 10 Apply patterns with a spatula or other tool. Make curls or other patterns on the surface of the shea butter soap until it is stiff.
  11 Cover the molds with plastic wrap and an old towel. Cover the molds with a towel to trap any remaining heat. This will help the soap to harden properly.
 - This process of solidifying the ingredients is called saponification (saponification).
- You can put the molds in the refrigerator and leave them there overnight to speed up the process and better preserve the essential oils. The result is a harder white bar of soap.
 12 Remove the soap from the molds. Remove the soap from the molds and keep it out of direct sunlight for 4-6 weeks in a well-ventilated area to help complete the saponification process.
Tips
- When looking for lye, remember that it is also called sodium hydroxide.
- Although lye is corrosive and hazardous to work with, it will react with the oils in the soap (during the saponification process) and no lye will remain in the finished soap.
Warnings
- When mixed, the water and lye heat up and give off vapors within 30 seconds. Do not breathe in these vapors as they can cause choking and discomfort in your throat. Although this will go away, it is best to wear a mask and work in a well-ventilated area.
- Wear gloves to protect your hands.
- The lye can eat through the fabric and burn the skin. Wear gloves, goggles and a mask when using any amount of lye.
- Always add lye to water, not vice versa. At the same time, stir the solution, otherwise the lye may collect at the bottom, which will lead to rapid heating and explosion.


