Author:
Sara Rhodes
Date Of Creation:
18 February 2021
Update Date:
1 July 2024

Content
- Steps
- Method 1 of 7: Retrieving Server Files
- Method 2 of 7: Starting the Server on Windows
- Method 3 of 7: Starting the Server on Mac OS X
- Method 4 of 7: Connecting to the Server
- Method 5 of 7: Modifying the Server
- Method 6 of 7: Configuring Port Forwarding
- Method 7 of 7: Setting up dynamic DNS
- Tips
- Warnings
Keeping a Minecraft server for all your friends is a great way to play together. You can assign different rules for your friends, starting with more frequent fights, ending only with constructs and everything else in between. You will need a long-term internet connection. Also, servers work better if no other programs are running on the computer, so try to have a computer dedicated only to this business.
Steps
Method 1 of 7: Retrieving Server Files
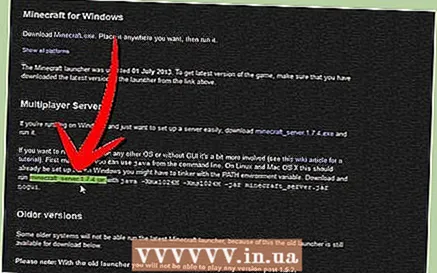
- 1 Find the server files. You can download the Minecraft server program for free from the Minecraft website. You can have a Minecraft server without buying games, but you will not be able to play on it.
- If you are on Windows, click on the "Minecraft_Server.exe" link under the "Multiplayer server" heading.

- If you have Mac OS X or Linux, download minecraft_server.jar.
- If you are on Windows, click on the "Minecraft_Server.exe" link under the "Multiplayer server" heading.
 2 Create a folder. The Minecraft server works directly through the program you downloaded from the site, and it will install itself in the folder through which you launch it. Create a folder with a name like "Minecraft Server" and download the server file into it.
Method 2 of 7: Starting the Server on Windows
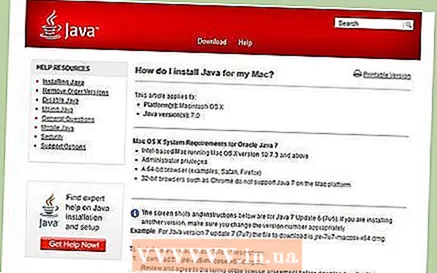 1 Install the latest Java. Check your Java version first. In Windows XP / Vista / 7/8, click on the Windows key and on the R key (K in Russian) to launch the Run command. Enter "cmd" in the box to open a command prompt. Type java -version and hit enter. Your Java version must be 1.7.
 - To download the latest version of Java, visit the Java download page.
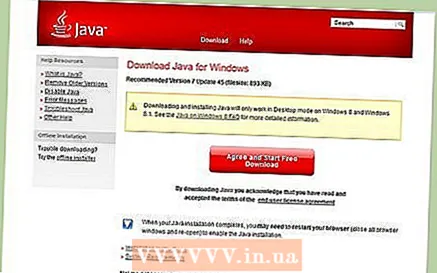
- To download the latest version of Java, visit the Java download page.
 2 Start Minecraft server. Open the folder containing the "Minecraft_server.exe" file. Double click on the .exe file, and you will see a window showing the progress of the server construction. The process is automatic. Server configuration files will be created automatically and added to the folder.
 - At this stage, you can go to your Minecraft server over the local network or you can go online if you do not use a router. If you are using a router but want to log into the server online, follow the steps in the Port Forwarding section below.
- If the server fails to load and you see a screen with garbled text, you will need to start the server as administrator. Right click on the program and select "Run as administrator". You will need an administrator password.
Method 3 of 7: Starting the Server on Mac OS X
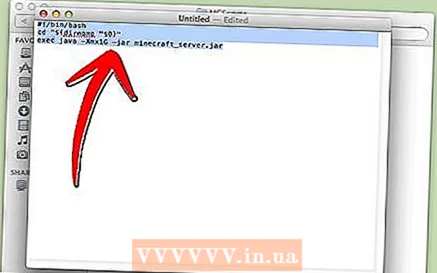 1 Open the server folder. Open the folder that contains the minecraft_server.jar file. Create a new text document using TextEdit. Set the format to "Make Plain Text". Copy the following lines to a file:
#! / bin / bash
cd "$ (dirname" $ 0 ")"
exec java -Xmx1G -Xms1G -jar minecraft_server.jar- If you want to assign more RAM to the server, change from 1GB to 2GB or higher, depending on your system.
 2 Save the file. Save the file called "start.command". Open Terminal in the Utilities folder. You will need to give execution permission, start.command to the file you just created. Enter the command "chmod A + x" in Terminal, then drag the start.command file into the Terminal window. This will give the file the right direction. Press Enter to save changes to the file.
 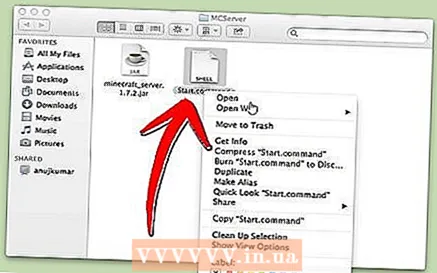 3 Double click on the batch file. By starting start.command, you will start the Minecraft server.
Method 4 of 7: Connecting to the Server
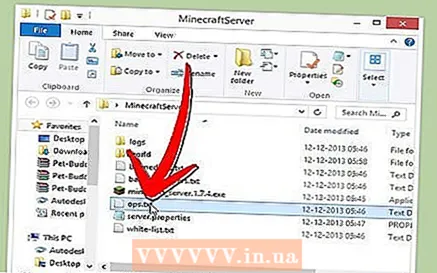 1 Configure operator privileges. When starting the server for the first time, exit immediately. Open the ops.txt file in the Minecraft server directory. Enter your username in this file to assign yourself administrator privileges. Thus, you can kick or ban players, as well as change other settings.
 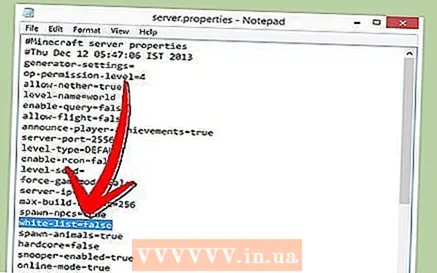 2 Set up your whitelist. Add Minecraft usernames of your friends to the white-list.txt file in the Minecraft server directory. Only those users who will be in this list will be able to connect to your server. This way, you won't miss different griefers in your game.
  3 Obtain an external IP address. Enter "my ip address" in Google, and you will be given your external (public) IP address in the very first result. Let users enter your external IP address in the Minecraft multiplayer menu.
 - If your ISP assigns you a dynamic IP address, check the "Dynamic DNS" section below to know how to set up Dynamic DNS that will remain constant even if your IP address changes.
 4 Pass out your address. Give your server IP or hostname to your friends. They will need to enter the IP address or hostname of your server in the multiplayer menu in Minecraft.
 - Players who will enter via the local network must enter their local IP address, and those who will enter via the Internet must enter an external IP address or hostname.
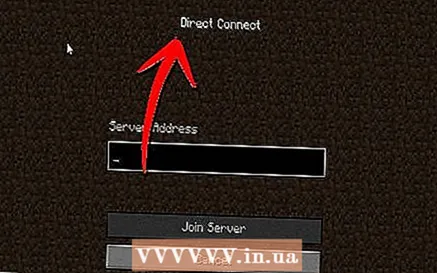
- Players who will enter via the local network must enter their local IP address, and those who will enter via the Internet must enter an external IP address or hostname.
Method 5 of 7: Modifying the Server
- 1 Install all plugins. There are tons of user-created plugins and mods that you can download for free that will change your experience of the game. These can be either construction boosters or a complete change to the economy, as well as completely new game modes. Use plugins to add variety to your server and keep your friends interested.
- Bukkit is the most popular plugin you can add to your server. You will need to download the CraftBukkit tool. By running CraftBukkit, you will completely replace the Minecraft server, that is, instead of the Minecraft server, you will use the CraftBukkit server.
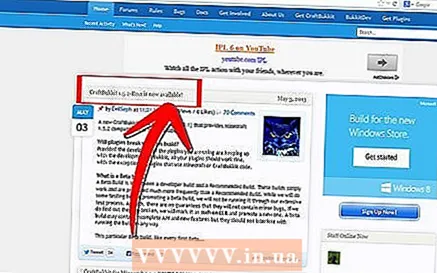
- Bukkit is the most popular plugin you can add to your server. You will need to download the CraftBukkit tool. By running CraftBukkit, you will completely replace the Minecraft server, that is, instead of the Minecraft server, you will use the CraftBukkit server.
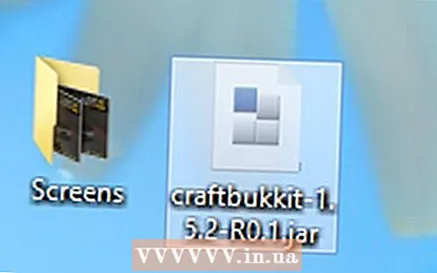 2 Download and install the latest version of CraftBukkit. This server program will give you the ability to add plugins that are not supported by the regular Minecraft server program.
  3 Download new plugins. There are many plugin repositories available on the web. Find the plugin you like and download it. Make sure you are downloading from a trusted source.
 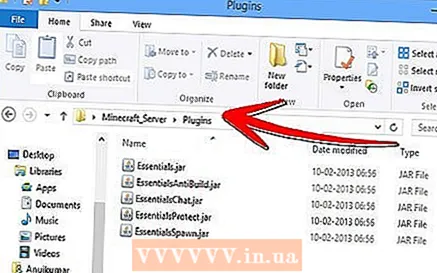 4 Install the plugin. Unzip the file you are downloading. .Zip files must contain .jar files, which, in turn, have all the plugin data. Copy each .jar file from the .zip file to the plugins directory in your server folder.
 - Restart the server to install all plugins. You may need to change the server settings again after you install the new plugin.
- Make sure your whitelist is configured to only allow your friends to enter the server.

- Restart the server to install all plugins. You may need to change the server settings again after you install the new plugin.
Method 6 of 7: Configuring Port Forwarding
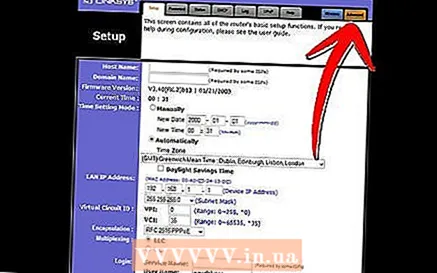
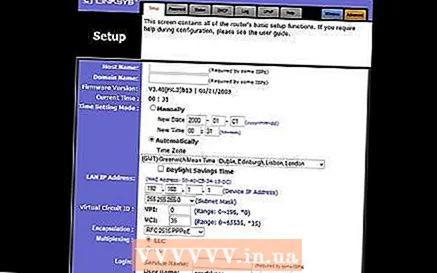 1 Go to the configuration menu of your router. Each router has its own way to access the settings. Most routers can be accessed via an Internet browser by entering the IP address, which is usually 192.168.1.1 or 192.168.2.1.
 - If you cannot access your router with any of the above IP addresses, go to PortFoward.org and enter your router information. The guides, by default, will give you a list of the default addresses your router uses.

- Most routers require a username and password to enter the configuration menu. This should be the username and password that you configured when you installed the router on your computer.

- As a rule, the default username is "admin" and the default password is "password" or "admin".
- If you cannot access your router with any of the above IP addresses, go to PortFoward.org and enter your router information. The guides, by default, will give you a list of the default addresses your router uses.
 2 Go to the "Port Forwarding" menu. Typically, it is under "Advanced Options". It may have a different name like "Virtual Servers", depending on the manufacturer.
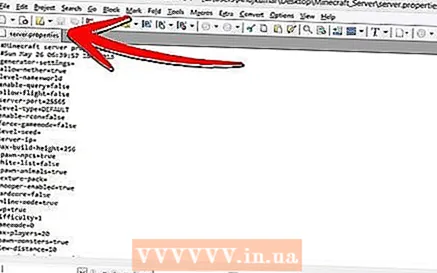
 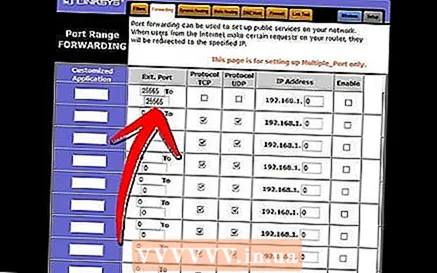 3 Enter the port information. By default, the Minecraft server port is 25565. If your router requires a port range, then enter 25565 in both "Start Port" and "End Port".
 - Set "Protocol" to "TCP".
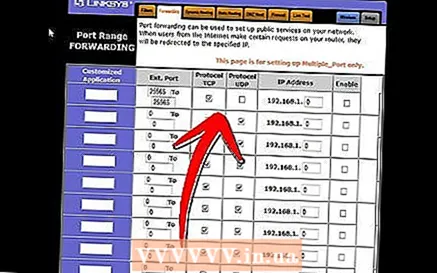
- Set "Protocol" to "TCP".
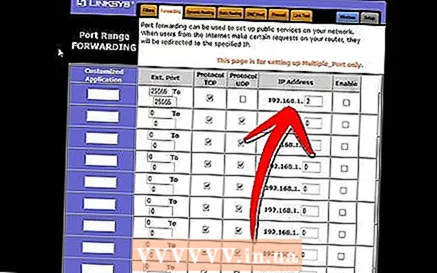 4 Enter the local IP address of your server. Make sure the IP address matches the IPv4 address of your server. Test this on Windows by opening a Command Prompt in Windows and typing "ipconfig". Your IP address will need to be next to the IPv4 address. You may need to scroll up to see it. If you're a Mac user, click on the Apple menu and choose System Preferences, then choose Network. Your IP address will be at the bottom, right side of the window.
 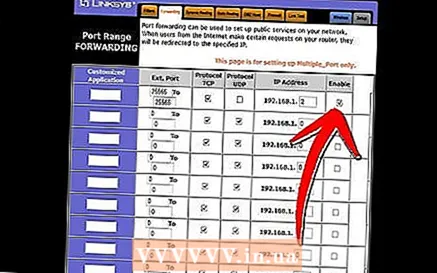 5 Check the box next to "Enable". Recheck your settings to make sure you entered everything correctly.
Method 7 of 7: Setting up dynamic DNS
- 1 Find out if you have a dynamic IP address. Most local ISPs assign dynamic IP addresses. Thus, connecting to your server becomes a little more difficult, as you will need to inform the users of the server every time your IP address changes. Some ISPs may provide dynamic IP for long periods of time, which will not change.
- Google "my ip address" and check your IP address every few weeks. If you only give your IP address to a few friends, then you shouldn't set up a permanent IP address if it doesn't change often.
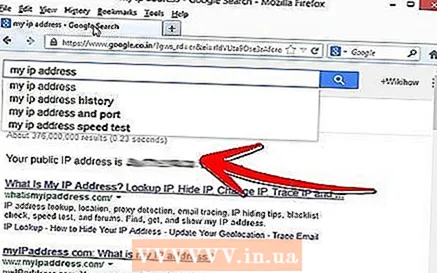
- Google "my ip address" and check your IP address every few weeks. If you only give your IP address to a few friends, then you shouldn't set up a permanent IP address if it doesn't change often.
 2 Configure Dynamic DNS. Dynamic DNS will bind the domain name to your dynamic IP. This way you will have a permanent address that you can connect to. Many services offer free accounts for one address.
 - Dynamic DNS requires you to have a program on your computer that will update your domain every time your IP address changes.
 3 Set up your router. You will need to configure your router to connect via Dynamic DNS. Finding these settings differs from router to router, but usually they are located under “Advanced settings”.
 - You will need to enter your hostname, username and password.
- You will need to enter your hostname, username and password.
Tips
- If you enter "help" into the white server window, then a list of commands will appear.
- The server folder does not have to be on the work surface, but you should keep it in an easily accessible place in case you need to make changes to the settings.
- Set up a password for your server so that only people who know it can access it.
Warnings
- Make sure your "minecraft_server.jar" has this name, and that it doesn't have "(1)" in the name, or that it hasn't been renamed, or it won't work.


