Author:
Clyde Lopez
Date Of Creation:
19 June 2021
Update Date:
24 June 2024

Content
- Method 2 of 3: Making a cone by folding the paper
- Method 3 of 3: Create a Unique Cone Design
- Tips
- Warnings
- An irregular shape will greatly affect how your cone will end up. Make an effort to cut the circle into the correct shape.
- To achieve a round shape, you can use a compass or circle a round object, such as a lid or a round container.
 2 Draw a triangular wedge. Use a mold to cut the circle on both sides to create a wedge. To draw your own wedge, make a mark in the center of the circle, then take a ruler and draw two straight lines from the center point. The closer these lines are, the smaller the wedge will turn out and the wider the bottom of your cone will be.
 - Use a compass or protractor to determine the center of your circle if you are not sure where to point. If you are drawing a circle with a compass, it is best to first mark the center point and then draw a circle around it.
- You can also draw a triangular wedge using a ruler and pencil.
3 Cut a triangular wedge in the circle. To make a cone with a small bottom, cut out a larger wedge. Use scissors or a model knife to cut the wedge as straight as possible. If you are wrong, then you will most likely have to start over. 4 Bring the cut sides of the circle together. Combine the two resulting slices one on top of the other to create a cone. While holding them together, make sure their bottom edges match.Your circle should now take on the cone shape you want. - Unroll the paper and try again if the sides did not fold correctly the first time.
- Don't make sharp folds on the paper. The cone must be rounded.
5 Glue the inside of the cone with tape. When you glue the aligned cuts, the cone is ready. Align the cuts so that one side slightly overlaps the other, and glue the inside with tape. After that, the cone will be ready. - One straight piece of tape will make the taper the strongest and smoothest. If you try to glue the cone with several pieces of tape, it will turn out sloppy. Hold the edges together with one hand and tape with the other.
Method 2 of 3: Making a cone by folding the paper
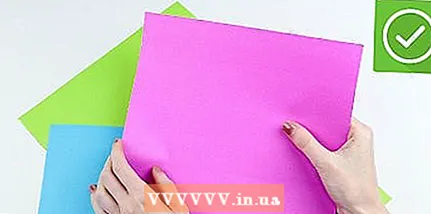
- 1 Cut out a large triangle. If you don't like the circle method, you can make a cone out of a paper triangle. To roll it into a regular cone, one side of the triangle must be long and the other two short and the same length. The larger the triangle, the larger the cone will be. Try to keep your measurements and cuts as accurate as possible.
- Minor mistakes can make your cone lopsided or, much worse, too short for pasting.
- In the same way, you can fold the cone out of a semicircle. This cone will have a smoother top.
- If you don't want to measure yourself, you can use the triangle pattern. Choose a template with one long and two equal short sides.
- 2 Fold the far corners of the paper towards the center. Take one of the far corners and fold it towards the center so that the edge of the paper is in the center of your triangle. With your other hand, wrap the second corner and wrap it around the first. As a result, your triangle should take the shape of a cone.
- If you find it difficult to wrap the corners together, then you have not cut your triangle wide enough.
- The far corners are the corners at the edges of the long side of the triangle.
- Hold the first folded corner while you fold the second. Hold each corner with one hand.
- 3 Align your cone. If you have not been able to wrap the paper perfectly, then you will have to move it a little to align the cone. Tighten the rolled corners as needed. If you feel like you've rounded the corners unevenly, you might want to try again.
- If excess paper is peeking out from the bottom of the cone, then your original sheet was uneven. In this case, to continue working, cut off the excess with a model knife. If the base of your cone turns out to be flat, hardly anyone will notice the mistakes that you made in the process of making it.
- The whole process of work does not take very long, so it is better to repeat it several times until you have a perfect cone.
- 4 Fold the free edges of the cone inward. Excess paper must be wrapped inside the cone. This will allow you to hide any irregularities, and the folds will keep their shape. If you folded the paper correctly, then all that remains is to take care of the triangular tip, which needs to be wrapped inward.
- If for some reason the edge is too short to wrap inward, you can fix this problem by gluing a strip of tape over the edge from the outside to the inside.
- Try rolling the cone tighter or looser if you find it difficult to find a place to fold.
- 5 Glue the cone with tape. Although wrapping the free edges inward helps to maintain the shape of the cone, it is worth tapeing the joint line from the inside of the cone to be more secure. Cut a strip of duct tape and apply it along the seam line. If you are still in doubt about the strength of the taper, cut off additional strips and tape them across the top and center of the seam. When the tape is secured, your cone is ready to use.
- Dangling edges can also be glued on.
Method 3 of 3: Create a Unique Cone Design
 1 Choose the right paper. You can plan ahead of time what material to use if you have a clear idea of what you need the cone for. Certain types of paper are better for some projects than others.
 - Printer paper is great for decorative cones. You can paint it in different colors or paint something on it.
- Thick cardboard is ideal for party hats.
- Use parchment paper if you want to make a baking cornet.
- 2 Cut off the tip of the cornet. If you are making a cornet for baking, the cone must be trimmed. Take scissors and cut off the top. Through this hole, you can squeeze the frosting or syrup by squeezing the cornet.
- If the hole is too small, try cutting it again. But keep in mind that the lower you cut the cone, the wider the hole will be. In the process of trimming the cone, the main thing is not to overdo it.
- 3 Draw a pattern on the cone. If you are making a decorative cone or party cap, it will be nice to decorate it with a pattern. Take your favorite colored pencils or markers and draw something. Various patterns (such as zigzags or curls) are best for the cone, but you can also write on it. For example, if it's a birthday party hat, you might write “Happy Birthday” on it.
- First, circle the future drawing with a pencil, if you are afraid to make a mistake somewhere.
- It is much easier to draw the drawing on the paper before rolling it into a cone.
- 4 Look for new ideas for additional inspiration. There are many ways to decorate a paper cone. While you should try to implement your own ideas, take a look at other people's creative projects for inspiration. Experiment with different methods for making a cone. Decorate your cone with something new. The possibilities are truly endless.
Tips
- Repetition is the mother of learning. The more cones you make, the better they will be.
- Use printer paper.
Warnings
- Take your time when taking measurements. While not as fun as decorating a cone, mistakes early on can force you to start from scratch.


