Author:
Eric Farmer
Date Of Creation:
4 March 2021
Update Date:
1 July 2024
Content
- Method 2 of 4: Making a Glue-Based Mod Podge
- Method 3 of 4: Applying Mod Podge
- Method 4 of 4: Consider the advantages and disadvantages
- Tips
- What do you need
 2 Find a clean container with a tight-fitting lid. You will need a clean jar with a tight lid. It should hold 8.5 ounces (337.50 ml) of the mixture. The container can be glass or plastic.
  3 Combine flour and sugar in a saucepan. Sift 1 ½ cup (210 grams) flour and ¼ cup (56.25 grams) granulated sugar into a saucepan. Do not put the saucepan on the stove yet or light the fire. 4 Add water and mix. Pour 1 cup (225 ml) cold water into a saucepan and whisk the mixture quickly with a whisk until well combined, removing any lumps.
 - Consider adding ¼ teaspoon of oil. This will help give the glue a glossy finish.
5 Turn on the stove and stir all the ingredients. Turn on medium heat and do not simmer. Ultimately, you need a thick glue consistency. If the mixture becomes too thick, add a little water and continue mixing. - Consider adding vinegar. By adding ¼ teaspoon of vinegar, you can avoid mold and mildew in your Mod Podge. If you want to add vinegar, add after removing the pot from the stove, and stir the Mod Podge well again.
 6 Remove the pan from the stove and let cool. After the mixture has thickened, turn off the stove and move the pan to a heat-resistant surface. Let the mixture cool completely before you proceed with the next steps, otherwise the Mod Podge may ferment. 7 Pour the mixture into a container. Hold the pot carefully over the jar and pour over the contents. You can use a spoon or spatula to help the mixture come out better. If necessary, you can stir the mixture again in the container.
 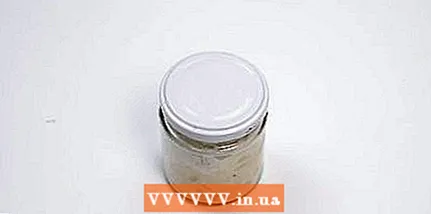 8 Close the lid and store the Mod Podge in a cool place. Check again to make sure your Mod Podge is completely cool before closing the lid. Due to the fact that your Mod Podge is made from natural products, you will need to store it in a cool place such as the refrigerator. Use it for one to two weeks. Throw away the Mod Podge as soon as it starts to ferment or grow moldy.
 Method 2 of 4: Making a Glue-Based Mod Podge
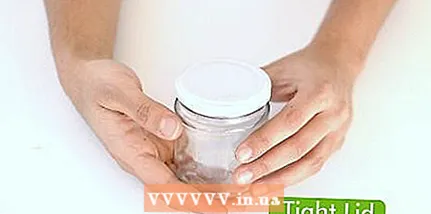 1 Wash the jar with a tight-fitting lid. You will need a clean jar with a tight lid that can hold 337.50 ml. The container can be glass or plastic.
 - If you plan on making a Glossy Mod Podge or Glitter, you'll need a large container.
 2 Find PVA glue. You will need about 225 ml of white, liquid glue - the kind kids use at school. If the can with glue is originally 225 ml, then you do not need to measure it. If the bottle contains more glue, you will need to pour it into a measuring cup to measure out the correct amount.
 - Consider using an acid-free scrapbooking glue. It is more durable than conventional glue and is less prone to yellowing.
- 3 Open a jar of glue and pour it into your container. You can simply flip the can of glue over the container and let it drain, or squeeze out the contents. If the glue is too thick and too stringy, you can add some hot boiled water to the jar, close the lid and shake. Hot water will help soften the glue. Open the bottle of glue again and pour it into the jar - now it will be much easier for you to do this.
- Consider microwave softening the glue for about 30 seconds (or less, depending on the power of your microwave). This will help empty the glue bottle faster and easier.
- 4 Add water to the container. After the glue is completely poured, 112.50 ml of water into the container and stir.
- 5 Add glitter or varnish to make the glue shine. Your Mod Podge will be matte by default, but you can fix it with 2 tablespoons of water-based gloss or polish. Just add glitter or varnish after adding water.
- 6 Consider making a shiny Mod Podge. If you want the glue to shine, add 2 tablespoons of glitter to the mixture. This method is most effective when combined with a water-based varnish or gloss.
- 7 Close the lid tightly and shake the container. After adding all the ingredients to the jar, close the lid tightly and shake well. If Mod Podge seeps out from under the lid, simply wipe it off with a damp cloth.
Method 3 of 4: Applying Mod Podge
 1 Try adding a label to the jar of glue. You can design and print the label on self-adhesive paper, or create a label from scratch using a piece of paper and tape. Make the label after pouring the Mod Podge into the container and shaking well. Here are examples of how you can make a label from scratch without using a computer or printer:
 - Write "Mod Podge" or "Decoupage" on a small piece of paper.
- Cut off a piece of tape that is larger than your label.
- Place the label face down in the middle of the tape.
- Place the tape labeled on the glass container. Smooth it down so that no air bubbles remain on the label.
- 2 Use Mod Podge to decorate boxes and other items. Simply brush a thin layer of Mod Podge over the area you are decorating. You can also use a sponge brush. Press the cloth or paper onto a damp surface with Mod Podge, making sure to smooth out any ripples, bubbles or creases that appear. Apply a second thin coat of Mod Podge on top of the fabric or paper. You can always apply additional layers of Mod Podge after the first one dries.
 3 Consider tinting your Mod Podge. If you made a Mod Podge with glue and water, you can add a few drops of food coloring and then apply it to several cans of Mason. As a result, you will get multi-colored jars. Be sure to add 2 tablespoons of water-based gloss or polish to your Mod Podge, otherwise the jars will be faded and matte.
 - Do not add varnish if you want frosted Mason jars that look like sea glass.
- 4 Consider sealing glue. Your homemade Mod Podge won't be as durable as the one you buy at the store. You can make it more durable by letting it dry completely (a few hours) and then spraying it with acrylic spray sealant.
- Just hold the can at a distance of 15-20 centimeters from the surface and spray paint onto the surface. After the sealant is dry, you can add a second coat if needed.
- If you've added polish or glitter to your Mod Podge to make it glossy, just be sure to use a glossy acrylic sealant.
Method 4 of 4: Consider the advantages and disadvantages
 1 Be aware that DIY Mod Podge is not the same as store-bought glue. When making and using these recipes, keep in mind that homemade Mod Podge is different from store bought. There are several major differences between the two, which we'll cover in this section.
  2 Keep in mind that a homemade Mod Podge costs a lot less than a store-bought Mod Podge. Store glue can be very expensive, so it's no surprise that many artisans try to make their own recipes at home using the materials at hand.
 - 3 Understand the difference in quality. Homemade Mod Podge is usually made with water-thinned glue, so it lacks some of the properties that commercial glue has. The Mod Podge purchased in the store can be used as glue and sealant, which makes it more durable. The home version is less sticky as it lacks gloss or sealant properties.
- To make your homemade Mod Podge more durable, consider treating your project with an acrylic sealant after the Mod Podge is dry.
 4 The difference is in the final coverage. The Mod Podge store will be presented in various forms, glossy, satin, matte. There are even glow-in-the-dark options as well as shiny ones. If you don't add polish or glitter, your homemade Mod Podge will be matte.
 - Flour-based Mod Podge can leave residue or have a grainy texture.
 5 Remember, a flour based Mod Podge will spoil quickly. You can make Mod Podge with completely edible and non-toxic materials like flour. Unfortunately, this will make the final product perishable. You must store it in a cool place and use it for one to two weeks, or it will start to deteriorate and rot.
Tips
- Keep the homemade Mod Podge out of the reach of children and pets, and make sure to screw the lid back on tightly to prevent it from drying out.
- Heat the PVA glue in the microwave for about 30 seconds (or less, depending on the microwave). This helps to pour the glue out of the bottle much faster and easier.
- Boiled hot water will also help thin the glue.
- Homemade Mod Podge may not be as sturdy and resilient as store-bought. Consider buying glue from a store to be used for individual jobs.
What do you need
- Glass jar or container with a lid
- Casserole or pot (second option)
- Spoon or whisk (second option)
- Beaker


