Author:
Bobbie Johnson
Date Of Creation:
9 April 2021
Update Date:
1 July 2024

Content
- Method 2 of 3: Garland of paper circles
- Method 3 of 3: Garland of paper flowers
- Tips
- What do you need
- Simple paper garland
- Garland of paper circles
- Garland of paper flowers
 2 Cut at least 3 strips of 6.3 cm by 25.4 cm from each sheet of paper. Use sturdy scissors to cut equal strips of paper from all sheets. You can adjust their size based on your preference: adjusting the width of the stripes affects the width of the garland rings, and adjusting the length of the stripes affects the size of the rings. 3 Twist one strip into a ring. Make a ring by simply twisting the strip so that the ends overlap each other by about 2.5 cm. The most reliable method of securing the strip in the ring is gluing and waiting for it to dry before proceeding. But if you don't have the time or patience to glue each ring of the garland individually, you can fasten the ends of the rings with double-sided transparent tape.
 - If you have very little time, you can staple the ends of the ring twice with a stapler. Remember, if one ring breaks open, the garland will split in two.

4 Attach the next ring to the first. Now take a strip of paper and thread it through the first ring, and then connect the ends to make the second ring. Fasten the ends of the second ring in the same way as for the first. If you are going to alternate colors, make sure you choose the correct color for the second ring. 5 Repeat steps until all rings are secured. Continue to thread the strips of paper through the previous rings and join them into new rings until you have made a whole garland of interconnected rings. If you want the garland to be longer, cut as many strips of paper as possible and make more rings until you reach the desired length. 6 Hang up the garland. After the garland is ready, you just have to hang it. You can throw a garland over a tree, decorate a patio, a pillar, or any piece of furniture. If you want, attach the garland to the wall by hanging it on sturdy studs. Method 2 of 3: Garland of paper circles
 1 Take at least 10 sheets of cardboard. Cardboard is somewhat thicker and more durable than regular paper, and the garland from it looks more elegant. For a fun, eye-catching garland, choose paper in a variety of designs, from pink and purple peas to green stripes or checkers. Just pick a few paper designs that work well together. You can include some plain paper here for a change.
 - 2 Cut the paper into strips. Each sheet of paper should have 3-5 stripes, depending on how large you want the garland rings to be. It is better to cut the circles for the garland from strips after their preliminary preparation.
- 3 Cut the circles of the paper. The garland will look better if the circles are of several different sizes: from 7.6 cm to 15.2 cm in diameter. You don't have to use every color of paper in the same amount, nor do you have to cut the same number of circles of different sizes.
- The easiest way to cut circles is to use a special circular paper punch, but you can also just draw circles on the back of the paper and cut them out with scissors.

- The easiest way to cut circles is to use a special circular paper punch, but you can also just draw circles on the back of the paper and cut them out with scissors.
 4 Create a garland pattern. Arrange the circles in the order in which you want to see them in the garland. If you want the garland to be double-sided, then lay out the circles in pairs (2 of the same size and pattern together, facing out). Arrange them in a variety of ways so that they look good on the outside.
 - Place ordered circles close to the sewing machine for easy sewing.
- 5 Sew the circles together. Use a fun color of thread to hold the garland together, such as red, and sew all the circles right through the center. Simply place the first circle on the sewing machine, lower the needle down and turn on the sewing machine.Sew circles, placing the next one after the other according to the prepared pattern, until they are all connected with a thread. You can leave a few centimeters of free space between the circles, or distribute them further or closer to each other on the threads.
- They do not have to be evenly spaced or symmetrically centered. If the circles are connected in a garland and at the same time draw attention to themselves, you have a spectacular garland.
- Bartack the end stitch of the last circle in the garland.
- 6 Hang up a garland. After preparing the garland, you can hang it by simply sticking a couple of buttons into the wall and hooking the garland onto them. For greater reliability, nails can be used for the same purpose. You can also just throw the garland over trees or furniture.
Method 3 of 3: Garland of paper flowers
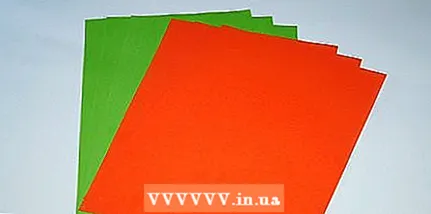 1 Take at least 10 sheets of heavyweight paper. You will need several different colors of paper to create the flower petals, and any shade of green for the leaves. You can use any colors that are interesting and pleasing to the eye, but red, yellow or orange will look great. Thick paper is slightly heavier than regular paper and will be easier to form and fold. You will need 2-3 green leaves, and the rest you will use for flowers.
 - 2 Transfer the outlines of the flowers to the paper. Create several patterns of different colors with petals connected, and then trace them on paper designed for flower petals. Then create templates for several leaf variations and transfer them to green paper. Patterns can be of any size, but ideally the flowers should be palm-sized and the leaves should be as wide as three fingers joined together.
- 3 Cut out the pieces of the paper garland. Use sharp scissors to cut all the pieces out of the paper. You should have about 25 flowers and 10 leaves.
- 4 Shape the flowers. Use scissors to curl the edges of the paper as if you were twisting packing tape. Just pull the petals over the edge of the scissors to make them curl. For a change, you can twist some flowers inward, and others - vice versa. Just alternate between the front and back curls of the paper.
- 5 Shape the leaves. Fold the leaves in half to create a centerline, and then twist them inward using scissors. This will add texture and volume to the leaves.
 6 Lay out a pattern of flowers and leaves. Now arrange the flowers and leaves in a horizontal pattern that will create an eye-catching garland. The leaves should be located on the sides of the garland and should not be alternated with each flower. You can arrange the flowers in a repetitive or random order.
 - 7 Thread the thread through the garland details. Insert a string or very thick thread into a large needle and poke holes in the center of each flower and leaf with the needle. Pull the needle and thread through the holes until you collect all the pieces of the garland onto the thread. After stringing the pieces onto the thread, cut it off and tie large knots at the ends to keep the garland intact.
- 8 Add small pom poms (or beads) in the center of the flowers.
- 9 Hang up the garland. When your adorable flower garland is ready, hang it from trees or garden furniture, or attach it to nails or buttons inside the house. You can throw the garland over a stair rail or wrap it around a tree trunk.
Tips
- The use of wider stripes results in a shorter string length.
What do you need
Simple paper garland
- Drawing paper
- Scissors
- Glue, tape or stapler
Garland of paper circles
- Cardboard
- Hole punch or scissors
- Sewing machine
- Threads
- Buttons
Garland of paper flowers
- Thick paper
- Scissors
- Pencil
- Twine or thick thread
- Long needle


