Author:
Mark Sanchez
Date Of Creation:
8 January 2021
Update Date:
1 July 2024

Content
The corner, which is in the shape of a right-angled isosceles triangle, was originally designed by Albert J. Swanson in 1925. This device was used to quickly and accurately measure roof beams. Today, the corner helps carpenters in much broader areas: it can be applied to almost any project, large or small. The corner has markings to help you lay out the material and cut it accurately. Foreign names of the corner always indicate time savings due to its (corner) use. You can use the corner as a simple ruler or measure the values you need in construction.
Steps
 1 Draw perpendiculars. Use a corner to mark lines on the wood that will be at right angles to the edge of the piece. Keep the tool straight off the edge of the board. The pointed part of the corner will help mark the location of the line. Draw a straight line using the square piece of the corner. This use of a corner is effective, for example, in positioning a floor beam.
 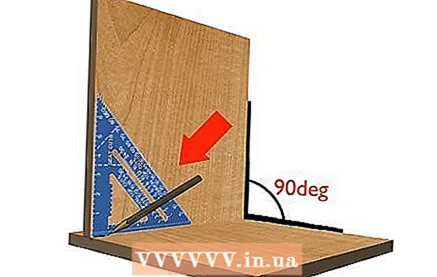 2 Join two pieces of wood at right angles. When assembling or building cabinets, boxes, or other similar pieces of furniture, place a corner against the pieces of wood to measure the correct angles that you need when processing the material.
 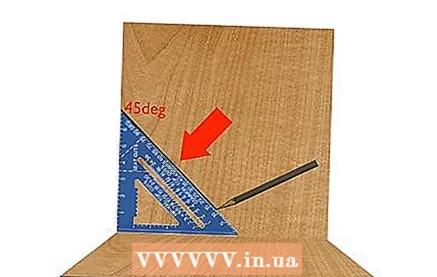 3 Draw a line at a 45 degree angle. Place the square side of the corner against the edge of the board and mark the location of the diagonal to mark its location. Since the corner is an isosceles triangle, the angle between the diagonal and any edge of the board will be exactly 45 degrees.
 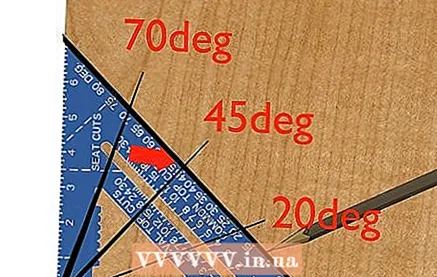 4 Learn to read corners around the corner. Take the corner of the corner of 90 degrees as the fulcrum. On the hypotenuse of the corner, you will see the degree markings - 1, 5 or 10 degrees each. Find the mark you want, make a pencil mark at that spot and use the square side of the corner to draw the desired line.
 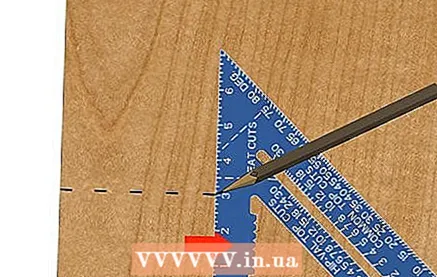 5 Draw a parallel line. Place the tool against the edge of the board and measure the distance you want to cut, for example. Then slide the corner along the edge of the board, keeping the pencil at the same level. This will allow you to immediately draw a line parallel to the edge of the board.
  6 Set the direction of the portable circular saw. Lay the corner flat on the board to be cut. Position the saw bar parallel to one of the corner legs and cut. It will turn out very neatly.
Tips
- The corner is available in two sizes: a pocket seven-inch (17, 78 cm), which you can take everywhere, and a twelve-inch (30, 48 cm), which is often needed for stationary work.
What do you need
- The material on which you will make the necessary marks
- Pencil
- A circular saw


