Author:
Gregory Harris
Date Of Creation:
14 August 2021
Update Date:
21 June 2024

Content
- Steps
- Method 1 of 3: Hanging Pom Poms
- Method 2 of 3: Honeycomb Pom Poms
- Method 3 of 3: Paper Pom Pom Gift Cylinder
- What do you need
- Hanging pom poms
- Honeycomb pom poms
- Gift cylinder made of paper pom-pom
Whether you're throwing a party or just looking to decorate your home, making flower pom poms is a fun and inexpensive way to add flair to anything.
Steps
Method 1 of 3: Hanging Pom Poms
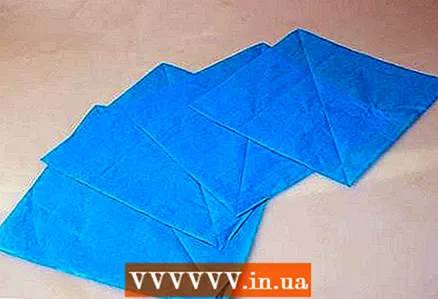
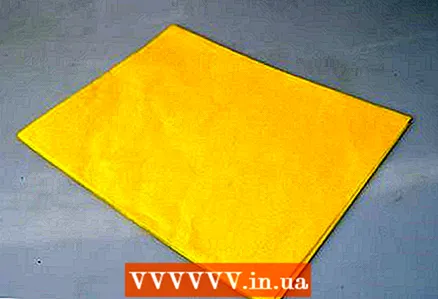 1 Lay the paper so that all corners are even. You will need 8 to 13 sheets of paper to make a pompom, the number of sheets depends on the thickness of the paper. The thinner the paper, the more sheets you have to use.
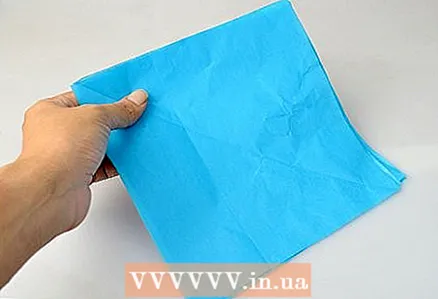
 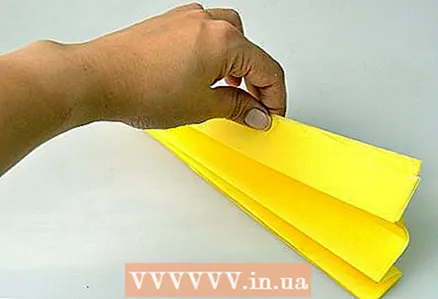 2 Fan the paper. To do this, fold the edge of the paper about one inch (2.5 cm). Then turn the paper over to the other side and do the same. Repeat until the paper looks like an accordion.
 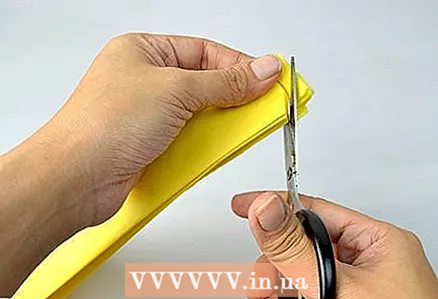 3 Trim the edges. After you've folded the paper, trim off the edges. Round the corners for delicate, feminine pom-poms. For more dramatic pom-poms, sharpen the edges.
 - Don't worry if you don't cut as nicely as you would like. While the formation of the edge of the paper will certainly affect the shape of the pom-poms, you won't be able to notice small details or errors when unfolded.
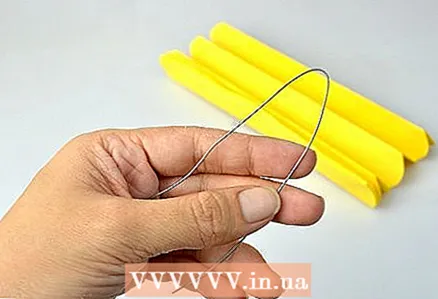 4 Cut off 23 to 25 centimeters of flower wire. Fold it in half.
 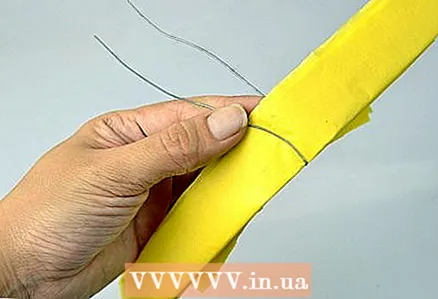 5 Place the wire on the paper. It should be as close to the center of the paper as possible. Twist the ends of the wire to secure it.
 - Don't worry about over-tightening the wire. In fact, if the wire is tightened looser, the pompom will be easier to unfold.
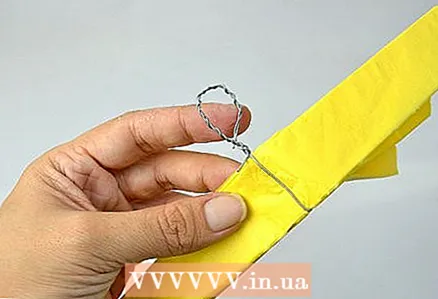 6 Bend over the excess wire to make a loop. Then pull the line through the loop and tie a knot. Be sure the line is long - you use it when you hang the pompom.
 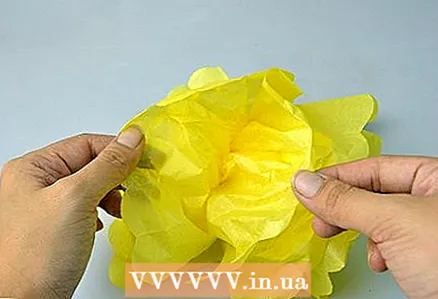 7 Expand the pompom. Slowly lift the top sheet of paper until it fluffs up. Repeat with the first four layers, then flip the pompom over and repeat. Continue until all the paper unfolds.
 - Use gentle, slow movements to do this, or you risk tearing the paper. To stretch out each piece of paper as much as possible, try to reach with your index and thumb from the outside to the middle of the pom-pom.
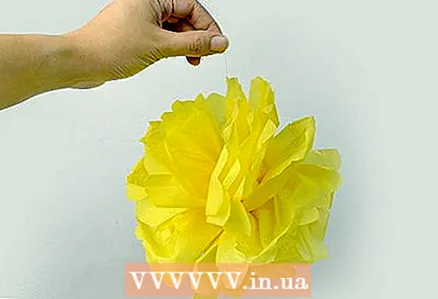 8 Hang the pom-pom over the nail by hooking it onto the line. Enjoy your new decoration!
Method 2 of 3: Honeycomb Pom Poms
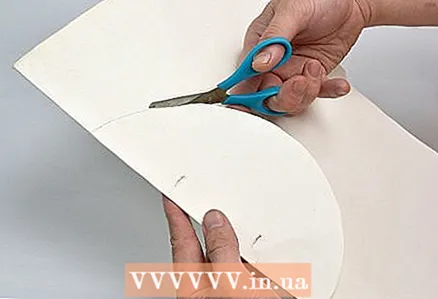 1 Cut a circle out of cardboard. The size of the circle is entirely up to you - small circles will make small pom-poms and large circles will make large pom-poms.
 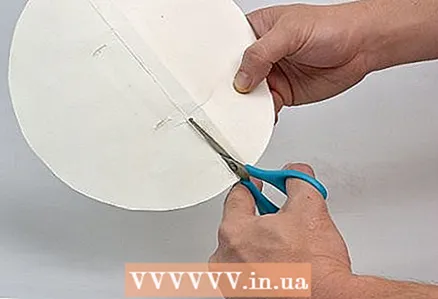 2 Cut the cardboard circle in half. You should end up with two identical halves.
 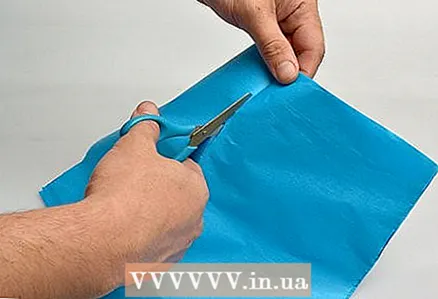 3 Design paper honeycombs. Cut the paper you are going to use so that it is much smaller than your cardboard sheet of paper. Then place one sheet of paper on top of the cardboard.
 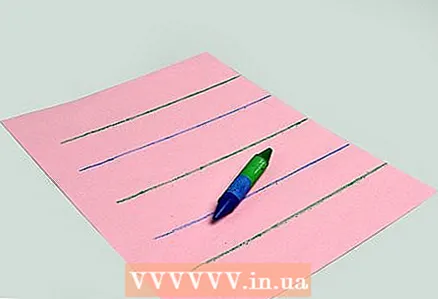 4 Plan the glue lines. Keeping it flat on the cardboard, divide the honeycomb paper evenly into pieces from 4 to 8 sections (depending on the size of your paper). Instead of folding honeycomb paper, draw lines on the cardboard where the paper will fold. Highlight with different colors.
 - If you do not have cardboard, you can make these marks directly on your paper, using a pencil, or a fine pen.
- If you are using 10x14 paper (half the size of 22x28), place the line spacing between 3.2 and 4.4 centimeters.
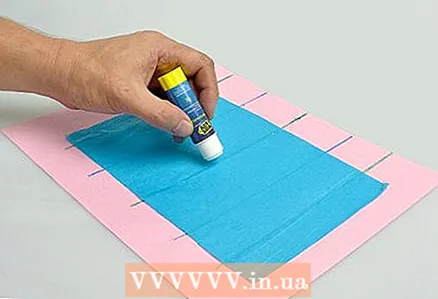 5 Choose a line color. Maintain your honeycomb paper horizontally on a cardboard, lower the glue stick vertically through the honeycomb paper where you marked with this color.
 - If you are using thin paper such as tissue paper, hold it firmly and gently run the glue stick from the middle of the paper to the edges to prevent tears.
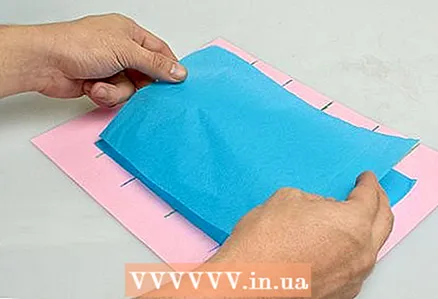 6 Place another piece of paper on top of the already glued one. Wipe down to make sure it sticks.
 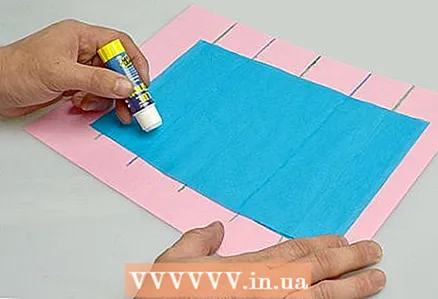 7 Apply glue. Apply glue along the lines of a different color like last time. Place another layer of tissue paper on top and rub to ensure adhesion.
 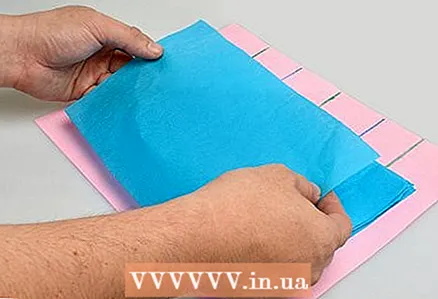 8 Repeat the above procedure with 30 to 40 sheets of paper. Make sure you glue all the lines between the sheets to continue the honeycomb effect.
 - For a multi-colored pom-pom, change the color of your artwork in half using gluing.
- For a striped pattern, change the color approximately every 5 sheets.
 9 Cut off the honeycomb paper. When you are finished gluing the sheets of paper, place one of the semicircles on top of the paper and draw a line around it loosely. Then cut out the paper as it will be slightly larger than the cardboard.
 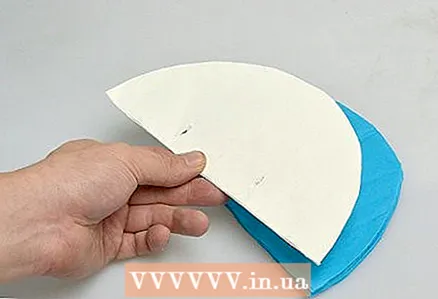 10 Glue the cardboard semicircle onto the honeycomb paper. After you've cut out the honeycomb paper, glue over the cardboard on both sides.
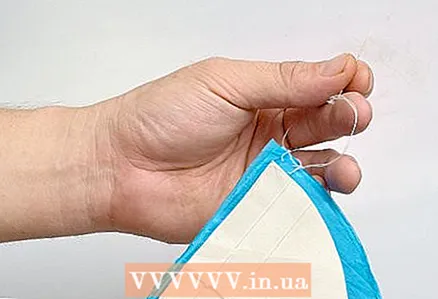
 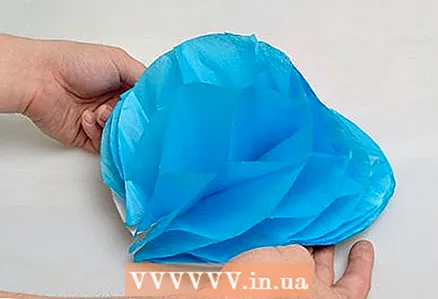 11 Use a needle and thread. For an even effect, pull the needle and thread through the upper corner of the semicircle. Tie a knot, cut the thread, and repeat with the bottom corner too.
 - Make sure you don't tighten the knots too tight or the pompom won't open.
- Leave the string at one end - you can use it to hang the pompom later.
 12 Hold the cardboard by the two ends. Pull slowly to get the ball. The honeycomb pattern should become more apparent when you open the pompom.
 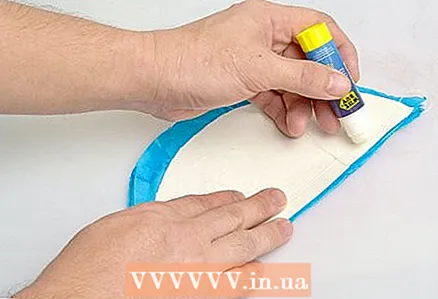 13 Glue the pieces of cardboard together. This will allow the pom-pom to remain in the shape of a sphere.
 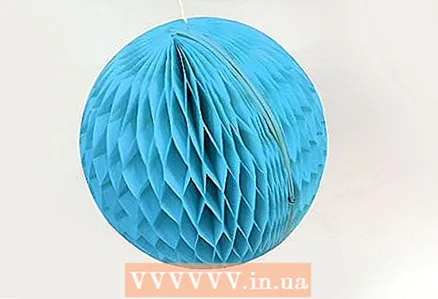 14 Hang up. Enjoy decorating!
Method 3 of 3: Paper Pom Pom Gift Cylinder
 1 Cut the paper into small squares. This will help you avoid crooked colors.
 - The size of the squares depends entirely on the size of your gift. If the gift is small, you will need to make small squares. However, if the gift is large, you may want to make the squares as big as possible!
 2 Fold the squares. You will need 4 squares per flower.
 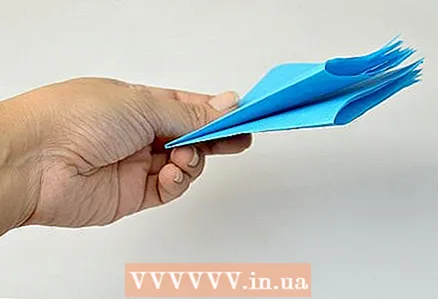 3 Fold the stacks in half. Your stack should now have 16 layers.
 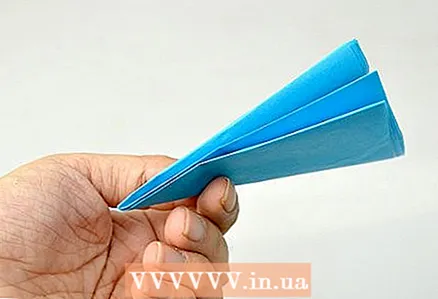 4 Fold the stack diagonally to create a triangle. Then repeat to get a smaller triangle.
 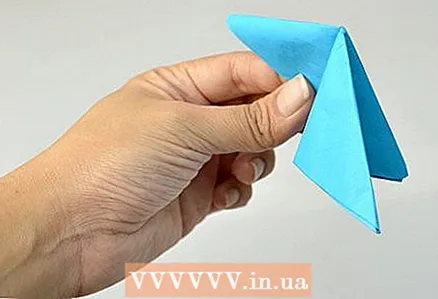 5 Fold the sides of the triangle up. The result should be an even smaller triangle.
 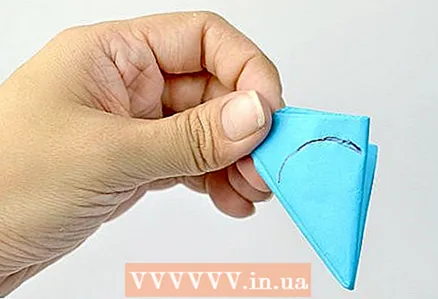 6 Use the folded edge as a point and draw an oval at the widest part of the triangle. It should stretch from edge to edge.
  7 Cut along the line. Get rid of the apex of the triangle.
 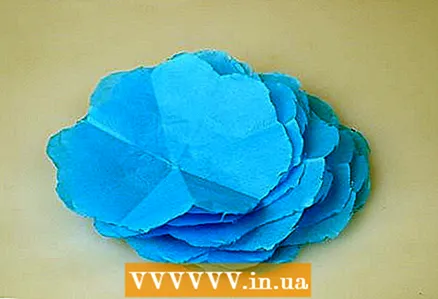 8 Open the tissue paper. Fold 8 layers so that the petals are slightly displaced to make a flower.To make a fully round pompom, stack all 16 layers.
 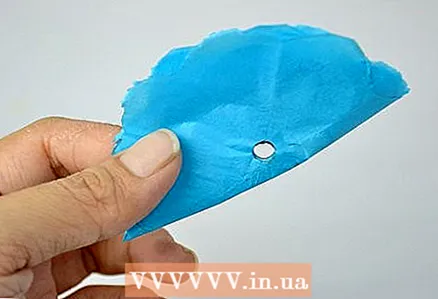 9 Fold the stack in half. Make a hole in the center. Then pull some tape or twine through the hole.
 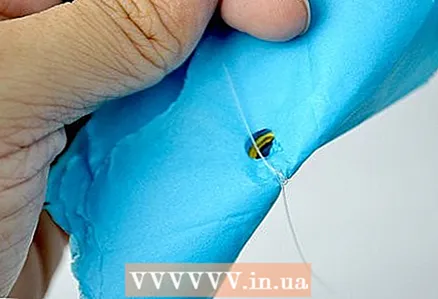 10 Open the flower and smooth out the petals. Then slowly fluff the petals out to create a floral effect. Leave the last flat parts for the flower. For a pompom, beat 8 sheets and lower the other 8 down.
 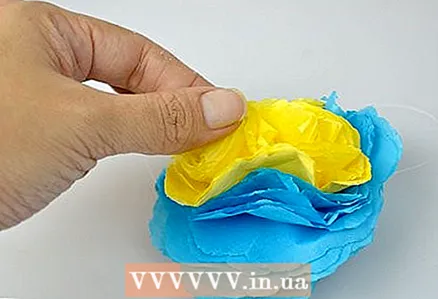 11 Tie on top of the gift. Use twine or ribbon to tie your gift.
 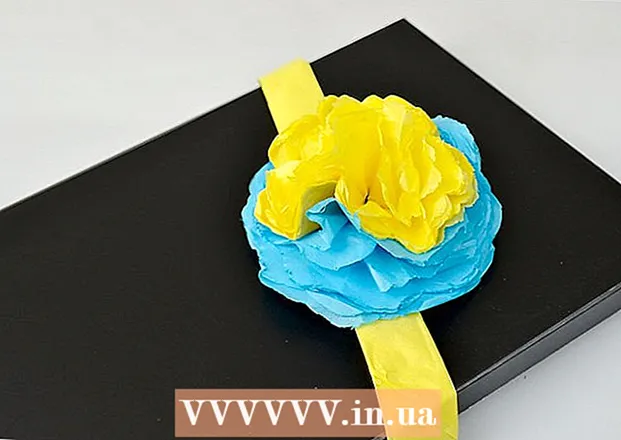 12finished>
What do you need
Hanging pom poms
- Paper. This special method will work best with thin paper, but wrapping paper or plain paper will work as well.
- Flower wire or other thin wire
- Fishing line
- Drawing buttons
Honeycomb pom poms
- Paper (and one sheet of cardboard)
- Glue stick
- Scissors
- Needle and thread
- Two colored markers
- Cardboard. For best results, use the old box for this project!
Gift cylinder made of paper pom-pom
- Scissors
- 2 sheets of paper per flower
- Twine or tape
- Hole puncher


