Author:
Bobbie Johnson
Date Of Creation:
2 April 2021
Update Date:
1 July 2024

Content
In this article, you will learn how to position text along a curved line in Adobe Photoshop, that is, how to bend text.
Steps
Method 1 of 2: Using the Pen Tool
 1 Open or create a Photoshop file. To do this, double-click on the blue icon with the letters "Ps", in the menu bar at the top of the screen, click "File", and then:
 - click "Open" to open an existing document;
- click "New" to create a new document.
 2 Click on the Pen tool. This fountain pen tip icon is at the bottom of the toolbar on the left side of the window.
 - Or just click Pto pick up the Pen tool.
 3 Click on Circuit. It's in the drop-down menu to the right of the fountain pen tip icon in the upper-left corner of the window.
  4 Create a starting point for the curve. To do this, click anywhere on the current layer.
  5 Create the end point of the curve. To do this, click on a different place in the current layer.
 - A straight line is created between the two points.
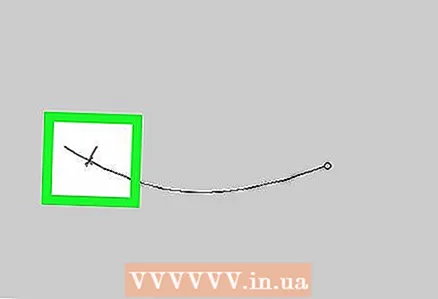
 6 Create an anchor point. To do this, click on the middle of the straight line.
  7 Convert a straight line to a curve. Pinch Ctrl (Windows) or ⌘ (Mac OS X), and then drag the anchor point to make the curved line (arc) you want.
  8 Click on the Text tool. This T-shaped icon is next to the Pen tool in the toolbar on the left side of the window.
 - Or just click Tto pick up the Type tool.
 9 Click on the arc where you want the text to start.
- Use the drop-down menus on the left and center of the top bar to select a font, style and size.
 10 Enter your text. As you enter text, it will position itself along the created arc.
Method 2 of 2: Using the Warped Text tool
 1 Click on the Text tool. This T-shaped icon is next to the Pen tool in the toolbar on the left side of the window. A dropdown menu will open.
  2 Press Horizontal Text Tool. It's near the top of the drop-down menu.
  3 Double click on the window. Do this where the text will be.
  4 Enter the text to bend.
- Use the drop-down menus on the left and center of the top bar to select a font, style and size.
 5 Push ☑️. It's at the top right of the window.
 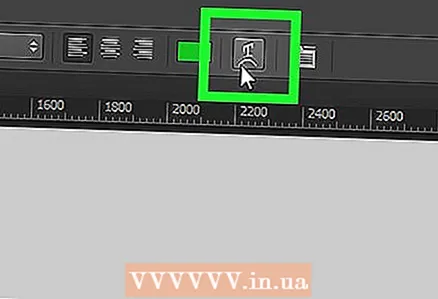 6 Click on the Warped Text tool. This icon is at the top of the window and looks like a "T" with a curved line.
  7 Choose an effect. To do this, click on the desired option in the drop-down menu "Style".
 - As you select a style, the text will change so you can see the changes you make.
- Use the Horizontal and Vertical options to select a vertical or horizontal bend.
- To set the amount of curl for the text, move the Curl slider to the left or right.
- Use the Distort Horizontal and Distort Vertical sliders to increase or decrease the warping of the text.
 8 Click on OKwhen done.


