Author:
Virginia Floyd
Date Of Creation:
8 August 2021
Update Date:
20 June 2024
Content
1 Take a square piece of paper. If you are using origami paper with a shiny or colored side on one side, place the colored side down.- A 15 x 15 cm square is a good option for beginners. If you want to make butterflies of different sizes, large and small, choose the appropriate leaf size.
 2 Fold the sheet in half. Draw your fingers along the fold line. When you unfold your sheet, the fold line should be clearly visible.
 - The fold "valley" is a fold towards itself, the fold itself goes into the product. You need to fold the part of the figure, delimited by the fold line, onto yourself.
3 Lay the sheet upright and fold it in half again. Expand. - You can see steps 2 and 3 by watching a short video.
- You now have two valley folds: horizontal and vertical.
4 Expand the sheet 45 degrees. Rotate the sheet counterclockwise so that the "rhombus" shape lies in front of you. 5 Make the valley fold again. Gently fold the sheet so that the bottom corner matches the top corner. Expand. 6 Repeat the process, making the same fold, but only vertically. Gently fold the sheet so that the right corner matches the left. Expand. - You can see steps 5 and 6 by watching a short video.
7 Expand the sheet 45 degrees. Unfold the sheet clockwise or counterclockwise so that the edge (not the corner) is facing you. - Your sheet should have four fold lines: vertical, horizontal, and two diagonal lines.
8 Place the sheet in front of you so that it resembles a square, not a diamond. Fold the sheet so that the sides meet on the center fold line. Bend the right side towards the center first, then repeat the same process with the left side. - Do not unfold.
- This is the base collar fold.
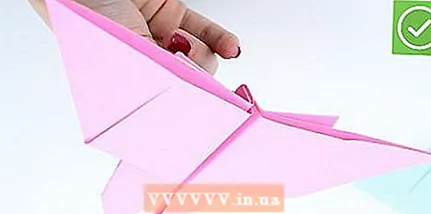
9 Find and lift the diagonal folds at the top corners, right and left. Insert your thumb and middle finger at folded corners. Hold the top layer with your fingers, while pressing the bottom of the workpiece with your other hand. 10 Fold the top edge, you should have a roof-like shape. Find a fold in the middle of the workpiece. Pull the cuffs from the previous step between your fingers to the sides and down so that the top of the workpiece comes to the center fold. - The top of the piece should look like the roof of a house.
11 Unfold the workpiece 180 degrees. The roof should now be at the bottom, facing you. 12 Repeat steps 7 and 8 on the other side of the workpiece. When you're done, you have a basic boat. This template is used as a starting point for many origami creation. Part 2 of 3: Wings
- 1 Turn the resulting workpiece over. The folded edges you made in the last step should be face down. The boat blank must be horizontal.
- 2 Fold back the top half. Fold the top edge to the bottom, and use your fingers to press along the fold.
- 3 Hold the trapezoidal model in your hand with the long side up. Fold the top right cuff down.
- The angle should be pointing down towards you.
- Note that in the upper right corner, you only need to fold the top layer.
- 4 Repeat the same for the left lapel. When you're done, both corners should be pointing down.
- 5 Fold the edge of the left cuff down. There are no folds for this, just make sure you get an even fold.
- The fold should start from the top edge of the workpiece and continue to the middle of the side.
- 6 Repeat step 6 for the right cuff. Since there are no folds for this, just make sure they are roughly the same.
- You can see steps 6 and 7 by watching a short video.
- 7 Turn the workpiece over. The folds should be face down on the work surface.
- 8 Fold the workpiece in half vertically. Bend the left corner to the right and smooth it well with your fingers.
Part 3 of 3: Torso
- 1 Bend the top wing diagonally. Lift the top wing, which is now on the right, and move it back (to the left). You should have an inner fold of about one centimeter from the left corner of the top edge diagonally to the bottom left corner. Smooth each fold well with your fingers and unfold.
- 2 Turn the workpiece over. The ends of the wings should point to the left, and the fold you just made should be face down on the work surface.
- 3 Repeat Step 1 for the second upper wing. Bend the wing to the right this time. Make a 1cm inner pleat from the top right corner to the bottom right corner. Smooth each fold well with your fingers and unfold.
- 4 Unfold your wings. Do this so that you have a central vertical fold "mountain".
- 5 Pinch the fold you made in steps 1-3. This is the torso of a butterfly.
- Smooth each fold well with your fingers.
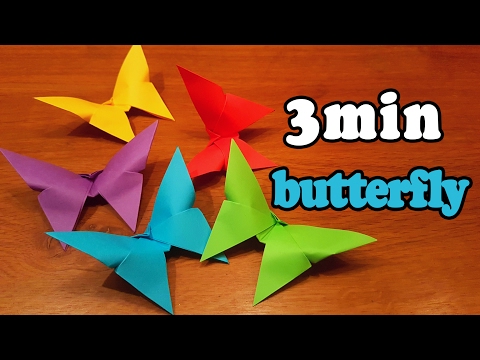
 6 Present your own butterfly or use it as a decoration. Try making butterflies in different colors and sizes.
What do you need
- Origami paper


