Author:
Janice Evans
Date Of Creation:
23 July 2021
Update Date:
1 July 2024

Content
- Steps
- Part 1 of 2: Get ready to paint the pumpkin
- Part 2 of 2: Painting the pumpkin
- Tips
- Warnings
- What do you need
Coloring a pumpkin is a good way to celebrate the fall season or celebrate Halloween. Coloring is a creative activity that can be done by the whole family without worrying about the mess that remains after carving a lantern from a pumpkin. To do everything right, you need paints, in fact, the pumpkin itself and inspiration. If you want to learn how to color a pumpkin, follow these easy steps.
Steps
Part 1 of 2: Get ready to paint the pumpkin
 1 Choose a pumpkin. A good pumpkin for painting should be smooth, free from flaws, cracks or scratches on the surface. The smoothest are pumpkins with light ribbing. Avoid pumpkins with a lot of ridges and bumps, they will be difficult to paint. Examine the pumpkin for cuts or worm holes, which can then be a problem. Also make sure the pumpkin is flat enough to be more stable on the surface.
 - Beware of soft spots on the surface of the pumpkin, these are signs of rotting. For the pumpkin to last longer, it must be fresh.
- Almost all pumpkin varieties can be painted.
 2 Wash and dry the pumpkin. Gently wipe off any dirt using wet wipes and dampened toilet paper, and wipe the pumpkin with a paper towel or tissue. Do not use hard brushes to avoid damaging the surface of the pumpkin by scratching it.
 - Try not to get the root or bottom of the pumpkin wet, this will cause rotting.
 3 Choose a design. Before painting the pumpkin, choose a design. Everything looks good on the pumpkin, the main thing is not to make the pattern too complicated. Refer to popular sketches, choose a black cat, a bat, a running horse, geometric shapes - whatever. Once you've chosen a design, sketch out the drawing on a piece of paper.
 - Let your pumpkin shape be a source of inspiration. For example, a square pumpkin is the head of Frankenstein.
- Who said pumpkins are only painted for Halloween? You can paint a pumpkin inspired by the fall theme by painting fallen leaves, or choose a random theme altogether.
- Have fun painting a portrait of yourself or a family member on the pumpkin.
 4 Apply sealant (optional). It is not necessary to apply the sealant, but the paint adheres better to it. You can buy craft sealant at a craft store. It is available in aerosols and cans of your choice.
 - Using a brush, apply sealant all over the pumpkin and let dry. Rinse the brush thoroughly if you plan to apply paint with the same brush.
- Make sure the sealant is dry before applying paint.
Part 2 of 2: Painting the pumpkin
 1 Color the entire pumpkin with one color (optional). For painting, you can use a natural pumpkin shade or apply a different color first. Use acrylic paints. If you have a different paint and don't know if it will fit well, test it on a small patch of pumpkin.
 - Choose colors according to the chosen design. If you're drawing a goblin, choose a dark green shade.
- Paint the pumpkin piece by piece, letting each piece dry before moving on to the next. This way you won't have any problems how to hold and paint the pumpkin so as not to smear the paint.
- After you've painted the bottom of the pumpkin, don't put it down until the paint is completely dry. Otherwise the pumpkin will stick.
 2 Apply your chosen design to the pumpkin. Use a marker and stencil to draw the outline of the design. Don't worry if you've smeared it a little. You will paint over the drawing from above and you will be able to correct the flaws. If in doubt, you can use a pencil first and then trace the drawing with a marker.
 - To prevent the stencil from getting lost, you can stick it on the pumpkin.
- To draw straight lines, stripes, or shapes, use scotch tape over the pumpkin.
- Use transfer paper to apply the design to the surface (optional). How to use it:
- print or draw your design on paper;
- stick the transfer paper onto the pumpkin;
- stick the patterned paper onto the transfer paper;
- circle the drawing with a pencil;
- when finished, remove both layers of paper, and you will see the outline of the drawing on the surface of the pumpkin.
 3 Color in the drawing with acrylic paint. You can use paint brushes, cotton swabs, sponges, or any other item to apply the paint. Keep a damp cloth nearby to quickly wipe away stains.
 - If you are using light colors, you may need to apply several coats of paint.
- Make sure the paint is dry before applying a new coat.
- Make sure the design covers all visible parts of the pumpkin, and not just the front. Take a few steps back to get a better view of the visibility.
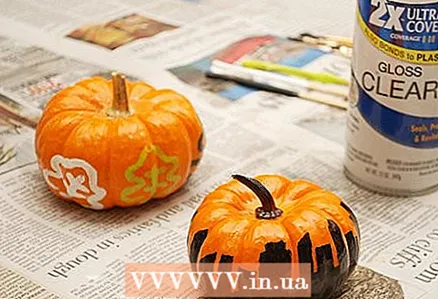 4 Use a sealant to seal the result. When the paint is completely dry, apply a light coat of sealant to the entire surface.
  5 Add sequins, ribbons, or other decorations (optional). Wait for the pumpkin to dry and then decorate it however you like.
 - Ribbons can be used to depict hair.
- Spray glitter onto wet paint to add a glow.
- Using a glue gun, glue dots, you can add pumpkin eyes, beads, pom-poms, rhinestones, sequins.
- The final step is to put the hat on the pumpkin.
 6 Place the pumpkin in a prominent place. Place it where it is likely to attract attention. It can be placed in the center of your dining table or on your front porch. The main thing is that it should not be overlooked.
 - If you are placing the pumpkin outside, make sure it is not exposed to direct sunlight so that it does not start to rot prematurely.
Tips
- Acrylics are good for pumpkin, but you can also try other types of paints.
- Painted little pumpkins can make a good table decor.
- To make it harder for yourself, use the cutting technique along with the drawing technique.
- If you plan to carve the pumpkin after painting, then you should use a sealant or the paint will flake off.
- If you're feeling creative, color the sides of the pumpkin differently.
- Take a closer look at the soft areas of the pumpkin - you need to make sure that the pumpkin stays for as long as possible. Pumpkins are wax-coated, so get the right paint for your decor.
- Take a closer look at the base of the pumpkin tail, there should be no dark spots, otherwise it will indicate rotting.
Warnings
- If you are using a spray sealant, spray outdoors. You don't want to breathe in acrid fumes.
What do you need
- Pumpkin
- Wet wipes, paper or cloth towels
- Sealant
- Acrylic paints
- Paint brushes, cotton swabs, or other items for applying paint
- Indelible marker
- Transfer paper
- Sequins, ribbons and the like


