Author:
Clyde Lopez
Date Of Creation:
19 June 2021
Update Date:
1 July 2024

Content
- Ingredients
- Cooking on the stove
- Cooking in a pressure cooker
- Adzuki bean paste (anko)
- Steps
- Method 1 of 3: Cooking on the stove
- Method 2 of 3: Cooking in a pressure cooker
- Method 3 of 3: Adzuki Bean Pasta (Anko)
- What do you need
Adzuki beans are widely used in Japanese, Chinese and Korean cuisines, but they can be used for Asian recipes or as a substitute for other types of beans in your favorite dishes. They are high in protein and lower in calories than many other beans, including hyacinth beans, kidney beans, pinto beans, white beans, and chickpeas. Read on to find out more about how to cook these beans.
Ingredients
Cooking on the stove
For 8-10 servings
- 4 cups (1 L) dried adzuki beans
- 4 slices bacon (optional)
- 1 tsp (5 ml) salt (optional)
- 1 tsp (5 ml) ground black pepper (optional)
- 1 tsp (5 ml) garlic powder (optional)
- 1 tsp (5 ml) chili powder
- Water
Cooking in a pressure cooker
For 4-5 servings
- 2 cups (500 ml) dried adzuki beans
- Water
Adzuki bean paste (anko)
For 600 g of pasta
- 200 g dried adzuki beans
- Water
- 200 g granulated white sugar
- A pinch of salt
Steps
Method 1 of 3: Cooking on the stove
 1 Soak the beans. Place the beans in a large saucepan and fill it with water. Let the beans soak in water at room temperature for 1-2 hours.
 - Most dried beans are recommended to be soaked before cooking. This step will soften the beans and also remove most of the water-soluble components that can lead to digestive upset.
- Note that the soaking process can be skipped for adzuki beans and there will be no side reactions. Soaking will make the beans a little easier to digest, but this step is not necessary.
- You can soak the beans for 1 hour or overnight.
 2 Drain the water. Drain the water by pouring the contents of the pot into a colander. Rinse the beans several times under running water, then pour them back into the pot and add fresh water.
 - The water should cover the beans by about 5 cm.
- Fill the pot with cold water to cook the beans more evenly.
 3 Add bacon if necessary. You can add bacon to the beans if you wish. Cut it into 1-inch pieces and add to the pot with beans.
 - The bacon will give the beans a smoky, salty flavor. Thus, bacon works well if you are going to eat beans this way or add them to a dish such as chili. But if you are going to use beans in a sweeter or milder dish, then bacon will not work in this case.
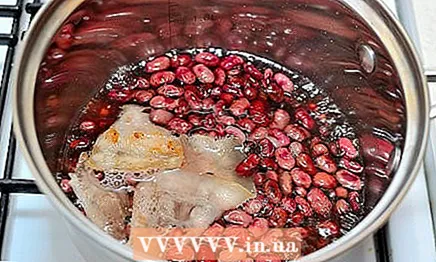 4 Bring the beans to a boil. Cover the pot with a lid and bring the water to a boil over high heat.
  5 Let it simmer. Once the water has boiled, reduce heat to medium and let the beans continue to simmer until they are so soft they can be punctured with a fork.
 - If the beans were soaked in advance, it will take about 60 minutes. If you haven't soaked the beans or have soaked for less than an hour, you may need to wait about 90 minutes.
- Open the lid slightly so that steam can escape, thereby avoiding pressure build-up.
- Periodically skim off excess foam that rises to the surface of the water while cooking the beans.
- Add more water if necessary if a lot evaporates during cooking.
 6 Add the seasonings you want. Beans can be served this way or added to recipes as they are cooked, but if you want to make them more flavorful, then after turning off the heat and draining the water, you can add salt, black pepper, garlic powder, chili powder or other favorites to the beans. seasonings.
 - Before adding the seasonings to the beans, drain the water to prevent them from dissolving in the water.
 7 Serve. Drain if you haven't already during the seasoning step, and serve the beans while they are still hot.
 - You can serve the beans in tortillas, on a plate, along with cornbread or boiled rice. Beans can also be added to casseroles, chili, or stews.
- Alternatively, you can chill the beans and add them to fresh salads.
- You can store cooked beans in sealed trays for 5 days in the refrigerator or six months in the freezer.
Method 2 of 3: Cooking in a pressure cooker
 1 Soak the beans. Place the beans in a large saucepan or bowl and fill it with enough water to cover the beans. Let the beans soak overnight at room temperature.
 - As a matter of fact, it is not necessary to soak the adzuki beans. You can cook it in the pressure cooker without soaking it first. Pre-soaking will shorten the cooking time and help remove water-soluble ingredients that can cause digestive upset.
- Do not soak the beans before cooking to preserve their color, shape, and flavor.
 2 Drain the water. Drain the water by pouring the contents of the pot into a colander. Rinse the beans several times under running water.
 - Rinsing will remove the water-soluble fiber that is still attached to the bean shell.
 3 Place the beans in the pressure cooker. Transfer the drained beans to a pressure cooker and add 2 cups (500 ml) cold water. Close the pressure cooker and set it to high pressure.
  4 Cook until the beans are tender. If the beans were pre-soaked, then it will take 5-9 minutes, and if not soaked, then 15-20 minutes.
 - When the beans are cooked, drain off excess water using a colander. Please note that after cooking, a little water should remain.
- When the beans are cooked, they should be soft enough to pierce with a fork.
 5 Serve. Serve adzuki beans while hot, or add to your favorite bean recipes.
 - If the beans are warm, you can serve with tortillas, cornbread, or rice. You can also add it to a casserole, chili or stew.
- If you decide to chill the beans, you can enjoy them by adding them to your salad with fresh vegetables.
- If you have leftover beans, you can store them in an airtight tray for five days in the refrigerator or six months in the freezer.
Method 3 of 3: Adzuki Bean Pasta (Anko)
 1 Soak the beans. Place the adzuki beans in a medium saucepan or glass bowl and cover with water. Let the beans soak at room temperature overnight.
 - In many recipes, soaking the beans is an optional step. To make a paste, the beans must be soaked to soften them and remove water-soluble elements that can lead to digestive upset.
 2 Rinse and replace water. Drain the beans by pouring the contents into a colander. Rinse the beans several times under running water, then pour them back into the pot and add fresh water.
 - Rinsing the beans after soaking will help clean up any dirt or water-soluble fiber that is still attached to the bean shell.
- When pouring the beans into the pot, make sure that the water covers the beans by at least 2.5-5 cm.
- Be aware that the beans will roughly double in size by the end of cooking, so make sure the pot is large enough.
 3 Boil water. Place the pot on the stove with a high heat. Without covering the pot, bring the beans to a boil.
 - After the water starts to boil, turn off the heat. Place the lid on the pot and let the beans sit on the unplugged stove for 5 minutes.
 4 Drain and replace the water again. Pour the contents of the pot into a colander and let the liquid drain slightly.
 - There is no need to rinse the beans this time.
 5 Bring to a boil. Transfer the beans back to the pot and add enough water to cover the beans. Place a saucepan on high heat and let the beans come to a boil.
  6 Simmer until the beans are tender. After the water has boiled, reduce the heat to low-medium and let it continue simmering. It will take 60-90 minutes.
 - Cook beans uncovered.
- Use a slotted spoon periodically to press down on the beans floating on top of the water.
- During cooking, add water as needed. While the beans are boiling, the water evaporates and as a result the water level decreases. You must have enough water to cover the beans.
- On the other hand, if you add too much water, the beans will move too much and fall apart.
- To check the doneness, remove one bean and squeeze it with your fingers. Once the beans are cooked, you can crush the beans with your fingers.
 7 Add sugar and stir. Add sugar in three separate batches, stirring after each addition. Increase heat and simmer until the beans are pasty.
 - Stir the beans constantly while adding sugar.
- Continue cooking the beans even if they boil.
- Turn off the heat when the paste has reached the desired consistency, but do not remove the saucepan from the stove yet.
 8 Add salt. After the sweet beans have cooled slightly, add salt and stir with a wooden or plastic spoon.
 - The paste should still be warm to the touch, but not hot.
- When the beans have cooled, the paste should still thicken and become denser.
 9 Transfer the paste to a separate tray and finish chilling. Sprinkle or spoon the beans into a separate tray. Cover the tray lightly and let the paste cool at room temperature.
 - Do not leave the paste in the saucepan while cooling.
 10 Use or store as needed. You can use cooked sweet beans in your favorite Asian desserts and snacks, including mochi, an-pan, daifuku, dango, dorayaki, manju, tayaki, and apple pie.
 - Store unused beans in an airtight tray and refrigerate for up to a week or freezer for up to one month.
What do you need
- Casserole with lid
- Colander
- Separate glass dish
- Skimmer
- Wooden or plastic spoon
- Fork
- Serving dishes
- Sealed plastic bags or trays


