Author:
Helen Garcia
Date Of Creation:
19 April 2021
Update Date:
1 July 2024
Content
- Steps
- Method 1 of 4: Stretching the Muscles
- Method 2 of 4: Strengthening the back
- Method 3 of 4: Maintaining a Healthy Lifestyle for Back Care
- Method 4 of 4: Treating Upper Back Pain
- Tips
- Warnings
About 84% of adults experience some degree of back pain at some point in their lives. Although pain in the upper back is less common than pain in the lower back, it is still a fairly common problem these days. Since the thoracic spine (in the upper and middle back) is not as mobile as in the lower and neck, injuries are less common. However, pain in this area can develop due to poor posture and chronic muscle tension. If you suffer from upper back pain, exercise, good posture, and lifestyle changes can reduce or even eliminate the discomfort you are experiencing.
Steps
Method 1 of 4: Stretching the Muscles
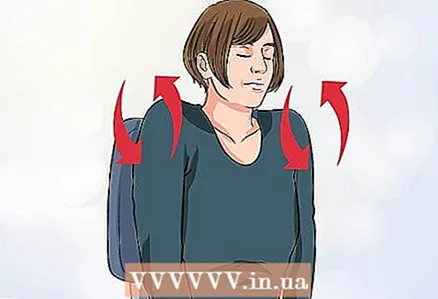 1 Perform shoulder rotations. This exercise is also sometimes referred to as “shoulder scars”. It helps relieve tension in the neck and shoulder area, which can help relieve upper back pain.
 - Sit upright in a straight-backed chair. Place your feet flat on the floor.
- Pull your shoulders up to your ears, as if hunched over. Then take them back and lower them down.
- Repeat the exercise in the opposite direction: up, forward, and down. Do the exercise two to four times per set, several times a day.
 2 Stretch your shoulders by moving your elbows. First, place your hands on your shoulders with the palms of your hands. The left hand should be on the left shoulder, and the right hand should be on the right.
 - Continue to keep your palms on your shoulders and bring your elbows together. When doing this, you should feel a feeling of stretching in the upper back and shoulder area. Hold this position for three deep breaths, and then relax. Repeat the exercise several times a day.
 3 Stretch your back by alternately lifting your opposing arms and legs. Lie on your stomach on the floor and stretch your arms and legs. Your arms should be extended in front of you. It is also recommended to place a small pillow under the lower abdomen.
 - From this position, gently lift your right arm and left leg up in addition to lifting your head slightly. Hold the pose for a couple of seconds and then lower yourself to the floor.
- Repeat with left arm and right leg. Do the exercise a couple of times a day.
 4 Extend your back while lying on your stomach. Lie on your stomach, put your arms at your sides, and straighten your legs. Bring your shoulder blades together and, keeping your neck straight, lift your head, arms and chest off the floor. Hold the pose for two seconds.
 - Slowly lower your body to the floor. Perform three sets of ten back extensions.
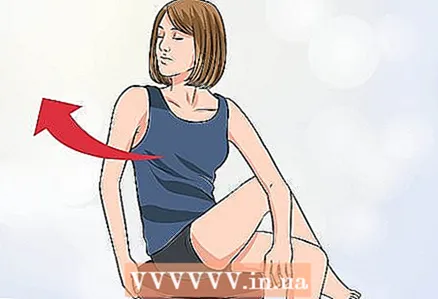 5 Do a side stretch from a seated position. For this exercise, you will need a chair without armrests or a stool. Bring your left leg over to your right. Place your right elbow on your left knee. Twist gently to the left. Hold the stretch for 10 seconds and then repeat the exercise on the other side.
 - Do this stretch three to five times on each side throughout the day.
- Stop stretching if you feel pain.You don't need to stretch more than the stretch that is comfortable for you.
 6 Flatten the shoulder blades. This exercise can relieve tension in the upper back and shoulders. To do it, take a sitting or standing position, place your arms at your sides and bring your shoulder blades together. Hold the pose for a few seconds, then relax and repeat the exercise.
 - Note that you need to do more than just push your chest forward. Try to visualize the threads that are pulling your shoulder blades together. The movement should come from the shoulder muscles, not from the chest.
 7 Stretch your arms. This exercise will help you maintain flexibility in your shoulders and release tension, which will help reduce and prevent pain.
 - Extend your right arm across your chest, trying to reach as far as you can. Place the palm of your left hand on the elbow of your right hand and gently pull it towards you to strengthen the stretch.
- Hold the pose for 10 seconds. Repeat the exercise three to five times, and then repeat it for the other hand.
- Stop stretching if you feel pain.
 8 Perform a combination of three Pilates poses: prayer poses, cat poses and camel poses. These positions will help you increase flexibility and help release muscle tension from your back and shoulders. Get on all fours. Inhale and lower your buttocks to your heels as you exhale. Tilt your head down, tuck your chin, and extend your arms forward to assume the prayer pose (also known as the child yoga pose).
 - From this position, inhale, returning to all fours. Arch your back up towards the ceiling, lowering your head and sucking in your stomach. This pose is called the cat pose.
- Exhale and lower your belly to the floor. Bend your back down and stretch your chin towards the ceiling. This pose is the camel pose.
- Return to Praying Pose. Repeat all the exercises 5 times in sequence.
 9 Do twists. This type of stretch, also called “segmental crunches,” is a great way to gently stretch your back while strengthening your core muscles.
 - Lie with your back on the floor and stretch your arms out to the sides. Make sure your back is in a “neutral” position (you should be able to slide your palm between the natural curve of your spine and the floor), but not arched or flat on the floor.
- Bend your knees, press your feet to the floor.
- Tighten your abdominal muscles. Continue to keep your shoulders flat on the floor as you gently lower your knees to one side. Your knees should drop to the floor together. But do not lower them further than the position you are comfortable with.
- Hold the pose for three quality deep breaths. Then gently return your knees to the center position and repeat the stretch on the other side. Do it several times a day.
Method 2 of 4: Strengthening the back
 1 Try making a modified plank. Getting into a full plank position can be difficult at times, especially with back pain and / or weak core muscles. The revised plank will help you strengthen your muscles safely without putting unnecessary strain on your back.
 - Lie on your stomach on the floor. You may want to use a yoga mat for your comfort.
- Raise your torso so that your body rests on your elbows and forearms, as well as your knees. The elbows should be directly under the shoulders. You can place your palms on the floor or clench them loosely into fists.
- Place your back, shoulders and neck in one line. You will be looking at the floor, but you do not need to bend your body towards it. Do not look forward or at the ceiling.
- Tighten your abdominal muscles to make it easier for you to stay in this position. If you need to create additional resistance to maintain your posture, you can tighten your abdominal muscles so that your elbows and knees are squeezed towards each other.
- Maintain the pose for as long as you can. Try to stay in it for at least three deep, even breaths.
- Gently lower your body to the floor and relax a little.Repeat the exercise several times throughout the day.
 2 Get into the half-bridge. The half-bridge exercise will help you strengthen your torso and relieve back pain.
 - Lie with your back on the floor. Place a yoga mat under your back if desired.
- Bend your knees, press your feet firmly to the floor. Keep your head and shoulders relaxed (not tense).
- Tighten your abdominal and gluteal muscles. Use these muscles to push your hips up towards the ceiling so that your torso forms a straight line from your shoulders to your knees. The hips should not sag or rise too high. The gluteal and abdominal muscles should keep you in this position.
- Hold this position for as long as possible. Inhale deeply through your nose and exhale through your mouth while maintaining your position. Try to hold at least three good breaths.
- Gently lower your hips to the floor. Take a little breath, and then repeat the half-bridge four more times.
 3 Perform one-sided resistance press leg raises. This exercise will help strengthen your core muscles without putting too much strain on your back. Stronger core muscles will make your back healthier and help relieve pain.
 - Lie on your back on the floor. For convenience, you can use a yoga mat.
- Bend your knees, press your feet to the floor. Make sure your back is in a “neutral” position (you should be able to slide your palm between the natural curve of your spine and the floor).
- Tighten your abdominal muscles. Lift your right leg up so that the knee forms a right angle with the floor. Place your right hand on your right knee.
- Keep your abdominal muscles tense to pull your right knee towards your body while applying pressure with your right hand in the opposite direction. You must feel this resistance.
- Hold in the accepted position, breathe deeply and evenly. Try to take at least three good breaths.
- Then, gently lower your right foot to the floor. Repeat the exercise with your left arm and left leg. Do the exercise five times for each side.
- Once you are comfortable with the exercise, you can increase the difficulty by using the opposite hand for the knee (that is, the left hand for the right knee and the right hand for the left knee). You can also complicate the exercise by placing your hand on the outside of your knee and pulling it towards you while you try to keep your leg upright with your abs.
 4 Do a two-way resistance press. After mastering the previous exercise, you can proceed to the two-way leg raises on the press. It will further strengthen your core muscles.
 - Lie with your back on the floor. Use a yoga mat if you want to. Make sure your back is in a neutral position.
- Tighten your abdominal muscles. Lift both feet off the floor so that they are at right angles to the floor. Place your palms on top of your knees (your left hand on your left leg, and your right hand on your right leg).
- Keeping your abdominal muscles tense, begin to push your knees with your hands, as if you were trying to lower them to the floor. Use your abdominal muscles to keep your legs elevated.
- Breathe deeply while doing this exercise. Try to hold in the accepted position for at least three breaths.
- Then gently lower your feet to the floor. Give yourself a break and then repeat the exercise five more times.
- This exercise can be just as difficult as an exercise with a one-sided leg raises on the press.
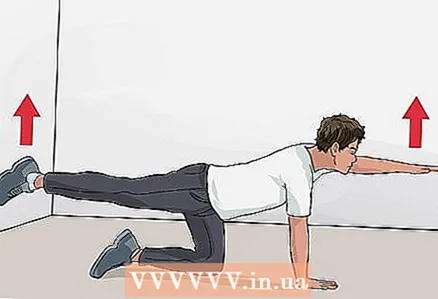 5 Straighten your limbs from a standing position on all fours. This exercise will also help you strengthen your core muscles in a way that is gentle on your back.
 - Get on all fours. The exercise can be performed on a yoga mat if desired. Make sure that your palms are on the floor just below your shoulders.
- Straighten your spine so your back, shoulders, and neck form a healthy line.You will be looking at the floor, but do not bow your head. Also, don't strain to look up.
- Tighten your abdominal muscles. Lift your right hand off the floor and extend it in front of you, palm up. Hold this position for three good breaths. Lower your right hand to the floor and repeat the exercise for your left hand.
- Keeping your abdominal muscles tense, lift your right leg and pull it back. Hold the pose for three breaths. Lower your right leg and repeat on your left leg.
- If the task is too easy for you, increase the difficulty of the exercise by simultaneously raising the opposite arms and legs (that is, the right leg and left arm or the left leg and right arm). Repeat the exercise for the other side.
Method 3 of 4: Maintaining a Healthy Lifestyle for Back Care
 1 Watch for the correct weight. Excess weight puts increased tension on the back muscles, which can lead to pain. Check with your doctor if you are unsure if your weight is normal.
 - Be sure to consult with your doctor before introducing any weight loss regimen for yourself. Express diets and other unsafe weight loss programs can seriously damage your health.
 2 Get plenty of cardio workouts. Regular aerobic exercise can help you build strength and endurance. Do exercises that won't hurt your back, such as swimming or even brisk walking. Avoid running and jogging fast, which can cause joint pain.
 - Check with your doctor to find out which exercise is most effective and safe for you.
- Note that although the exercise is low, golf is usually not suitable for people with back problems.
 3 Get started monitor posture. Poor posture is a common cause of upper back pain. Poor posture while standing or sitting can strain your neck, shoulders, and back muscles, causing pain.
 - Lean with your back against the wall and take a comfortable standing position with your heels 5-10 cm away from the wall. In this case, the buttocks, shoulder blades and head should touch the wall, but the lower back in the lower back should not. Remind yourself daily to walk with your shoulder blades slightly pulled back, your stomach in, and your head up straight.
- Keep your head straight even when standing or sitting. Try not to tilt your head forward as this puts a lot of stress on your neck, shoulders, and upper back.
- Remember that the spine has natural curves, so with correct posture, your back should not be perfectly straight.
 4 Arrange your workplace. Use ergonomic chairs at home and at work, and make sure your desk is at the correct height (or work while standing behind a desk).
 - An ergonomic office chair is especially important for preventing upper back pain by keeping your head, shoulders, hips and knees in a proper position. Correct posture prevents straining your neck and back while you sit and stare at a computer monitor.
- Keep the monitor just below eye level. Remember to keep your elbows close to your body and support.
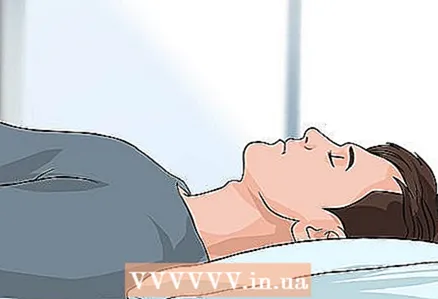 5 Sleep on your back or side to relieve stress on your spine. Sleeping on your stomach can lead to neck and back pain.
 - If you prefer to sleep on your back, use a small pillow under your feet at the knee area. You can also use a rolled towel for this purpose.
- If you sleep on your side, place a small pillow between your knees.
 6 Reduce stress. Stress and anxiety lead to increased tension in the muscles of the shoulders and neck, which can lead to pain in the upper back.
 - Try yoga or tai chi. They emphasize gentle movement, meditation, and deep breathing to help relax the body and increase its plasticity.
- Meditation can also help combat stress.
- You can also take up a hobby. Active hobbies such as gardening or walking in nature can help you keep fit.
 7 Be aware of the way you carry heavy things. You can easily injure your back if you lift or carry things the wrong way. It is not uncommon for schoolchildren to suffer from upper back pain as they carry overloaded and unbalanced backpacks.
 - Always lift weights with your feet, not your back. Start by bending your knees a little, but don't squat down. Keep the weight close to your body as you lift it, and allow your legs to push you into a straight position instead of lifting the weight by extending your back.
- Watch for a balanced load. Wear the backpack on both shoulders and try to keep it as light and balanced in weight as possible. When carrying heavy items such as grocery bags, try to hold approximately the same weight in both hands.
Method 4 of 4: Treating Upper Back Pain
 1 Apply warmth to the affected area. Warming up the area where the back pain occurs can help relax the muscles, thereby providing temporary pain relief. You can use a heating pad or rubber heating pad filled with hot water to warm your upper back.
 - Do not use a heating pad while sleeping.
- Warm up your back for no more than 15-20 minutes at a time.
- A hot shower or bath may also work. If you have a hydromassage shower head, directing the pulsating water to painful areas can give you relief.
 2 Apply ice. Ice is usually used to relieve painful injuries that have occurred in the past 48 to 72 hours. Ice can also be helpful in combating pain and inflammation in arthritis.
 - To make a cold compress, dampen a kitchen towel or cloth with water until lightly dampened. Roll up a towel (or napkin) and place in a zip-lock bag. Place the bag in the freezer for about 15 minutes. Then apply the cold bag to the affected area for no more than 10 minutes.
- Also in the pharmacy you can buy ready-made gel or clay-based ice compresses.
- Never place an ice pack directly on your skin. Place a thin towel between your skin and the ice pack to prevent frostbite.
- You can use a bag of frozen vegetables as an ice pack. In this case, choose something small and uniform, such as frozen peas or corn. Avoid re-frozen vegetables (save them only for pain relief).
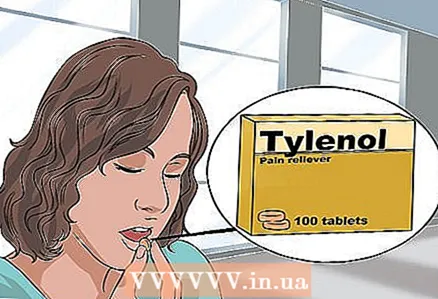 3 Take a non-prescription pain reliever. Try NSAIDs to relieve pain and inflammation. These include, for example, ibuprofen, naproxen, and aspirin.
 - You can also take paracetamol.
- If these medications don't work, talk to your doctor about prescribing more serious prescription pain relievers.
 4 See your doctor. If you suffer from chronic pain (that is, it lasts a long time, gradually intensifies or regularly recurs), you need to see a therapist. Chronic back pain may be related to past injuries, possibly requiring additional treatment.
 - You should also see your doctor immediately if you feel weakness in your arms or legs, numbness or tingling in your abdomen, chest, arms, legs, or if you have bowel or bladder problems.
Tips
- Wear flat shoes. High heels can lead to back pain. A flat sole, especially when combined with ergonomic insoles or inserts, can help you prevent back strain.
Warnings
- If your upper back pain persists with self-treatment, see your doctor.In rare cases, it may require medical treatment, such as medication, physical therapy, or even surgery.
- Sudden, sharp pain in the upper back can indicate a potentially life-threatening condition, such as a heart attack. In this case, seek immediate medical attention.


