Author:
William Ramirez
Date Of Creation:
19 September 2021
Update Date:
1 July 2024
Content
This article is about replacing hard drive platters. This procedure is not for the technically inept or the faint of heart. The information below does not make any warranties, and will certainly void and nullify any existing warranty. It may be best to try swapping the controller board before attempting to replace the plates. This is a less disruptive process, and in any case, you need an identical drive for both processes.
Steps
 1 Be aware that these steps are only used as a last resort. You have tried your best, your data is not extremely important, and / or the size of your wallet limits your access to professional help.
  2 Create a clean work environment. You can't create a super clean environment in your home, but use common sense and organize everything as best you can. Keep air flow to a minimum.
  3 Collect and arrange your tools.
 4 Use powder-free latex gloves.
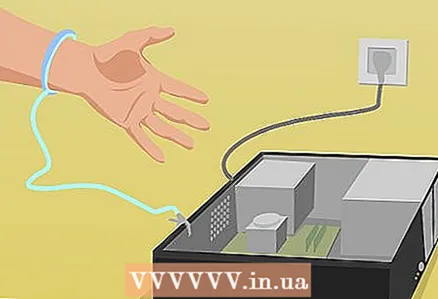 5 Ground yourself! If you don't know what it is, or how to do it, ask Google.
  6 Remove the cover of your failed drive. If the cover just doesn't come off, look for more screws! The screws are under the labels.
  7 After the cover is removed, inspect the plates. If they are scratched, scorched, deformed, or otherwise damaged, stop moving on!
  8 Replace the cover - if the platters are physically damaged, chances are you won't be able to recover any data. You can still try it if you like.
  9 Purchase a new HDD with the same model number and firmware version.
 10 Test your new HDD. Make sure you can read data from it and write information to it.
  11 Remove the cover from your donor HDD.
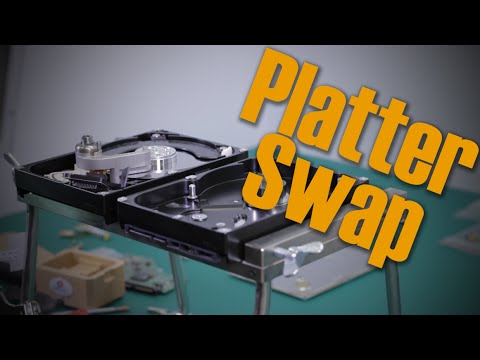
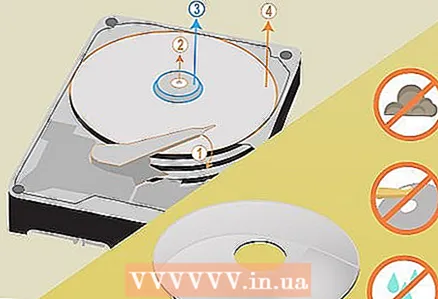 12 Remove the plates from the donor HDD. This is your chance to find out how they are assembled, if you miss out and damage parts, you can get a new donor. NOTE: If you are dealing with multiple platters, they cannot be removed without the proper hardware, because shifting the platters will destroy any chance of data recovery. You need a plate removal tool... The next steps are only if you are dealing with one plate.
  13 Remove the plate from the failed HDD.
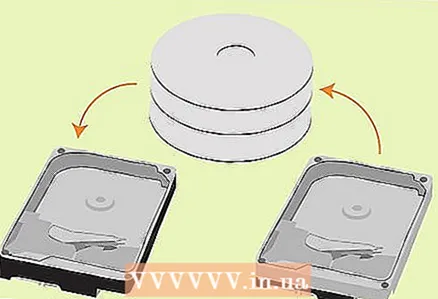 14 Re-assemble the donor disk with the platters of the failed disk inside (make sure that all platters are aligned in the same way in relation to each other as they were on the old disk).
 15 Install the donor disc.
 16 Copy the data quickly. You may only have one or two chances to read information from your hard drive. Some awful sounds can be made when doing this.
  17 Unplug the HDD and discard it. Continuing to use the HDD is unwise.
Tips
- You may have to remove the heads to remove the plates.
- When replacing inserts, be very careful with the head! Make sure the head is in place before attempting to remove the plates.
- Do your homework. Look at the pictures of the properties of the hard drive, before than opening it.
- Before deciding to remove the platters, try freezing the HDD (in a sealed container) and try creating a disk image using a tool such as DD_Rescue (http://www.gnu.org/software/ddrescue/ddrescue.html). Sometimes freezing the HDD will compress the bearings enough to read the information from the HDD for the last time. Freezing a hard drive can cause condensation to form on the platters, which can damage the platters by the heads when the hard drive is turned on.
- Hard Drive PCB online store: http://www.HDDZone.com (provides PCBs from Seagate, Maxtor, Samsung, western digital and IBM / Hitachi).
- This procedure is not for logically erased data. This procedure is for physically inoperable disks with intact data.
- HDD = hard disk drive
- Use the right tools!
Warnings
- Hard drives are mounted in sealed clean rooms, free of any dust. One speck of foreign material released onto the platter will destroy the disc in most cases. If this happens, try using a can of air and spray it, but don't wipe it off or use chemicals.
- This is will lead to the loss of any existing warranty.
- In most cases it is also will lead to void the warranty of the ENTIRE computer; read the warranty information very carefully.


