Author:
Ellen Moore
Date Of Creation:
18 January 2021
Update Date:
1 July 2024

Content
- Method 2 of 3: Setting up the sewing machine
- Method 3 of 3: Sewing with the sewing machine
- Tips
- Warnings
- What do you need
 2 Find a reel seat. This is a small plastic or metal stick that sticks out from the top of the sewing machine and is designed to hold a spool of thread.
 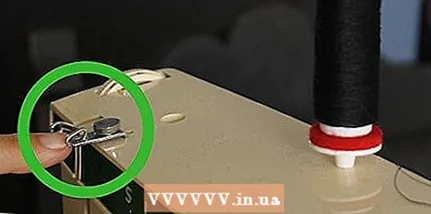 3 Find the thread guide. The thread guide guides the thread from the spool attached to the top of the machine to the bobbin winder. This is a geometric metal section that sticks out on the upper left side of the sewing machine.
 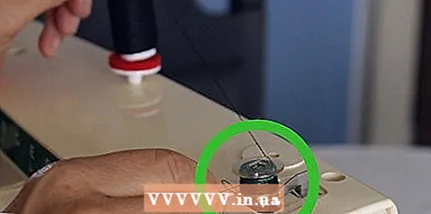 4 Find a winder. To the right of the reel seat is another, even smaller, metal or plastic pin, next to which there is a small horizontal wheel. This is a bobbin winder and its stopper. They work together (together with the bobbin and thread) to wind the thread around the bobbin before sewing.
  5 Look at the buttons that allow you to adjust the stitches. They may be in different places depending on the model of your sewing machine, but they usually look like buttons with small pictures and are located on the front of the sewing machine. These buttons allow you to change the type of stitches you can use, the length of the stitches, and their direction (forward and backward). Check the instructions for your sewing machine for the purpose of each button.
  6 Determine the location of the thread take-up. When you are ready to thread the sewing machine, start pulling the thread from the top of the spool, through the thread guide, and then into the thread take-up. This is the lever (with two notches cut out) located on the front left side of the sewing machine. Usually you can see printed numbers and arrows next to it, explaining how and in what order to thread the sewing machine.
  7 Find a tension adjuster. The tension dial is a small number wheel next to the thread take-up. It controls the thread tension while sewing; if the tension is too high, the needle will bend to the right. If the tension is not tight enough, the thread will tangle on the back of the fabric you are sewing.
 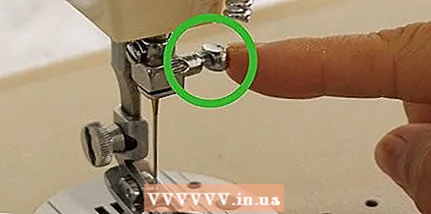 8 Find the needle clamp screw. This is a metal tool that holds the needle while sewing. It is located under the sleeve of the sewing machine and is very similar in shape to a large nail. It attaches to the right side of the needle.
  9 Find the foot. This is the metal part under the needle holder and looks like tiny skis. When you lower the foot, it holds the fabric in place and guides it as you sew.
  10 Find the foot lever and practice raising and lowering the foot. It should be behind or to the right of the needle holder and needle. To test the lever, lower it down and lift it up.
  11 Find the stitch plate. The stitch plate is the silver pad just below the needle. Very simple, right?
  12 Find the transporter. The feed dog is a small metal guide that sits on the needle plate, under the foot, and guides the fabric as you sew. Pay attention to the two metal rows under the foot - this is the conveyor. 13 Find the spool stopper and release. The spool is a small spool of thread that sits on the bottom of the sewing machine and feeds the second thread to the needle, which is needed to create the stitches from the inside. There is a spool stop under the metal plate, and there you will also find a button or lever that releases it. You will need it to secure the spool before sewing.
 Method 2 of 3: Setting up the sewing machine
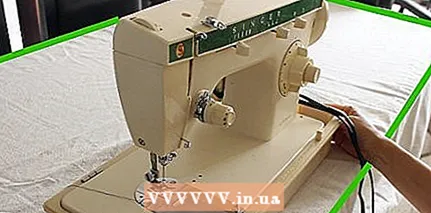 1 Place the sewing machine on a stable table, work area, desk, or sewing machine stand in front of you. Sit on a chair that is the appropriate height relative to the table you are using. The sewing machine should be positioned with the needle on the left and the rest on the right, relative to you. You will have to check a few parameters first and get a little familiar with the sewing machine, so do not plug it in at this stage.
 - 2 Insert the needle securely. The needle has a flat side, so there is only one way to insert it: the flat side must be facing back. On the other side, there is a groove at the bottom of the needle, usually located opposite the flat side of the needle. This notch always faces in the direction of the thread passing (the thread passes through this notch when sewing the fabric up and down with the needle).Insert the needle as described and securely tighten the screw holding the needle.
- 3 Install the coil. Sewing machines use two sources of thread - the upper thread and the bobbin thread. The bottom one is on the reel. To wind the thread onto the spool, place the spool on the upper spool seat, which is used to wind the thread. Follow the instructions and wind the thread from the thread spool through the thread take-up onto the bobbin. Turn on the thread take-up mechanism and wait until it stops by itself, when the bobbin is completely wound.
- When the bobbin is ready, place it in the designated spot, under the needle, on the bottom of the sewing machine. Leave the end of the thread on the outside to insert it into the needle.
- 4 Thread the sewing machine. The spool of thread on the top of the sewing machine should be unrolled and attached to the needle. To do this, take the end of the thread and pull it through the thread take-up from the top of the sewing machine, and then lower the thread down to the foot. The sewing machine should have small numbers and arrows to show you the order in which the thread runs.
- You can also follow the instructions on your sewing machine.
- Typically, the thread follows the specified path: "left, down, up, down, into the hook, through the needle." Another method of threading the sewing machine includes: "spool, thread guide, foot, needle, and using all guides in the direction of travel to these parts."
- You can thread the needle from the right or left, from the front or from the back. If there is already thread in your needle, this may tell you which direction to insert the thread next time; if not, find the last guide in front of the needle, it will be on the side from which you want to insert the thread into the needle.
- 5 Take out both threads. Slide the scissors under the foot to loosen the ends of both threads. You should have two ends - one from the thread coming through the needle and the other from the thread coming from the bottom spool.
 6 Plug the sewing machine into a power outlet and turn it on. Many sewing machines have built-in lights to help you determine if it is working and if it has electricity. The power button is often located on the right or back of the sewing machine, if any. Some sewing machine models do not have such a button and turn on as soon as they are plugged into an outlet.
 - Also connect the foot control to the sewing machine. Place the pedal in a comfortable position under your foot.

Daniela gutierrez-diaz
Fashion designer and sewing blogger Daniela Gutierrez-Diaz is a professional pattern and clothing designer at DGpatterns in Vancouver, Canada. With over five years of experience, he creates modern and unique silhouettes suitable for everyday life. Her blog On the Cutting Floor contains sewing tips and a variety of patterns in PDF format. Daniela gutierrez-diaz
Clothing designer and sewing bloggerKeep your sewing machine clean. Daniela Gutierrez-Diaz, a professional pattern and clothing designer, advises: “From time to time, take your sewing machine to a specialized sewing machine service center, in order to be cleaned there... It is advisable to do this regularly, especially if you use the sewing machine constantly».
Method 3 of 3: Sewing with the sewing machine
- 1 Choose a straight stitch, medium size. Check the instructions for how to do this on your model of sewing machine. On this model, the stitches are set by turning the lower knob on the right side of the machine until it clicks. Always set or change the stitch pattern with the needle up by removing the fabric as it can move the needle.
- The straight stitch is the most popular sewing stitch. The next most popular stitch is the zigzag stitch, which is used to finish the edges of fabrics and counteracts its unraveling and shedding.
 2 Practice on bad material. Choose a plain fabric, not jersey, for your first sewing experience. Do not use fabric that is too thick for your first attempts at sewing machine. Denim or flannel fabric is very difficult to work with due to their density.
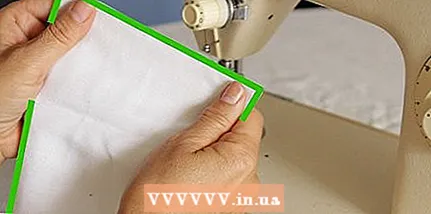
 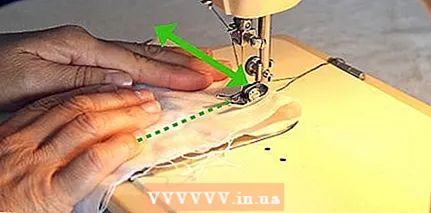 3 Place the fabric under the needle. Stitch by placing the topstitching material to the left of the machine. Putting the fabric to the right can cause uneven stitches.
 - 4 Lower the foot. Locate the lever on the back or side of the needle to raise and lower the presser foot.
- If you pull lightly on the fabric that is pressed down with the foot, you will realize that it is held quite tightly. When you stitch, the sewing machine uses a protractor to move the fabric at the correct speed. Therefore, there is no need to manually pull the fabric through the sewing machine; in fact, pulling the fabric can cause the needle to bend or damage your design. You can adjust the speed and size of the stitches using the buttons on the machine.
- 5 Hold the loose ends of both threads. For the first few stitches, you will need to hold the ends of both threads to avoid tangling in the fabric. After you have sewn a little, you can let go of the ends of the threads and use both hands to control the fabric and the sewing machine.
- 6 Step on the pedal. The pedal is responsible for controlling the sewing speed. It's like the gas pedal in a car - the harder you press, the faster your sewing machine will run. At first, depress the pedal very slowly and just enough to start the sewing machine.
- Your sewing machine may have a knee button instead of a pedal. In this case, use your knee to push it.
- You can use the upper wheel on the right side of the sewing machine to force it to sew, or move the needle by hand.
- The sewing machine will automatically guide the fabric away from you. You can guide the fabric under the needle in a straight line or at different angles. Practice stitching straight and wavy. The only difference is how you bring the fabric to the needle.
- Do not insert or pull the fabric under the needle. Doing so may stretch the fabric or break the needle, or the seam may become jammed into the bobbin. If you feel that the sewing machine is not working fast enough, depress the pedal harder, adjust the stitch length, or (if necessary) buy a faster sewing machine.
- 7 Find a button or reverse lever and try it out. It allows you to change the direction in which the sewing is going, so the fabric will move towards you and not away from you. Usually this button or lever is held by a spring, so you will have to hold it in order to continue sewing in the opposite direction.
- At the end of the stitching, add a few backward stitches over the last stitches. This will secure the stitching and help prevent unraveling.
- 8 Use the handwheel to raise the needle to its extreme point. Then raise the foot. The fabric should now be easy to remove. If the thread pulls back when you try to remove the fabric, check the needle position.
- 9 Cut the thread. Many sewing machines have a notch in the pin that holds the foot. You can cut the threads by holding them with both hands and sliding them over the barb. If there are no barbs or you want to cut the threads more carefully, then use scissors. Leave the ends of the threads in order to continue sewing the next seam.
- 10 Practice sewing seams. Pin together two pieces of fabric, right-side-to-side, right at the edge. The seam will be between 1.3 cm and 1.5 cm from the edge. You can stitch the fabric in one layer (and you might want to do this to reinforce the edge), but since the purpose of most sewing machine work is to join two pieces of fabric, you need to get used to stitching multiple layers of fabric and using pins. ...
- The fabric is fastened right-side to each other so that the seam stays on the wrong side. Right side is the side that will be outside when sewing is finished. On dyed fabric, the face is usually the brighter side. Some fabrics may not have a front side.
- Attach the pins perpendicular to the line along which the seam will run. You can stitch directly onto the pins and later easily remove them from the fabric, but doing so can damage the sewing machine, fabric, or pins. It is safest to remove the pins as soon as the needle approaches them, as if the needle accidentally hits the pin it will break and the needle will bend. Be that as it may, prevent the needle from hitting the pin heads.
- When you follow the fabric, pay attention to where the material is moving. The seams can go in different directions, but most sewing projects are subsequently trimmed so that the seams run parallel to the edge. Also, pay attention to the direction of the pattern, if your fabric has one, and position the fabric so that the pattern runs from top to bottom on the right side. For example, floral or animal prints, or stripes or other designs should go in the right direction.
- 11 Move to another part of the fabric. Use the hand wheel on the upper right side of the sewing machine to guide the needle up before starting a new seam and when removing the fabric from under the needle after finishing work. This will raise the needle and allow you to move the fabric to work on a different part of it.
- If the needle is not up, the thread may not budge when you pull on the end.
- Look at the lines drawn on your sewing machine for the standard edge-off. Typically, the indent should be 1.3 cm or 1.5 cm. Use a ruler to measure. They should be marked on the stitch plate (flat metal plate with a hole through which the needle goes). Otherwise, you can make such a mark yourself using electrical tape.
- 12 Learn to sew a sharp corner. When you need to turn at a corner of the fabric while sewing, lower the needle all the way into the fabric. You can use the hand wheel to lower the needle. Raise the foot. Leave the needle in the fabric. Then turn the fabric, leaving the needle in it. Finally, lower the foot onto the fabric in the new position and continue sewing.
 13 Try simple projects. When you've made a variety of different stitches and you're feeling confident at the beginner level, try sewing a pillow, pillowcase, or gift bag.
Tips
- Take your time and try different stitches for your sewing machine. This is especially important if you are making buttonholes or intricate stitches. If your sewing machine does not offer a wide variety of stitches, then do not be discouraged. You can sew a variety of designs using straight or zigzag stitches, or by combining them. (A zigzag stitch is not as difficult as it sounds. Just set your sewing machine to the zigzag mode and your machine will do it for you!)
- It will take practice to fully understand the foot control of the sewing machine, guiding the fabric under the needle and keeping the sewing speed constant. Even the best tailors train first before putting the fabric under the needle.
- Contrasting red thread has been used throughout this tutorial to help you see better; be that as it may, if the project is not a trial, then the color of the thread should match the color of the fabric as much as possible. Except when you need to highlight the color of the thread in the finished product.
- Cheap needles can be problematic, but old or poor quality threads are sure to be a source of inconvenience. The choice of thread depends on the texture and density of the fabric — standard cotton synthetic thread is ideal for medium-heavy projects (approx. 40-60 sizes). Cotton thread for greater density should be mercerized.Otherwise, there is a risk of frequent thread breakage when sewing at high speed. Use synthetic thread for thicker fabrics, leather, leatherette. Anything that gets very dense with multiple layers always requires a tighter thread.
- If you still haven't figured it out, or you don't have instructions, or your sewing machine is unlike any other, then ask a friend who can sew or a local fabric store or sewing machine repair shop consultant for advice. They can give lessons, or give paid consultations and workshops, or they can help you at an initial level if you ask politely. If this consultation helps you, then you will help the consultant by buying something from him.
- Take a look at the stitches. The threads should be barely visible between the two pieces of fabric. If there are places on your garment where the threads are clearly visible from the top or bottom of the fabric, then this means that you may need to adjust the thread tension.
- Sometimes the thread tension may be ok and you just need to change the needle. The needle should not be used more than two complete sets of garments. In addition, different fabrics for clothing require different needles: fine needles for textiles and fine fabrics, thick needles for denim. The type of fabric you are using will determine the size of the needle you need.
Warnings
- Keep your fingers away from the needle. Do not thread the machine while the machine is running or put your fingers under the needle while sewing.
- Do not try to force the sewing machine to do the impossible. If the needle cannot go through the fabric, then you are most likely trying to sew too much fabric.
- Do not sew on pins that hold the fabric together. Otherwise, the seam will be weak and the needle may break.
What do you need
- Sewing machine
- Needles - select according to fabric
- Pins; a pincushion or magnet will help you avoid losing it
- Textile
- Stable table, bedside table or work surface
- Thread
- Bobbins suitable for your sewing machine
- Ripper (not needed for samples, but extremely necessary for further sewing)
- Scissors


