Author:
Virginia Floyd
Date Of Creation:
12 August 2021
Update Date:
1 July 2024

Content
- Steps
- Part 1 of 5: How to Send an Email
- Part 2 of 5: How to Manage Emails
- Part 3 of 5: How to Create and Use Shortcuts
- Part 4 of 5: How to manage your contacts
- Part 5 of 5: How to use Gmail on a mobile device
- Tips
- Warnings
This article will show you how to send emails, manage received emails, and perform other basic tasks in Gmail. If you don't have a Gmail account, create one.
Steps
Part 1 of 5: How to Send an Email
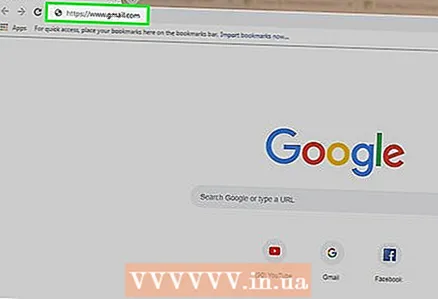 1 Open Gmail. Go to https://www.gmail.com/ in your computer's web browser. You will be taken to your Gmail inbox if you are already logged in.
 - If you are not already signed in to your account, enter your email address and password.
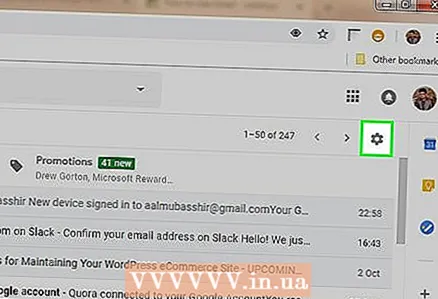 2 Make sure you are using the latest version of Gmail. For this:
 - Click on "Settings"
 .
. - Click "Switch to new version" at the top of the menu.
- If the menu displays the "Return to Classic" option, then you are already using the newer version of Gmail.
- Click on "Settings"
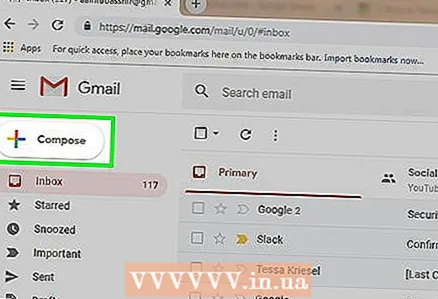 3 Click on + Write. It's in the upper-left corner of the page. A New Message window appears in the lower right corner of the page.
 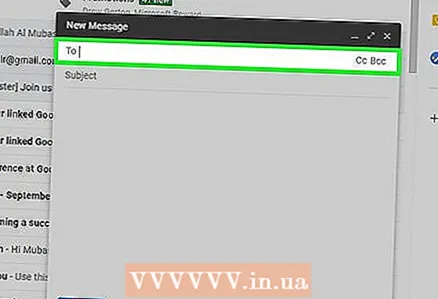 4 Enter the recipient's email address. Do this in the "To" text box.
 - To add the second person's address to the To text box, press Tab ↹when you enter the email address of the first person.
- To send someone a copy (or Bcc) of an email, click Cc (or Bcc) to the right of the To text box, and then enter that person's email address in the Cc (or Bcc) field that opens. ).
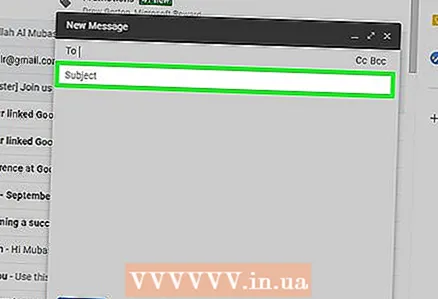 5 Enter a subject for your email. Do this in the Subject text box.
 - It is best if the subject line contains only a few words.
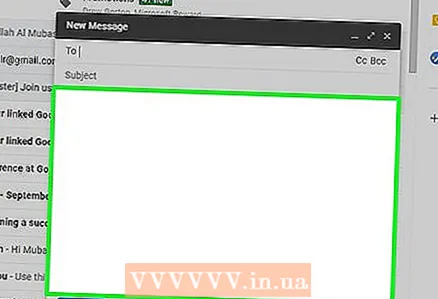 6 Enter your email text. Do this in the large text box below the Subject field.
  7 Add formatting or attachment. If you want, change the appearance of the text, attach a file or upload a photo:
 - Formatting - select the text. To do this, hold down the mouse button and move the pointer over the desired text. Now select one of the formatting options at the bottom of the email.
- Files - click "Attach files"
 at the bottom of the email, and then select the files you want.
 - Photos - click "Add photo"
 at the bottom of the email, and then select the photo you want.
 8 Click send. This button is at the bottom of the New Message window. The email will be sent to the specified recipients.
Part 2 of 5: How to Manage Emails
 1 Open the email. To do this, click on the subject line.
 - To close an open letter, click the left-pointing arrow icon above the upper-left corner of the letter.
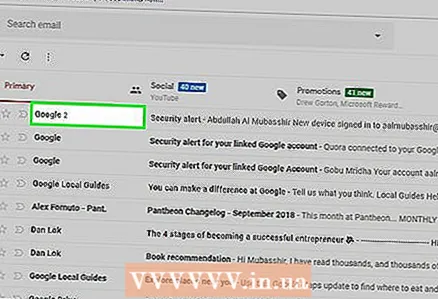
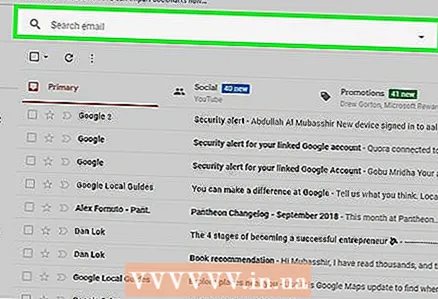 2 Find the letter. To do this, scroll through the list of incoming emails or click on the search bar at the top of the page, and then enter a request (for example, the subject of the letter or the name of the sender).
 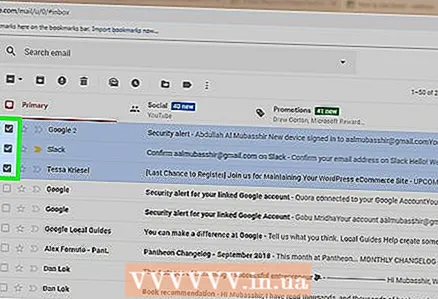 3 Select letters. If you want to select a group of letters, check the boxes to the left of each one.
 - This is useful for moving or deleting multiple emails at once.
- To select all emails displayed on the page, check the box above the top left of the first email.
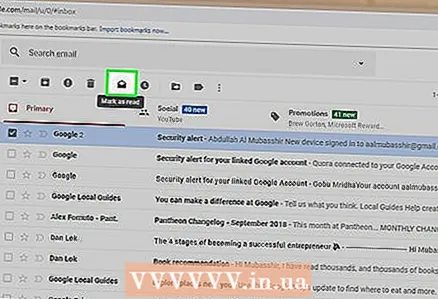 4 Mark the email as read. Select the letter and click the open envelope icon at the top of the page.
 - If you open an email, it will also be marked as read.
 5 Send the letter to the archive. This letter will disappear from your Inbox, but will not be deleted from your mailbox. Select an email and click the down arrow icon at the top of the page.
 - To view archived emails, click "All Mail"; if you do not see this folder, scroll down the list of folders (on the left of the screen) and / or click "More".
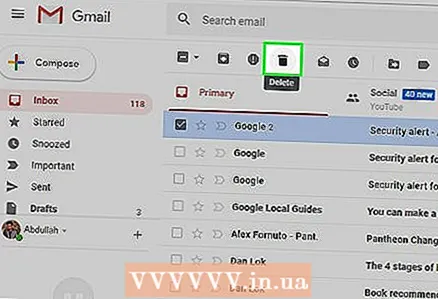 6 Delete the letter. To remove an email from your Inbox, select it and then click Remove
  at the top of the window.
 - The deleted letter will be sent to the "Trash" folder, where it will be stored for 30 days, after which it will be automatically deleted permanently.
 7 Mark the email as spam. Sometimes unwanted emails end up in your Inbox. To mark such emails as spam, select them and click on the "!" at the top of the page. The selected letters will be sent to the "Spam" folder and from now on, similar letters will immediately go to this folder.
 - You may need to mark emails from the same sender as spam multiple times before they stop appearing in your Inbox.
 8 Create a draft. If you started writing a letter, but you do not have time to complete it, save the letter as a draft - to do this, wait until the word “Saved” appears in the lower right part of the “New message” window, and then simply close the letter. Then find the letter in the Drafts folder in the left pane.
 - If you don't see this folder, scroll down the list of folders (on the left side of the screen) and / or tap More.
Part 3 of 5: How to Create and Use Shortcuts
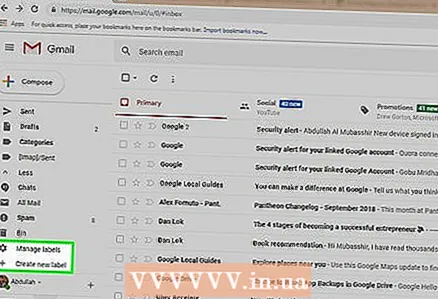 1 Remember what labels are. A shortcut is analogous to a folder in Gmail; if you assign a shortcut to an email, it will be added to the shortcut folder in the left pane.
 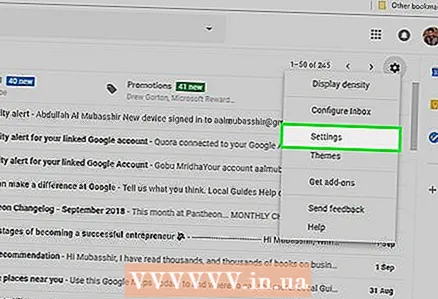 2 Open your Gmail settings. Click "Settings" in the upper right corner of the page, and then click "Settings" in the menu that opens.
 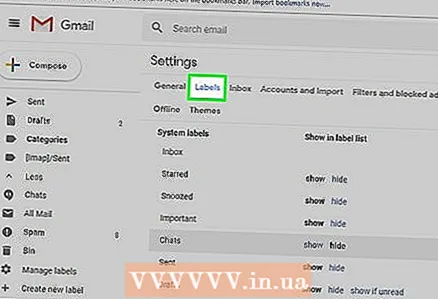 3 Click on Labels. This tab is at the top of the window.
 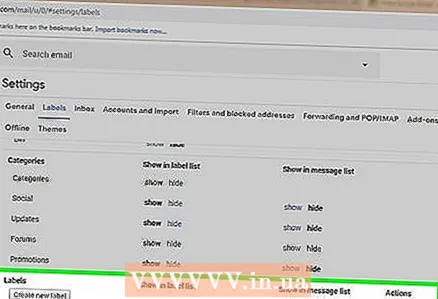 4 Scroll down to the Shortcuts section. A list of the shortcuts you created will be displayed.
 - If you haven't created shortcuts yet, this section will be blank.
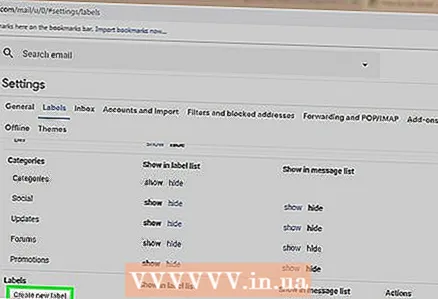 5 Click on Create shortcut. It's at the top of the Shortcuts section. A pop-up window will appear.
 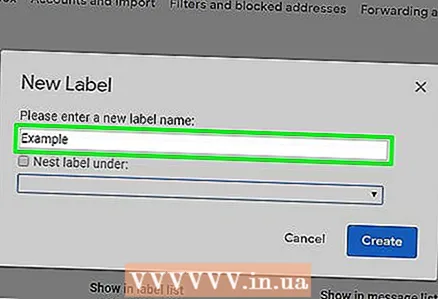 6 Enter a name for the shortcut. Do this in the line at the top of the pop-up window.
 - To place a shortcut under another shortcut (like a folder within another folder), select the checkbox next to "Place shortcut under", and then select the shortcut from the menu.
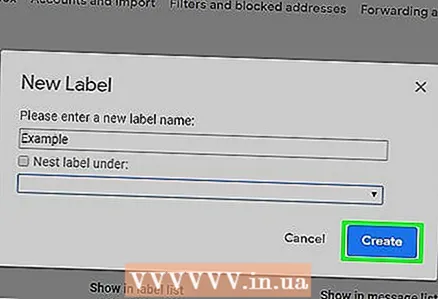 7 Click on Create. It's near the bottom of the window.
 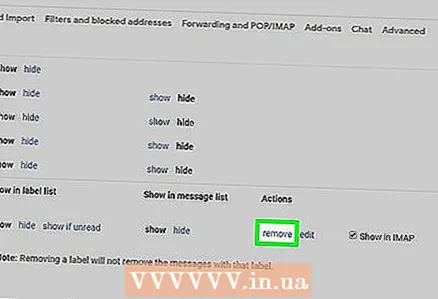 8 Remove all shortcuts (if needed). For this:
 - Find the shortcut you want to remove in the Shortcuts section.
- Click Delete to the right of the shortcut.
- Click Remove when prompted.
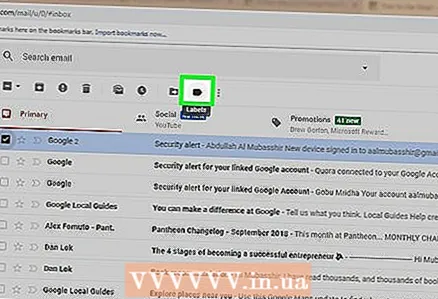 9 Add emails to the label. Select the letters you want, click "Labels"
  and select the appropriate shortcut from the menu.
 - To create a shortcut, choose New from the menu and enter a name for the shortcut.
 10 View the contents of the shortcut. To do this, click on the shortcut name in the left pane of your Inbox.
 - To open a list of all shortcuts, you may have to click More and then scroll down the contents of the left pane.
- To remove a tagged email from your Inbox, but not from your mailbox, archive the email.
Part 4 of 5: How to manage your contacts
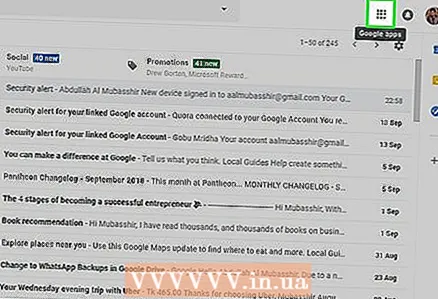 1 Click on "Applications"
  . It's in the upper-right corner of your Gmail inbox. A menu full of icons will open.
 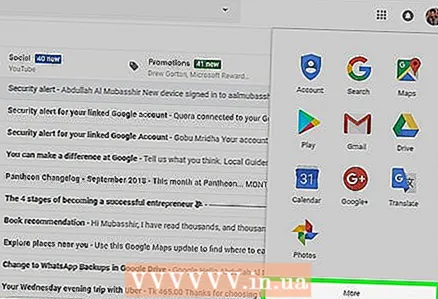 2 Click on More. It's at the bottom of the menu. The second page of icons will open.
 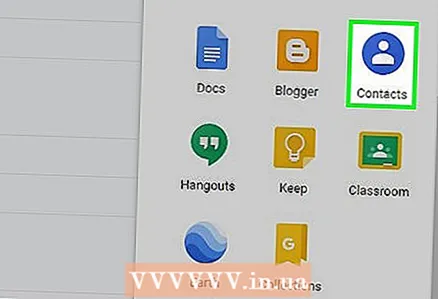 3 Click on Contacts. This option is marked with a white silhouette of a person on a blue background. The Gmail contacts page will open.
 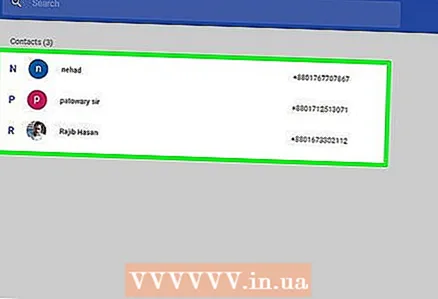 4 Review your contacts. Several contacts may appear here, depending on whether you've used Gmail before.
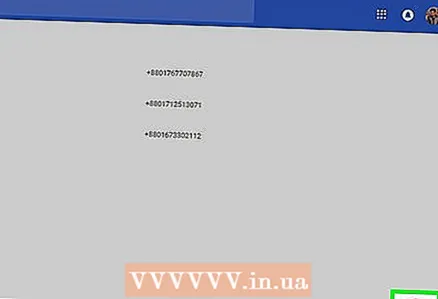
 - Contacts can include only names or complete information such as names, addresses, phone numbers, and email addresses.
 5 Click "Add"
  . It's in the lower-right corner of the window. A pop-up window will appear.
 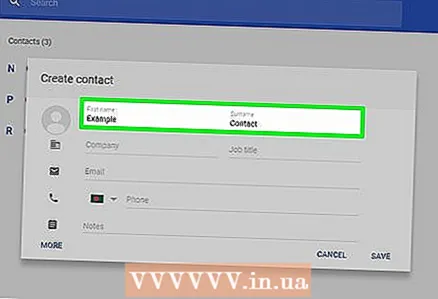 6 Enter the contact's first and last name. Do this in the First Name and Last Name text boxes at the top of the pop-up window.
 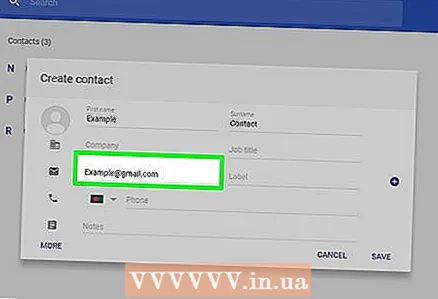 7 Enter the email address of the contact. Do this in the Email text box.
 - If you want, add additional information such as a phone number or contact photo.
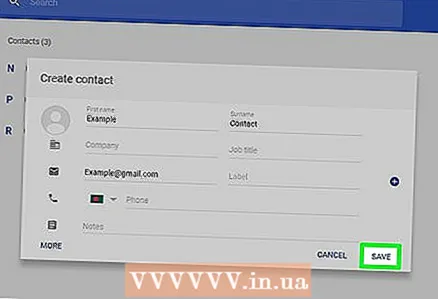 8 Click on Save. It's in the lower-right corner of the window. The contact will be saved and added to your account's contact list.
 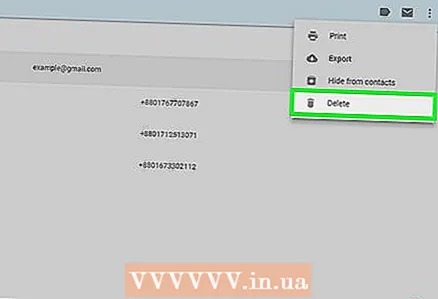 9 Delete the contact. For this:
 - Hover over the contact's name and select the check box to the left of the name.
- Click "⋮" in the upper right corner of the page.
- Click "Delete" in the menu.
- Click Remove when prompted.
Part 5 of 5: How to use Gmail on a mobile device
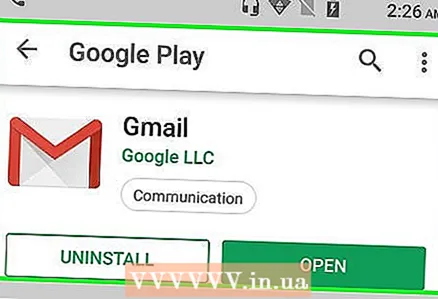 1 Install the Gmail app. If this app is not available on your mobile device, open the App Store
  (iPhone) or Play Store
  (Android), search for Gmail and install it.
 - Gmail is free to install and use, so don't pay for any app that claims to be Gmail.
- Typically, Gmail comes preinstalled on Android mobile devices.
 2 Start Gmail. Click the red M icon on a white background. Your Gmail inbox will open if you are already logged in.
 - If you are not already signed in to your account, enter your email address and password, or simply select your Gmail account.
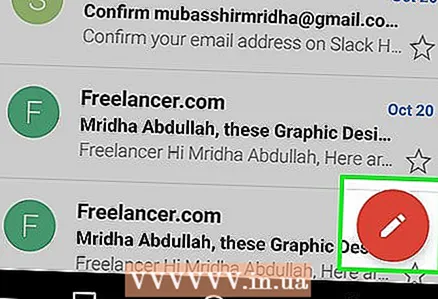 3 Send a letter. Although account management is limited on mobile devices, Gmail can still be used to send emails. To send an email, click "Create"
  , fill out the form that opens and click "Submit"
  .
. 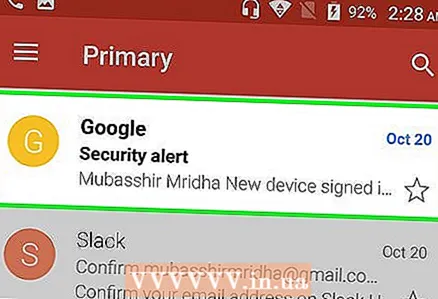 4 Open the letter. To do this, tap it.
 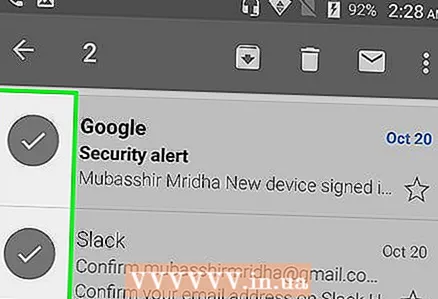 5 Select multiple emails (if needed). If you want to select multiple emails to archive or delete, tap and hold one email until a checkmark appears to the left of it, and then tap the other emails you want to select.
 - When a checkmark appears next to the first letter, you do not need to hold other letters - just tap each of them.
- To deselect, tap Back
 in the upper left corner of the screen.
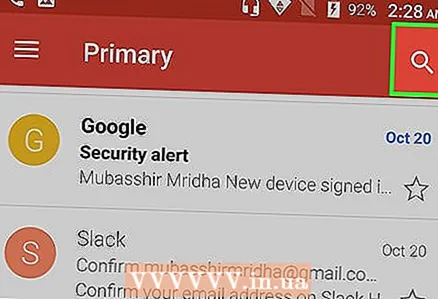 6 Find the letter. To find an email by keyword, sender or subject, click Search
  in the upper right corner of the screen, and then enter your query.
 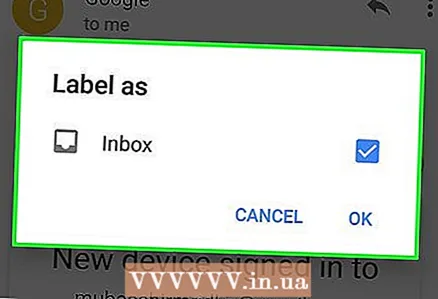 7 Add emails to labels. Like on a computer, on a mobile device, you can add letters to shortcuts.
 - Unlike a computer, you cannot create shortcuts on a mobile device.
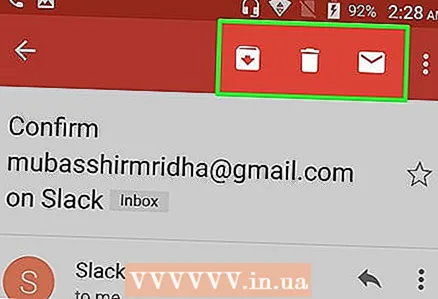 8 Manage letters. On mobile devices, there are several ways to manage your Gmail inbox:
 - Archive - select letters and click the down arrow icon at the top of the screen.
- Delete - select letters and click "Cart" at the top of the screen.
- Mark as read - select letters that you haven't opened yet, and then click the open envelope icon at the top of the screen.
- Mark as spam - select a spam email, press "⋯" (iPhone) or "⋮" (Android), select "Report Spam" from the menu and click "Report Spam and Unsubscribe" if this option is available (if not, just click " Report Spam ").
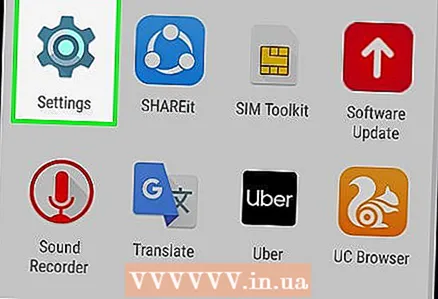 9 Turn on Gmail notifications. To be notified of every new Gmail email:
 - iPhone - run the application "Settings"
 , tap Notifications, scroll down, tap Gmail, and tap the white slider next to Allow Notifications (if the slider is green, notifications are already on).
 - Android - run the application "Settings"
 , tap Apps, scroll down, tap Gmail, tap Notifications, and tap the white slider next to Enable (if the slider is blue, notifications are already on).
- iPhone - run the application "Settings"
Tips
- In the online version of Gmail, you can exchange instant messages, that is, use a chat.
- Using a Gmail account, you can log in to any Google service. Also, some services of other companies can be used through your Gmail account - for this, during authorization, select the "Sign in with Google" (or similar) option.
- If you are using the desktop version of Gmail or the mobile version on iPhone, you can recall a sent email within five seconds of sending.
Warnings
- If the Gmail app is preinstalled on your Android mobile device, you won't be able to uninstall it.


