Author:
Roger Morrison
Date Of Creation:
22 September 2021
Update Date:
1 July 2024

Content
- To step
- Part 1 of 3: Examining your family history
- Part 2 of 3: Preparing to draw
- Part 3 of 3: Drawing the family tree
- Tips
Mapping your ancestry in a family tree is a great way to help children understand their roots and learn about great-grandparents and other family members they may never have met. For adults, it can be an opportunity to commemorate deceased relatives and create a beautiful representation of family history. Read on to find out how to create a family tree.
To step
Part 1 of 3: Examining your family history
 Learn about your family history. Some people are well versed in their family history, while others don't know much about their grandparents, great-grandparents, nieces and nephews, and other relatives. Before creating a family tree, you need to gather the necessary information by doing research in the following ways:
 - Ask family members for information. If you're making a family tree for a school assignment, your mom and dad can probably tell you everything you need to know about your family. For in-depth family tree research, consider searching a genealogical database. On websites such as WieWasWie you can find information about long-lost relatives whose existence you may not have been aware of.
- Be thorough. A family tree is less useful if you have accidentally forgotten someone. It is best to use multiple information sources so that you can be sure that the information you have found is accurate.
 Determine how far back in time you want to go. It is interesting to trace your family history and go back in time as far as possible, but when drawing a family tree it is not practical to include information from more than a few generations ago. You are limited by the size of the paper you use, because you have to be able to put all names on one page.
 - Many people choose to go back to their great-great-grandparents or great-grandparents and their siblings. These are people you, your parents or your grandparents have met and with whom you are more closely related than you are with other relatives.
- If you come from a large family with many great-aunts, great-uncle, nephews, nieces, and so on, you may have to stop with a more recent generation so that all family members can fit on one page. If you come from a smaller family, you can probably extend your family tree to a few generations further back.
Part 2 of 3: Preparing to draw
 Choose paper and drawing materials. Because you take the time to research your family history and draw your family tree, you should choose good quality drawing materials so that you can properly present your information.
 - Art supply stores sell large-sized single sheets of paper. Choose sturdy paper that looks attractive, such as watercolor paper.
- An easier option might be a piece of sturdy cardboard. You can also buy single sheets of these and you can also choose from different colors. You can buy sheets of cardboard at office supply stores or craft stores.
- First sketch your family tree with pencil and then trace your drawing with a nice fountain pen or felt-tip pen.
 Determine what shape your family tree will take. Some family trees are drawn in the shape of a real tree with a branch for each branch of the family. Other family trees are drawn in the form of a family diagram. In the end, the family tree looks a bit like a tree, but the names of the family members are not actually placed in a drawing of a tree. Use the style your teacher has specified or just choose the style you like best.
Part 3 of 3: Drawing the family tree
 Draw the family tree with light pencil lines. Think about what your family tree will look like and how much space you need to write down each name and draw the necessary connections. If you draw in pencil, you can redraw a branch if you don't have enough space.
 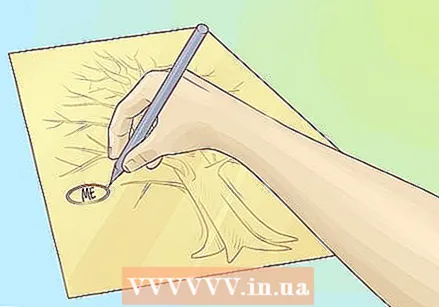 Write down your name. Since this is your family tree, the tree starts with you. Write your name in a place on the paper with enough space around it to add all the other names.
 - The place where you write your name is the beginning of the family tree. If you write your name at the bottom of the paper, the branches will stick up. You can write your name at the top of the page so the rest of the tree runs down, or write your name on the side of the paper and let the tree grow horizontally.
- If you decide to draw a real tree, draw the outline of the tree with light pencil lines and write your name where you prefer.
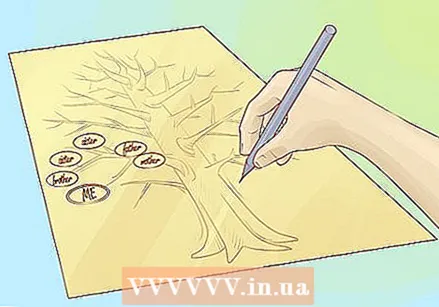 Add your parents, siblings. Write your parents' names directly above or below your own name, depending on the direction you want to extend the tree. Write the names of your siblings on the same level as your own name so that they derive from the names of your parents.
 - If you and your siblings have partners or children, include those too. You write the names of partners directly next to those of their partners and the names of the children you write below those of the parents. If you want, you can draw lines to connect the parents with their children.
- Adapt the family tree to your family. If you have one parent or more than two parents, please include their names as well. You can let your creativity run wild when drawing to add your stepparents, siblings as well as everyone else who is part of your family. The most important aspect of drawing a family tree is to make sure you have not forgotten anyone.
- To keep your family tree organized, you should use a regular pattern for the order in which you write siblings. For example, start on the left with the oldest child and then write the names of all subsequent children to the right, or vice versa. In any case, make sure that you use your chosen order consistently throughout the family tree.
 Add your aunts, uncles, nephews, nieces and grandparents. This is where the tree splits into several branches. On your father's side, write the names of his siblings and their partners, as well as their children (your first cousins). Write the names of your father's parents on the next level, drawing lines from their names to each of their children. Do the same for your mom's family, adding all the names of your maternal relatives.
  Add more generations. Go ahead and add the names of your Great Aunts and Great Uncles, as well as their partners and children. Then write the names of your great-grandparents in the family tree. Continue until you have made your family tree as extensive as you want.
  Expand your family tree with more details. Trace the tree with black or colored ink to make the names and outline stand out. You can add decorations and other details to make the family tree more interesting. Here are some examples:
 - Use different shapes for men and women. For example, you can use ovals for the women and rectangles for the men, or whatever other shape you want to use. This way, someone viewing your family tree can see at a glance the gender of the different people.
- Use dotted lines for divorced partners. This way, you can still portray the biological relationship between parents and their children, even if the parents are no longer married.
- Add dates of birth and (if applicable) death dates. This way you can add a lot of information to your family tree and make it interesting for your friends and other family members.
- Add more biographical information for each person, such as place of birth, maiden name, full first names, and so on.
Tips
- An easy way to draw your family tree is to use a free tool on the internet.


