Author:
Florence Bailey
Date Of Creation:
22 March 2021
Update Date:
1 July 2024
Content
- Steps
- Part 1 of 3: Choosing the Right Workplace and Varnish
- Part 2 of 3: Preparing wood for varnishing
- Part 3 of 3: Coating wood with varnish
- Tips
- Warnings
- What do you need
- Additional articles
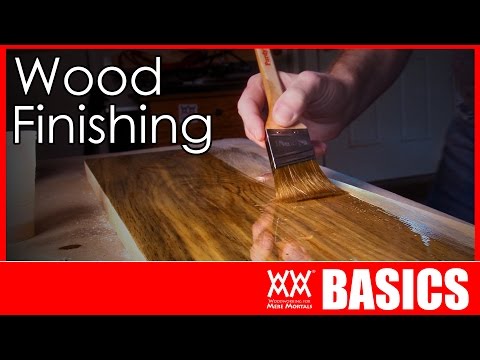
Coating wood with varnish not only preserves it, but also protects it from scratches and stains. Lacquer also adorns woodwork, highlighting the individual texture and color. You can also buy a tinted varnish to change the color of the wood. Follow these steps to apply varnish to wood furniture.
Steps
Part 1 of 3: Choosing the Right Workplace and Varnish
 1 Choose a well-lit, well-ventilated area. The strong and bright light will help you time to notice imperfections such as bubbles, brush marks, dents and bald spots. Good ventilation is also important, as many solvents and varnishes have a strong odor, which can lead to dizziness and nausea.
 - If the smell is too strong for you, open a window or turn on a fan.
 2 Choose an area free of dust and dirt. The work area must be very clean and not dusty. You can sweep or vacuum the area to prevent dust from settling on the product and deteriorating.
 - If you work outdoors, avoid windy weather, otherwise the smallest dust particles can settle on the wet varnish and ruin the appearance of your product.
 3 Pay attention to temperature and humidity. The temperature in the room where you paint should be around 21 ° C - 26 ° C. If the room is hot, the varnish will dry out too quickly, and air bubbles will form on the surface of the product. If the room is too cold, the varnish will dry too slowly, and the smallest dust particles will have a great chance to settle on the wet varnish.
  4 Wear suitable protection. When varnishing wood, you will be dealing with chemicals that can be dangerous if they come into contact with your skin, and they can also ruin your clothes. Before you start varnishing the wood, wear clothes that you will not mind getting dirty or ruined, as well as safety glasses and gloves. You can also wear a dust mask or respirator.
 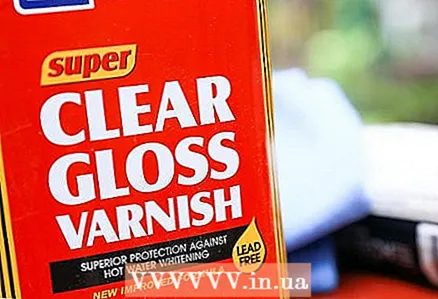 5 Find the right varnish. There are many different types of varnish, each with their own advantages and disadvantages. Some varnishes are easy to apply, while others are better suited for certain purposes. Choose the one that best suits your task and your preferences.
 - Oil based varnishes, including polyurethane varnishes, are very durable. They usually need to be diluted with a solvent such as turpentine. They also have a very strong odor; therefore, such varnishes should be used in well-ventilated areas. Brushes after use with such varnishes must be well cleaned so that they serve longer.
- Acrylic and water based varnishes have a low odor and are usually mixed with water. They dry faster than oil based varnishes, and they are not as durable. After using this varnish, brushes can be washed in soap and water.
- Spray varnishes are easy to use. They do not require brushes or solvents. These varnishes should be used in well-ventilated areas, as they have a strong odor that can cause dizziness and nausea.
- Varnishes can be both transparent and colored. Clear varnishes accentuate the naturalness of the wood, while colored varnishes act as paint, giving the wood a certain shade.
Part 2 of 3: Preparing wood for varnishing
 1 Remove the old coat if desired. You can apply the varnish either to the already painted surface to fix the paint, or to clean, unpainted wood. Old varnish can be removed in several ways, such as thinner or sandpaper.
 - If your furniture has never been painted, or you want to keep the original paint, skip to step 5.
 2 It is better to remove old varnish with a thinner. Remove varnish and old paint. By applying the solvent with a brush. Leave the solvent on the wood according to the manufacturer's directions. Scrape off the varnish with a rounded trowel. Do not allow the paint stripper to dry.
 - Be sure to remove any residual solvent. How you remove solvent residues depends on the solvent itself, but most solvents can be removed with turpentine or water.
 3 You can remove old varnish with sandpaper, an emery bar, or a sander. Sandpaper and sticks are best used on uneven or curved surfaces such as doorknobs and chair legs. Sanders are convenient to use on flat, flat surfaces such as a table top. Start with a medium grit, such as 150 grit, then work on to finer grit, such as 180.
 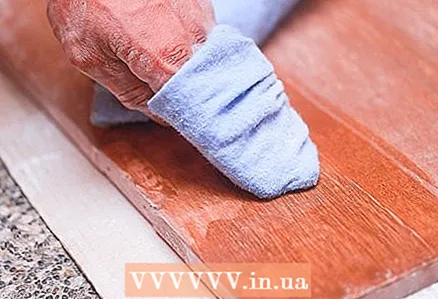 4 You can also remove varnish with paint thinner. The thinner can be used in the same way as the solvent. Dampen an old cloth or napkin with thinner, rub the surface with the old varnish. As soon as the old varnish starts to come off, remove it with a putty knife.
 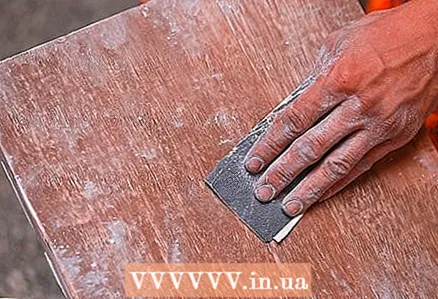 5 Buff the wood with a fine sandpaper. Sandpaper not only removes varnish residues, but also evens out rough and uneven surfaces. Use 180 to 220 grit sandpaper, sand along the grain.
 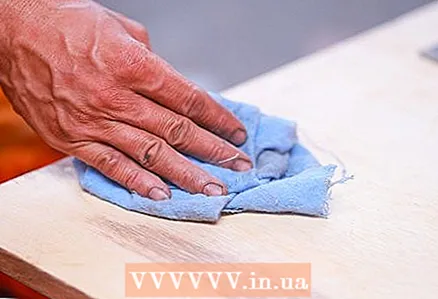 6 Clean sanded wood and work surface with a damp cloth and let dry. Your work area must be clean, free from dirt and dust, before you start applying varnish. Wipe the product with an important cloth.
  7 Prime the wood. Some types of wood, such as oak, need a primer. You can find a primer that matches the natural color of the wood, or use a colored primer that matches the color of the varnish you will be covering the wood with.
 - You can use a contrasting primer to highlight the texture of the wood, and a primer of a similar color to tone down the texture of the wood.
Part 3 of 3: Coating wood with varnish
 1 Prepare varnish for the first coat, if necessary. Some types of varnishes, for example, in the form of a spray, do not require preliminary preparation of the wood. Some varnishes need to be thinned for the first coat. This helps seal the wood and prepares it for the next coats. Subsequent layers do not need to be thinned.
 - If you are using an oil-based varnish, thin it with a paint thinner such as turpentine. Dilute the varnish 1: 1 (one part varnish to one part thinner).
- If you are using acrylic or water-based varnish, thin it with water. Dilute the varnish 1: 1 (one part varnish to one part water).
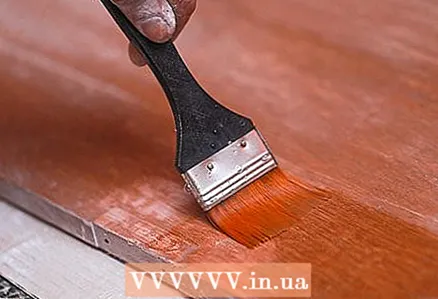
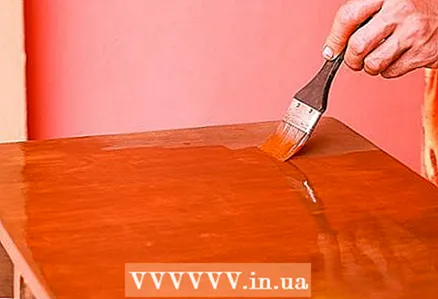
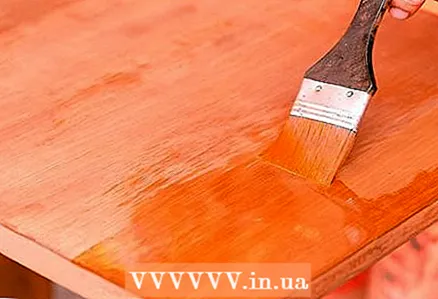 2 Apply the first coat of thinned varnish and let it dry. Use a flat brush or foam roller to apply varnish to the wood. Apply the varnish in long, even strokes along the grain of the wood. Let the first coat dry for 24 hours.
 - If you use varnish in the form of a spray, keep the can of varnish at a distance of 15-20 cm from the surface, apply in a thin even layer. Let the varnish dry according to the manufacturer's recommendations.
 3 Sand the first layer and wipe it off with a damp cloth. After you have applied the first layer, it needs to be smoothed out. You can sand the surface with 280 grit sandpaper, then wipe off any remaining dust and dirt with a dry cloth.
 - Wipe down your work area as well to remove dust and sanding residue.
- Remember to clean your brush in a solvent (if you are using an oil based varnish) or water (if you are using a water based varnish).
 4 Apply the next coat of varnish and let it dry. Use a clean brush or new foam roller and apply varnish to the wood. Apply varnish along the grain of the wood. Do not thin the varnish for this coat. Wait 24 hours for the varnish to dry.
 - If using a spray varnish, apply another coat. Hold the can of varnish at a distance of 15-20 cm from the surface, apply the varnish in a thin even layer. If you apply too much polish, you may have drops and smudges.
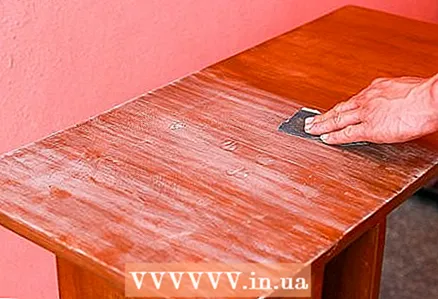
 5 Sand off the second coat and wipe off with a clean, damp cloth. When the second coat is dry, sand it with a fine sandpaper such as 320 grit. Allow the varnish to dry for 24 hours, do not forget to clean the work surface from the remains of dust formed during sanding.
 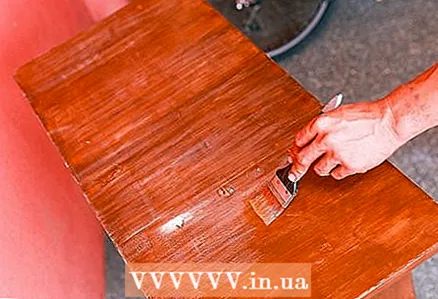 6 Continue applying layers of varnish and sanding. Apply 2 or 3 coats of varnish. Remember that the varnish must dry well before the next application, after sanding, remove the dust well before applying a new coat. Always apply varnish along the grain of the wood. Do not sand the last coat of varnish.
 - You can sand the varnish with 320 grit sandpaper, or you can go to 400 grit paper.
- For best results, wait 48 hours before applying the last coat of varnish.
 7 Wait until the varnish is completely hardened. It usually takes some time for the varnish to harden properly. To prevent the varnish from collapsing, leave the product in place and do not move it. Some types of varnish harden in 24 - 48 hours, some types take from 5 to 7 days. Read the instructions on the varnish can for the drying and hardening time of the specific varnish.
Tips
- Do not shake the varnish jar, unless it is a spray, otherwise bubbles will form in the varnish.
- Spraying the floor of your work area with water or placing wet sawdust on it will help limit the amount of dust that rises upward during varnishing.
- If you add a little washing baking soda to the water while preparing the wood for the varnish, it will help remove more dirt.
- If your area is humid, there are varnishes that dry well in a humid environment.
- Do not use steel wool to sand wood after applying varnish coats. Steel fibers can scratch the coating.
- If you're unsure whether to add pigment to your varnish, wet your wood object. This is the color your product will be when you cover it with varnish. If the color is too light, add coloring pigment to the varnish to darken the shade.
- Do not use cold varnish. If the varnish is not at room temperature or warmer, warm it up by placing the can in a bucket of hot water.
Warnings
- Remember good ventilation. Many solvents and varnishes have a strong odor that can cause dizziness and nausea.
- Keep varnish away from fire. Wood paints and varnishes are flammable.
- Consider proper protection, wear safety glasses, gloves and a mask.
- Do not mix different wood varnishes with each other. This can cause negative and dangerous chemical reactions.
What do you need
- Paint stripper or paint thinner (optional)
- Sandpaper (150 grit to 320 grit, 400 grit optional)
- Turpentine
- Wood varnish
- Brushes and / or foam rollers (optional)
- Laundry soda (optional)
- Dust mask, respirator and gloves (optional)
- Wet cloth
Additional articles
 How to varnish furniture How to make rolls
  How to play UNO
  How to Learn Morse Code How to Draw Fashion Sketches
  How to clean and polish shells How to rotate a pencil around your thumb How to make shorts from old jeans
  How to relieve boredom in summer How to make papier-mâché
  How to create an electromagnetic pulse
  How to dye fabric with coffee
  How to polish stones
  How to kill time


