Author:
Bobbie Johnson
Date Of Creation:
2 April 2021
Update Date:
1 July 2024
Content
- Steps
- Part 1 of 2: Getting Started
- Part 2 of 2: Faucet Repair
- Mixer with separate taps
- Ball mixer
- Cartridge mixer
- Mixer with ceramic discs
- Tips
- What do you need
The unpleasant sound of dripping drops from a leaking mixer can cause high water bills and can be nerve-racking. Fortunately, if you can determine the type of your faucet and get the tools you need to get it going, you can easily fix it yourself. Why pay a plumber when you can fix a leaking faucet yourself? To fix one of the most common types of faucet leaks, follow the instructions below.
Steps
Part 1 of 2: Getting Started
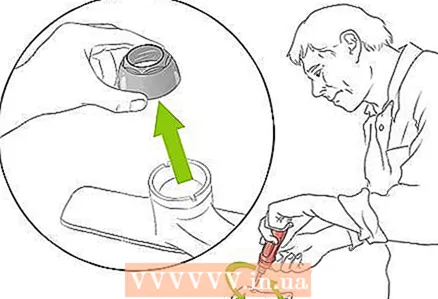
 1 Turn off the water supply to your faucet. Find pipes under the sink that go up. These pipes must have valves that can be turned, thereby shutting off the water supply to the sink. Turn clockwise to disengage.
 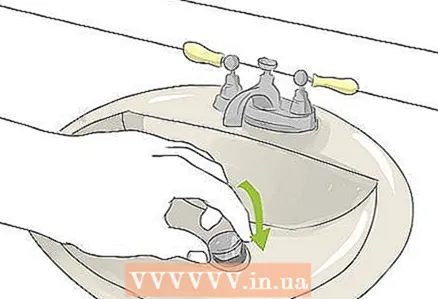 2 Plug the drain. To do this, use a stopper, if provided, or a rag. Nothing ruins your day as quickly as a bolt or washer caught in the drain.
 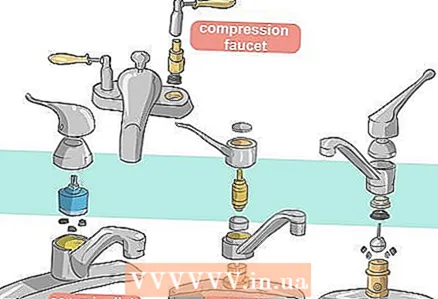 3 Determine your mixer type. ’Mixer with separate taps has two valves, one for hot and one for cold water, and is most easily identified by its appearance.The other three types of faucets have one moveable center arm that can be rotated to adjust the temperature of the water. You may need to disassemble your faucet to find out which type it is, as the internal mechanisms at the base of the lever are different:
 - IN ball mixer the ball is used.
- IN cartridge mixer the cartridge is in use. Cartridge materials vary, but there is often a decorative cap on the handle.
- IN ceramic mixers a ceramic cylinder is used.
Part 2 of 2: Faucet Repair
Mixer with separate taps
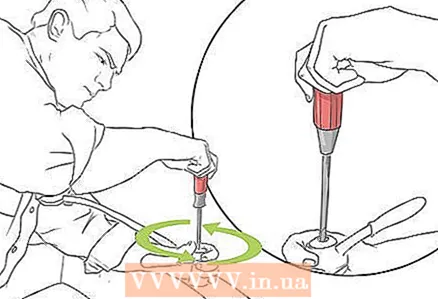 1 Remove both valves. If necessary, remove the decorative caps (which usually say "hot" and "cold" - hot and cold), unscrew with a screwdriver and remove the valves.
  2 Use a wrench to remove the gland nut. Under it, you will find a crane box that rests on an O-ring on the landing washer. The seating washer is usually made of rubber, which can wear out over time. If your mixer is leaking, it is most likely a seat washer.
 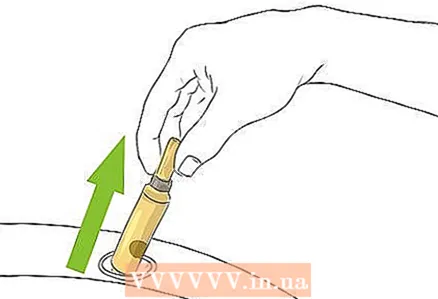 3 Remove the crane box. You will see a thinner O-ring and a thicker seating washer.
 - If the valves are leaking (but not the tap itself), replace the O-ring. Take your old one with you to the hardware store and use it as a reference to find a replacement.
 4 Remove the seat washer. It is held in place by an inverted brass bolt.
 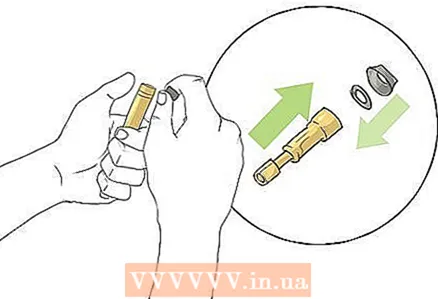 5 Replace the seat washer. Since these washers come in different sizes, you may need to take it with you to your plumbing store to find a suitable replacement. Apply mixer grease to the spare part before installing.
  6 Reinstall both valves. All small leaks should disappear by now.
Ball mixer
 1 Buy a spare parts kit. Ball mixers have few parts that can be replaced, and some will require special tools to replace them. You do not need to replace the entire mixer, only the distribution mechanism. Everything you need, including tools, should be included in this type of kit, which can be purchased at an affordable price from the plumbing department of repair shops.
  2 Start by unscrewing and removing the lever. Raise the lever and set it aside.
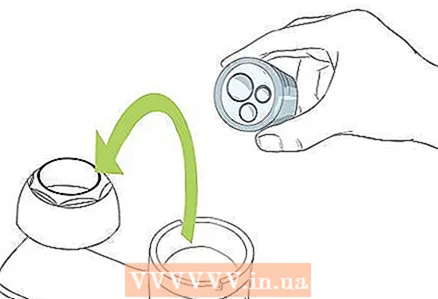
  3 Using pliers, remove the plug and pin. Loosen the switchgear with the tool provided in the repair kit specifically for this purpose. Remove the switchgear, washer and ball.
 - It will be like a hinge joint in the human body - a movable (usually white) rubber ball fits into the socket, stopping or letting in the flow of water.
 4 Remove the intake valves and springs. To do this, you will need to get to the mechanism itself, which can be done using pliers.
  5 Replace O-rings. Cut off old ones and lubricate new ones with mixer grease before installing.
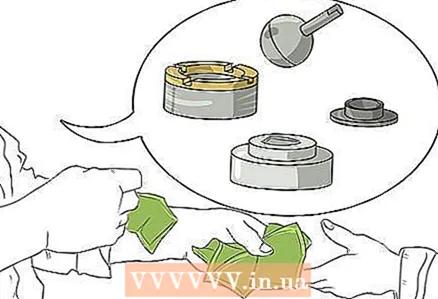
  6 Install new springs, valve seats and valve washers. All of this should be included in your repair kit and should provide a reverse process to the one you just completed.
 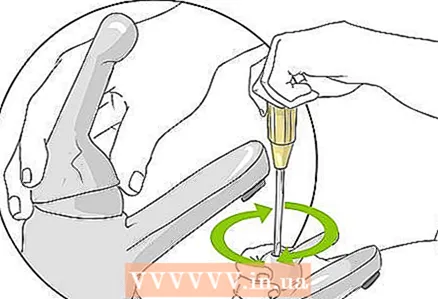 7 Replace the handle. The leak should stop.
Cartridge mixer
 1 Remove the handle. If necessary, remove the decorative cap, unscrew the bolt and remove the handle by tilting it back.
  2 Remove the retaining clip if necessary. It is a threaded round (usually plastic) that can hold the cartridge in place and can be removed with pliers.
  3 Pull the cartridge straight out. This is the position in which the cartridge is located when water is supplied with maximum pressure.
  4 Remove the mixer head. Set it aside and find the o-rings.
 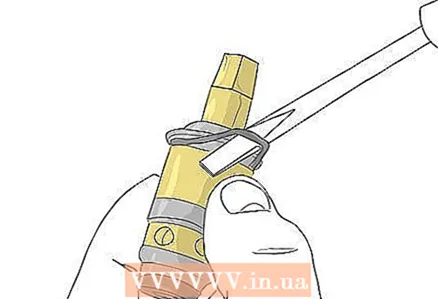 5 Replace O-rings. Cut off old rings with a utility knife, lubricate new ones with mixer grease before installing.
 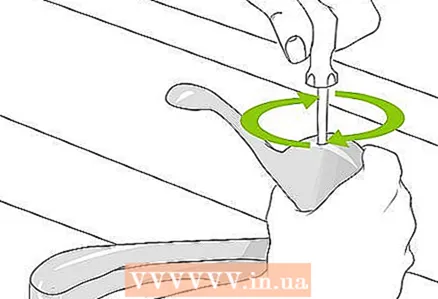 6 Replace the handle. The leak should stop.
Mixer with ceramic discs
 1 Remove the decorative shield. After unscrewing and removing the handle, find the shield, which is located directly under the handle and is usually made of metal.
  2 Unscrew and remove the disc cylinder. You will see some neoprene seals on the underside.
  3 Pull out the plugs and clean the cylinders. Vinegar works well for this, especially if your tap water is hard. Soak them for a few hours to remove build-up and see if they can be reused.
  4 Replace the seals if necessary. If they are leaky, frayed, looking thinner, or have other signs of wear, or if you just want to play it safe, bring them to a repair shop and find the exact replacement.
  5 Replace the handle and very slow turn on the water. Excessive pressure can lead to cracking of the ceramic disc.
Tips
- Your faucet may not look the same as one of the models above (for example, the handle of a ball faucet can be placed on the side for more elegance). However, the internal mechanism must be the same.
- If you notice limescale on the mixer handle bar, clean it with a special cleaner. This plaque can also cause the mixer to leak.
What do you need
For all methods
- Phillips (+) and straight (-) screwdrivers even if your faucet uses Phillips head screws, a flat head screwdriver may be needed to use it as a lever
- Mixer grease (temperature resistant and non-toxic so that it can be used with hot drinking water)
- Pliers
- Wrench
Mixer with separate taps
- Spare support nuts
- Spare O-rings (if needed)
Ball mixer
- Ball Mixer Repair Kit
Cartridge mixer
- Spare O-rings
Mixer with ceramic discs
- Spare seals (if needed)
- Vinegar


