Author:
Clyde Lopez
Date Of Creation:
22 June 2021
Update Date:
1 July 2024

Content
- Steps
- Method 1 of 3: Using the Settings app
- Method 2 of 3: Using Recovery Mode
- Method 3 of 3: How to back up your device
- Tips
- Warnings
In this article, we are going to show you how to erase all information from your Android device and restore to factory settings. As this process will erase all data, we recommend that you back up your device first.
Steps
Method 1 of 3: Using the Settings app
 1 Back up your device. Do this to preserve important data stored on your device.
 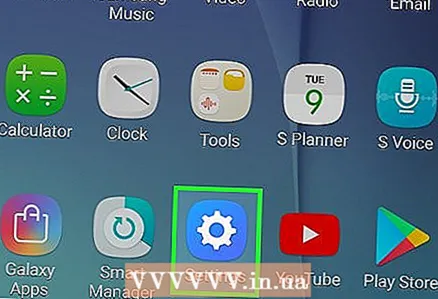 2 Launch the Settings app. Swipe down from the top of the screen, and then tap the Settings app icon
  which looks like a gear and is in the upper right corner of the menu.
 - On some Android devices, you need to swipe the screen with two fingers.
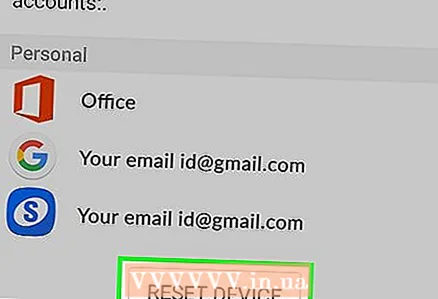
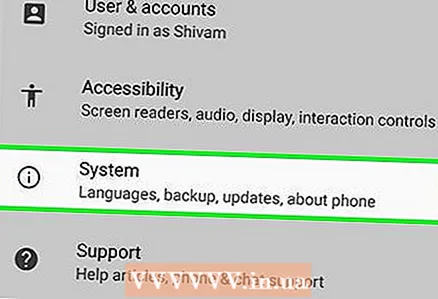 3 Scroll down and tap System. It's near the bottom of the settings page.
 - On Samsung Galaxy, tap General Settings.
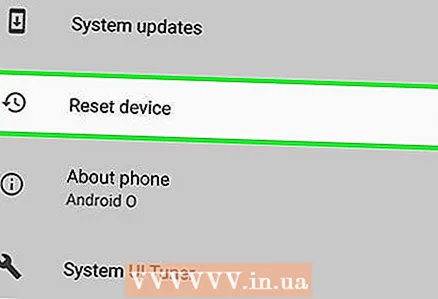 4 Tap Reset. This option is on the System (or General Settings) page.
 - On some devices, you need to click "Reset settings".
 5 Click on Reset. It's at the bottom of the page.
 - On some devices, you may need to tap Master Reset.
 6 Scroll down and tap Reset. It's at the bottom of the page.
 - On some devices, you need to click "Reset settings".
 7 Enter your PIN. This is the code used to unlock the device.
 - You may need to click Continue.
- If you use a pattern to unlock your device, enter it.
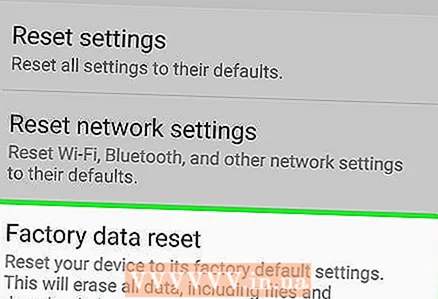
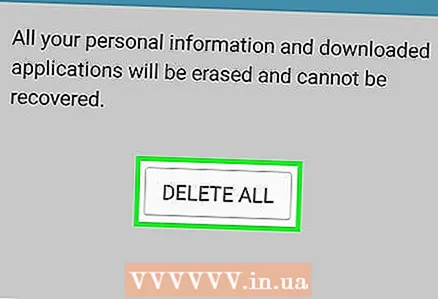 8 Click on Erase everything. This option is located at the bottom of the screen. The factory reset process will start.
 - On Samsung Galaxy, tap Remove All.
- The factory reset process will take about 30 minutes.
Method 2 of 3: Using Recovery Mode
 1 Remember when to use recovery mode. Recovery Mode is a built-in menu that can be accessed when the device won't turn on, certain features don't work, or the device cannot be unlocked. If you are unable to reset your device through the Settings app, use recovery mode.
 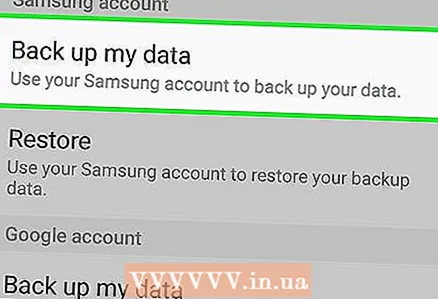 2 Back up your device, if possible. If you can't reset your device using the Settings app, but you can use the backup function, back up your device to avoid losing your photos, videos, apps, and settings.
 - If you decide to use recovery mode because your device won't turn on, you probably won't be able to create a backup.
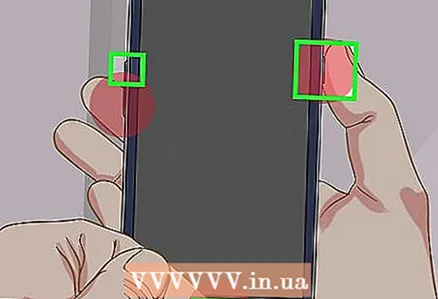 3 Define a combination of buttons to switch to recovery mode. It depends on the device model:
 - Nexus - volume up button, volume down button and power button.
- Samsung - volume up button, home button and power button.
- Moto X - volume down button, home button and power button.
- On other Android devices, you need to press the volume down button and the home button to enter recovery mode. If that doesn't work, try pressing the Home button and the Power button.
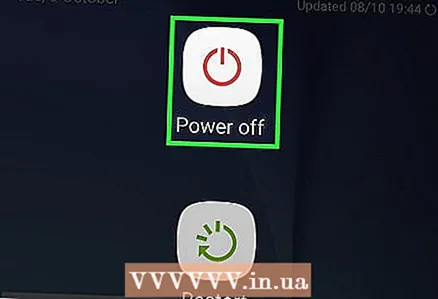 4 Turn off the device. To do this, press and hold the power button, and then tap “Power off” on the screen. You may need to click Turn Off again to confirm your decision.
 - On some devices, you need to enter a password first.
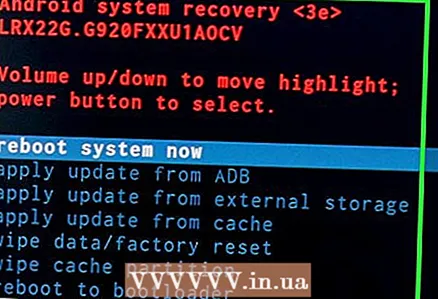
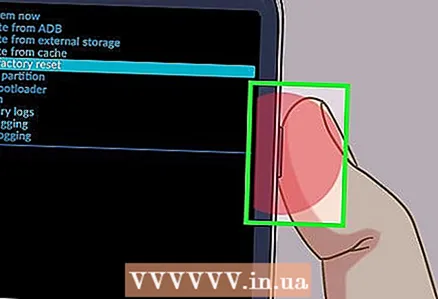
 5 Press and hold the key combination to enter recovery mode. The device will boot into recovery mode.
 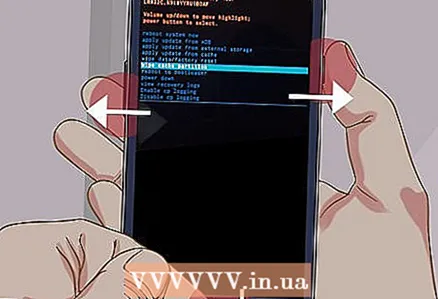 6 Release the buttons when prompted. When the Android message or logo appears in the upper left corner of the screen, release the buttons.
 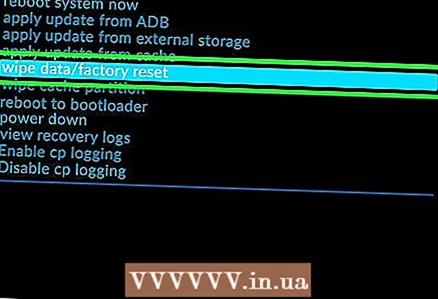 7 Select an option Erase data and factory reset. Do this with the volume down button.
 - In recovery mode, the volume down button works like a down arrow button, and the volume up button works like an up arrow button.
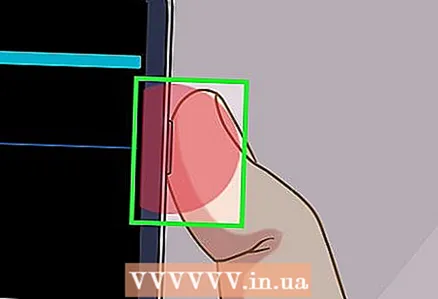
 8 Press the power button. The Erase Data & Reset Settings menu opens.
 - The power button in recovery mode works like the Enter button.
 9 Scroll down and select an option Yes. It's in the middle of the menu.
 - On some devices, you need to select the "Yes, erase all user data" option.
 10 Press the power button. This will confirm your decision and start the factory reset process.
 - This process will take about 30 minutes.
Method 3 of 3: How to back up your device
 1 Back up your photos and videos. You can do this in the Google Photos app:
 - Launch the Photos app, which has an icon that looks like a multicolored daisy.
- Click "☰" in the upper left corner of the screen.
- Choose Preferences from the pop-up menu.
- Click Back Up & Sync.
- Tap the white slider next to Backup & Sync. If the slider is blue, your photos and videos are already saved to your Google account.
 2 Launch the Settings app. Swipe down from the top of the screen, and then tap the Settings app icon which looks like a gear and is in the upper right corner of the menu.
 - On some Android devices, you need to swipe the screen with two fingers.
 3 Scroll down and tap System. It's near the bottom of the settings page.
 - On Samsung Galaxy, tap Cloud & Accounts.
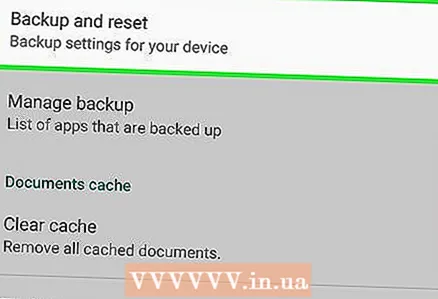 4 Tap Backup. This option is in the center of the screen.
 - On Samsung Galaxy, tap Backup & Restore> Google Account.
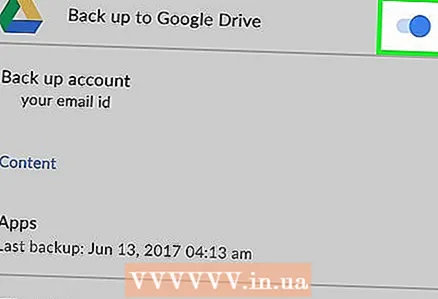 5 Click on the white slider next to Upload to Google Drive
  . The slider turns blue
  - this means that your Google account will be backed up to Google Drive.
 - If the slider is already blue, a copy of your Google Account is already being written to Google Drive.
 6 Back up apps and settings to Samsung Galaxy. If you have a Samsung Galaxy, back up your apps and settings to the Samsung cloud:
 - Click the Back button on the Google Account page.
- Click Back Up Data at the top of the page.
- Click Create at the bottom of the page.
Tips
- Resetting your Android device can fix a lot of problems (like slowdowns and freezes). It will also help you install an update that doesn't want to download.
Warnings
- If you reset the settings without creating a backup, the deleted information can only be returned using data recovery services.
- Resetting your settings will not permanently erase your data. If you want to discard a device, physically destroy it, not just reset it.


