Author:
Roger Morrison
Date Of Creation:
25 September 2021
Update Date:
1 July 2024

Content
- To step
- Method 1 of 5: Using PayPal
- Method 2 of 5: Using Apple Pay or Android Pay
- Method 3 of 5: Pay in cash
- Method 4 of 5: Using a debit card
- Method 5 of 5: Using Paytm Wallet or Airtel Money
- Tips
It's a common misconception that you must have a credit card to use Uber. If you have a checking account, you can link it to your PayPal account and use it to pay for your rides (in participating countries). Uber also accepts many different digital wallets, such as Android Pay, Google Pay, and Paytm. In some Asian and African countries, Uber even accepts cash! Learn how to sign up for Uber without a credit card and how to add additional payment methods to your Uber account.
To step
Method 1 of 5: Using PayPal
 Make sure Uber accepts PayPal wherever you are. You can use your PayPal account to sign up for and drive with Uber, as long as it is available in your country. With PayPal, you can use your bank account to pay for your Uber rides, so you don't need a credit card.
  Sign up for a PayPal account. To use PayPal as a payment method with Uber, you must have a valid PayPal account with an associated payment method. Check out How to Use PayPal to Send Money for help signing up with PayPal and linking your bank account.
 - Linking your bank account takes a few days because your bank account must be verified.
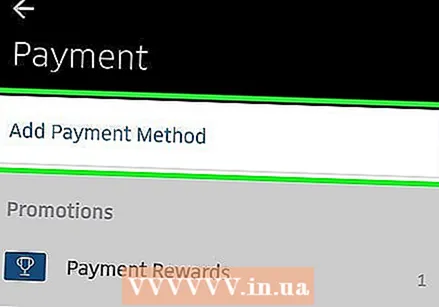
 Open the Uber app on your mobile phone. Now register for Uber (if you haven't already).
 - If you're already a member of Uber, launch the app, tap "Payments" in the menu and select "PayPal" as your payment method.
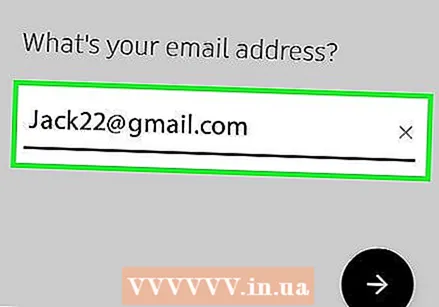
 Tap "Register" and enter your personal information as requested. Enter your name, email address, phone number, and a password to protect your account.
 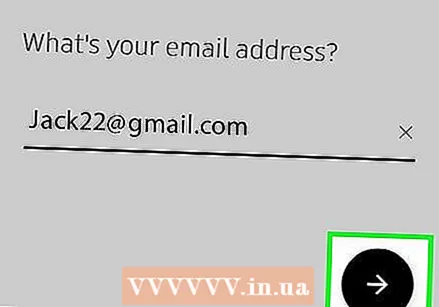 Tap "Next" when you are ready to continue. A text message with a confirmation code will be sent to the mobile phone number you specified.
  Tap "PayPal" on the "Add Payment" screen. The app will automatically try to connect to your PayPal account.
  Enter your password and then tap "Agree". Your PayPal account will be connected with Uber.
  Choose a vehicle. Use the slider at the bottom of the map to select a type of Uber vehicle. For a description of each Uber vehicle type, see Choosing the Right Uber Type.
  Tap the car icon on the slider to view details about the ride. Here you will find the estimated arrival time, the maximum number of passengers and the minimum fare.
  Get an estimate of the rate. In the details screen, tap "Get an estimate of the rate". Enter the address of your destination here and tap it in the search results.
 - After viewing the rate, tap the back button on your phone to return to the map.
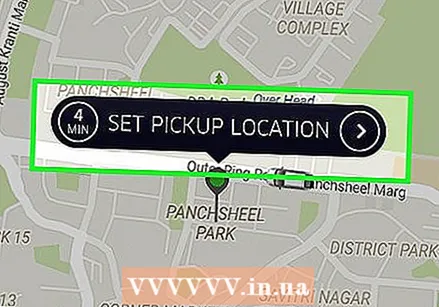
 Tap "Set Pickup Location" and then select your destination. Enter your destination address in the same way that you entered your current location.
 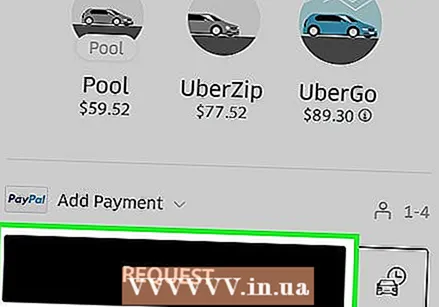 Tap "Request" to book your ride. After a few moments you will see the name of the driver, the license plate and a short description of the vehicle. Go to the pick-up location you specified and wait for your driver.
 - The app will keep you informed of how far your driver is from your pick-up location.
- When the ride is complete, the total amount will be deducted from your primary payment method in PayPal.
Method 2 of 5: Using Apple Pay or Android Pay
 Make sure your phone is compatible with Apple Pay or Android Pay. Apple Pay and Android Pay are mobile wallet services for iPhone and Android users. Using any of these services makes it possible to use Uber without providing a credit card.
 - Apple Pay: You must have at least an iPhone 6 to use Apple Pay in apps such as Uber.
- Android Pay: You need at least KitKat 4.4 and NFC support. The best way to find out if Android Pay works on your phone is to install the app from the Play Store. If your phone does not support Android Pay, you will see a message that the app is not supported.
- These services technically require the use of a credit or debit card to work, but you don't need to provide a card number directly to Uber. If you don't have access to a credit or debit card at all, try a different method.
 Link your cards to Apple Pay or Android Pay. Before you can use a digital wallet to pay for your ride, you need to link a card to your account. See Using Android Pay or Setting up Apple Pay for instructions on setting up your mobile wallet.
  Start the Uber app on your mobile phone. Now register for Uber (if you haven't already).
 - If you're already a member of Uber, launch the app, tap "Payments" in the menu and select "Apple Pay" or "Android Pay" as the payment method.
 Tap "Register" and enter your personal information as requested. Enter your name, email address, phone number, and a password to protect your account.
  Tap "Next" when you are ready to continue. A text message with a confirmation code will be sent to the mobile phone number you specified.
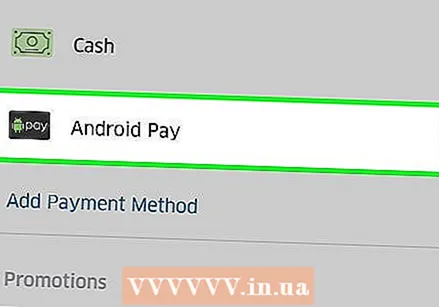
  Tap "Apple Pay" or "Android Pay" on the "Add Payment" screen. The app will automatically try to connect to your mobile wallet.
  Choose a vehicle. Use the slider at the bottom of the map to select a type of Uber vehicle. For a description of each Uber vehicle type, see Choosing the Right Uber Type.
  Tap the car icon on the slider to view details about the ride. Here you will find the estimated arrival time, the maximum number of passengers and the minimum fare.
  Get an estimate of the rate. In the details screen, tap "Get an estimate of the rate". Enter the address of your destination here and tap it in the search results.
 - After viewing the rate, tap the back button on your phone to return to the map.
 Tap "Set Pickup Location" and then select your destination. Enter your destination address in the same way that you entered your current location.
 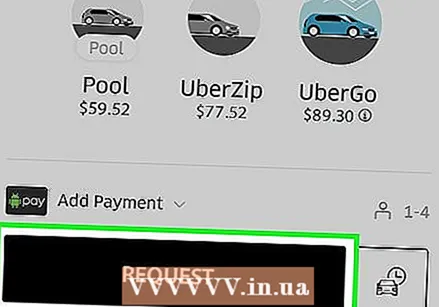 Tap "Request" to book your ride. In a few moments you will see the name of the driver, the license plate and a short description of the vehicle. Go to the pick-up location you specified and wait for your driver.
 - The app will keep you informed of how far your driver is from your pick-up location.
- When the ride is completed, the total amount will be deducted from the card you have registered with Apple Pay or Android Pay.
Method 3 of 5: Pay in cash
 See if Uber accepts cash in your area. As of 2015, Uber has started accepting cash in some cities in Asia and Africa. It is currently not possible to pay in cash for Uber in North America or Europe. To find out if cash is accepted in your city:
 - Go to https://www.uber.com/cities/ and select your city from the list.
- Scroll down to "Driving with Uber". The payment options accepted at your location are described in this section.
 Install the Uber app on your mobile phone. If cash is accepted at your location, you can sign up for an Uber account without entering credit card information. Find the Uber app in the App Store (iPhone) or Play Store (Android), then tap "Download" or "Install".
 - If you are already a member of Uber, you do not need to register again. Start the app, set your pick-up location and select "Cash" as the payment method.
 Launch the Uber app and tap "Register". Now you create your new Uber account.
 - Enter your name, email address, phone number and a password to protect your account.
- Tap "Next" when you are ready to continue. A text message with a confirmation code will be sent to the mobile phone number you provided.
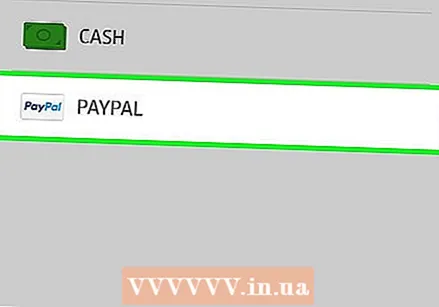
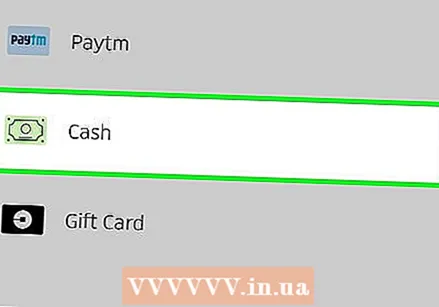
 Tap "Cash" on the "Add Payment" screen. This will set your default payment to the cash option.
 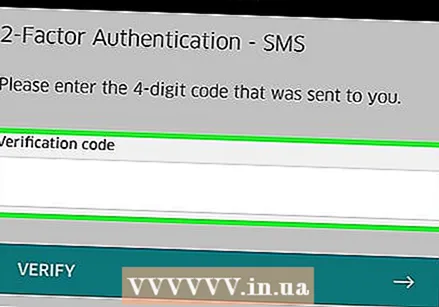 Enter the confirmation code you received via SMS to verify your account. If you don't see a prompt to enter the code, it will be displayed before you book your first ride.
  Set your pick-up location. Enter your current address in the search box or drag the map around to place the pin on your exact location.
 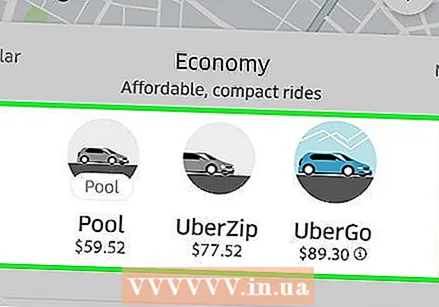 Choose a vehicle. Use the slider at the bottom of the map to select a type of Uber vehicle. For a description of each Uber vehicle type, see Choosing the Right Uber Type.
  Tap the car icon on the slider to view details about the ride. Here you will find the estimated arrival time, the maximum number of passengers and the minimum fare.
  Get an estimate of the rate. In the details screen, tap "Get an estimate of the rate". Enter the address of your destination here and tap it in the search results. You must have enough cash to cover the highest portion of the estimated fare to request this ride.
 - After viewing the rate, tap the back button on your phone to return to the map.
 Tap "Set Pickup Location" and then select your destination. Enter your destination address in the same way that you entered your current location.
 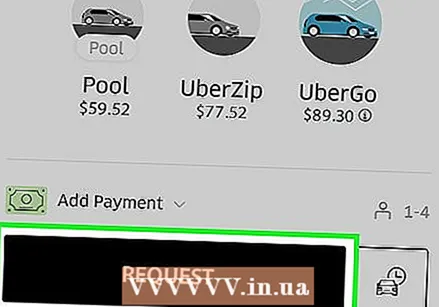 Tap "Request" to book your ride. In a few moments you will see the name of the driver, the license plate and a short description of the vehicle. Please go to the pick-up location you specified and waited for your driver.
 - The app will keep you informed of how far your driver is from your pick-up location.
- When your ride is complete, you pay your driver in cash. After the trip has started, you cannot provide another payment method, so you must have enough cash to cover the trip.
Method 4 of 5: Using a debit card
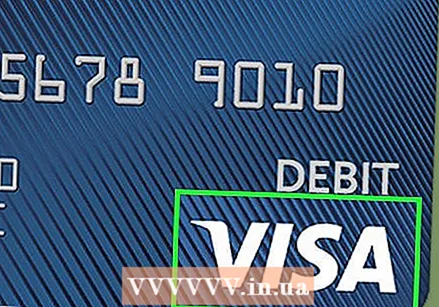 Look for a Visa or Mastercard logo on your debit card. If your bank offers you a card with a Visa or Mastercard logo, it should work with Uber, even if it's not a real credit card.
 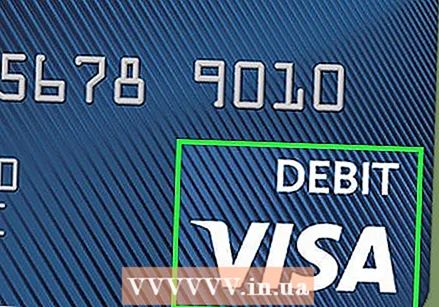 Request a prepaid debit card with a Visa or Mastercard logo. If you don't have a debit card, you may be able to use a Visa or Mastercard branded prepaid debit card. There are many different prepaid cards available in different countries. Consult a bank for more information.
 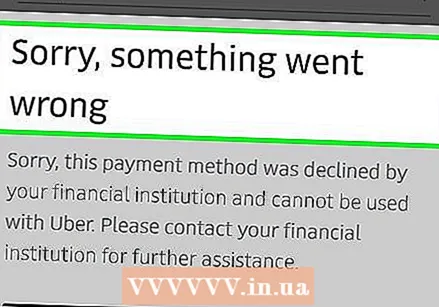 If you receive an error message, call the bank that issued the card. If you get an error when signing up for Uber with your debit card (prepaid or provided by your bank), call the support number on the back of the card and let them know you're trying to book a ride with Uber. The bank may need to manually authorize Uber charges.
 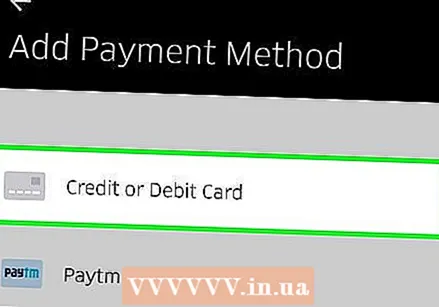 Link your debit card to Uber. If you haven't registered with Uber yet, you can skip this step.
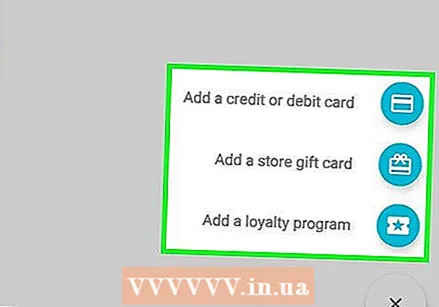
 - Log in to your Uber account, then tap "Payment" in the main menu.
- Tap the "Add New Payment" icon (a credit card with a plus sign) and enter the credit card number and verification information as prompted. Tap "Add Payment" when you're done.
 Choose a vehicle. Use the slider at the bottom of the map to select a type of Uber vehicle. For a description of each Uber vehicle type, see Choosing the Right Uber Type.
  Tap the car icon on the slider to view details about the ride. Here you will find the estimated arrival time, the maximum number of passengers and the minimum fare.
 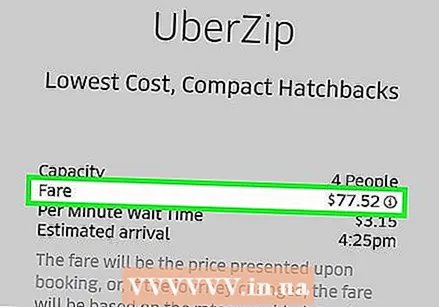 Get an estimate of the rate. In the details screen, tap "Get an estimate of the rate". Enter the address of your destination here and tap it in the search results. Make sure you have enough money on your debit card to cover the trip.
 - After viewing the rate, tap the back button on your phone to return to the map.
 Tap "Set Pickup Location" and then select your destination. Enter your destination address in the same way that you entered your current location.
  Tap "Request" to book your ride. In a few moments you will see the name of the driver, the license plate and a short description of the vehicle. Go to the pick-up location you specified and wait for your driver.
 - The app will keep you informed of how far your driver is from your pick-up location.
- When the ride is complete, the total amount will be debited from your bank card.
Method 5 of 5: Using Paytm Wallet or Airtel Money
 Start the Uber app on your mobile phone. Uber users living in India have the option to use Paytm Wallet or Airtel Money instead of a credit card. If you live anywhere other than India, this method will not work for you.
 - If you're already a member of Uber, you don't need to register again. Launch the app, tap "Payments" in the menu and select "Add a prepaid wallet" as your payment method. At that point, select "Paytm" or "Airtel Money". If you don't have an account, you will be guided through the installation process.
 Launch the Uber app and tap "Register". Now you create your new Uber account.
 - Enter your name, email address, phone number and a password to protect your account.
- Tap "Next" when you are ready to continue. A text message with a confirmation code will be sent to the mobile phone number you specified.
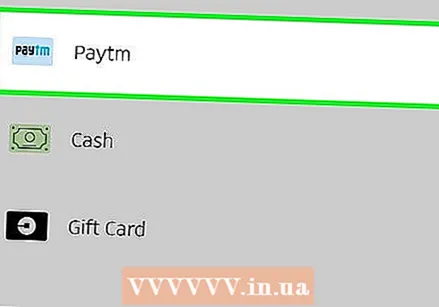 Tap "Add a prepaid wallet" and then select your option. Whether you select PayTM or Airtel Money, the following steps will be very similar.
 - The app will check if there is already a Paytm or Airtel Money account associated with the current phone number. If no account is found, a new account will be created automatically. Tap "OK" to continue.
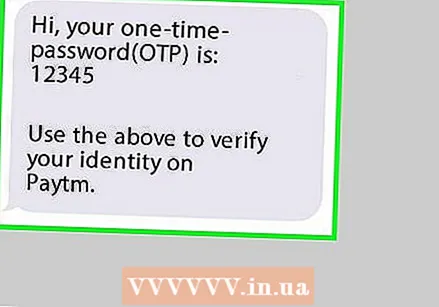 Check your text messages for a one-time password (OTP). Whether or not you have a Paytm or Airtel account, you will receive a text message from the service that includes an OTP.
 - If you already have an account, the OTP will also be sent to the email address you registered.
 Enter the SMS confirmation code in the OTP field. The Uber app should now be open to a screen that says "Enter One-Time Password (OTP)". Enter the confirmation code in the blank, then tap "Verify".
 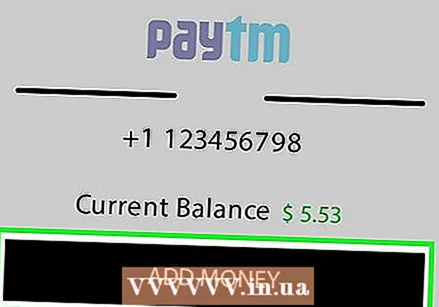 Use your available funds or add money to your account. After you have verified your account, you will be taken to a screen with your current balance.
 - To use the amount shown in the balance field, tap "Use" in the top right corner of the screen.
- To add money, tap "Add money". You can link a credit, debit or bank account to your account.
 Enter the confirmation code you received via text message (from Uber - not the Paytm or Airtel OTP) to verify your account. If you don't see a prompt to enter the code, it will be displayed before you book your first ride.
 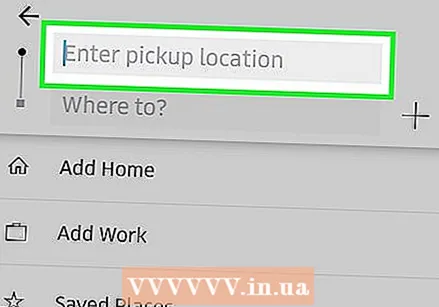 Set your pick-up location. Enter your current address in the search box or drag the map around to place the pin on your exact location.
  Choose a vehicle. Use the slider at the bottom of the map to select a type of Uber vehicle. For a description of each Uber vehicle type, see Choosing the Right Uber Type.
 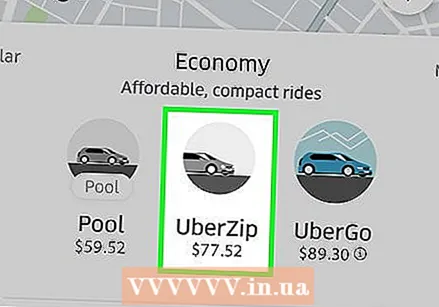 Tap the car icon on the slider to view details about the ride. Here you will find the estimated arrival time, the maximum number of passengers and the minimum fare.
  Get an estimate of the rate. In the details screen, tap "Get an estimate of the rate". Enter the address of your destination here and tap it in the search results. You must have enough money in your Paytm or Airtel account to cover the cost of your ride.
 - After viewing the rate, tap the back button on your phone to return to the map.
 Tap "Set Pickup Location" and then select your destination. Enter your destination address in the same way that you entered your current location.
  Tap "Request" to book your ride. In a few moments you will see the name of the driver, the license plate and a short description of the vehicle. Go to the pick-up location you specified and wait for your driver.
 - The app will keep you informed of how far your driver is from your pick-up location.
- When the ride is complete, the total amount will be deducted from your Paytm or Airtel account, depending on the service you use.
Tips
- Uber accepted Google Wallet, which allowed members to use their bank account to drive with Google. This has been deactivated in favor of Android Pay, which allows members to link only credit cards.
- If you need to change your payment method after your ride has already started, tap the arrow next to your driver's name, then tap "Change Payment". Unfortunately, you cannot use this option to switch to (or from) cash payment.


