Author:
Clyde Lopez
Date Of Creation:
20 June 2021
Update Date:
1 July 2024
![[2020]Add Album Art Cover Image to Any MP3 song file using Window media player](https://i.ytimg.com/vi/OeeeQBJiEko/hqdefault.jpg)
Content
- Steps
- Method 1 of 5: How to add cover art in Groove manually
- Method 2 of 5: How to add a cover art to Windows Media Player on the network
- Method 3 of 5: How to manually add skin to Windows Media Player
- Method 4 of 5: How to Edit Tags with MP3Tag
- Method 5 of 5: How to add a persistent tag
- Tips
- Warnings
In this article, we'll show you how to add or change music album art in Groove and Windows Media Player (WMP). Please be aware that some versions of Windows 10 do not have Windows Media Player. To edit MP3 files so that their metadata includes album art thumbnails, use the MP3 Tag Editor.
Steps
Method 1 of 5: How to add cover art in Groove manually
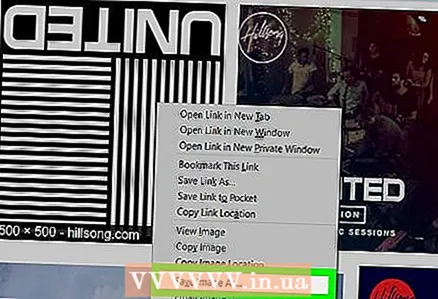 1 Find and download album art. Open a web browser, search for the album name and the words "album cover" (for example, "beatles album cover"), find the cover you want, right-click on it and select "Save" from the menu.
 - In some web browsers and / or search engines, click on the "Pictures" tab at the top of the page to view the covers.
- You may need to specify a folder to download the cover. In this case, click "Desktop" in the left pane of the window.
 2 Open the start menu
  . Click on the Windows logo in the lower left corner of the screen.
  3 Enter groove. This will search for the Groove Music player.
 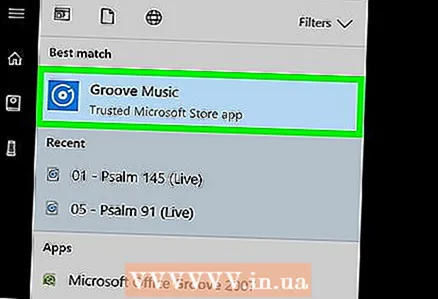 4 Click on Groove Music. It's a CD-shaped icon at the top of the Start menu. The Groove Music player opens.
 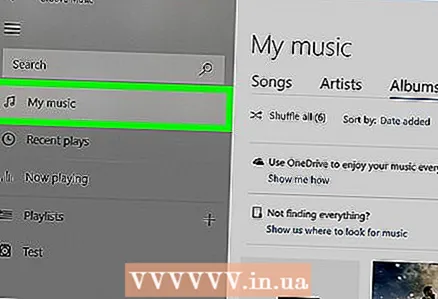 5 Click on My music. It's a tab in the upper-left side of the Groove window. This will open a list of your songs that have been added to Groove.
 - If you do not see this option, first click on the "☰" icon in the upper left corner of the window.
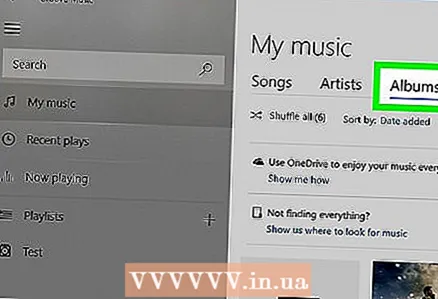 6 Go to the tab Albums. It's at the top of the Groove window.
  7 Select an album. Click on the album you want to edit.
 - Album covers cannot be added to individual songs.
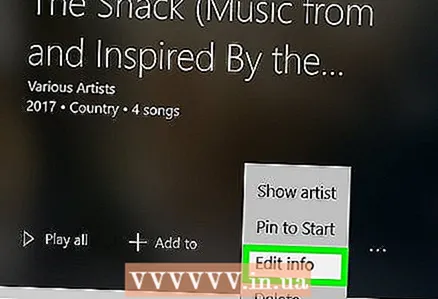 8 Click on Change details. It's a tab at the top of the album page. The "Edit Album Information" window opens.
 - If the songs are not included in the album or it is listed as "Unknown Album", the "Edit Details" button will not be displayed. Instead, right-click the song, click Edit Details, enter a name in the Album Name field, and then click Save.
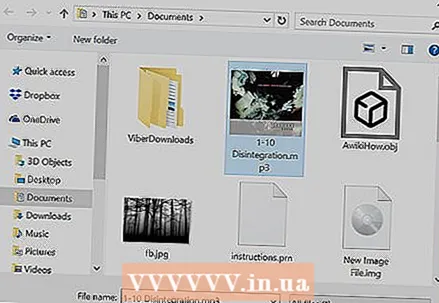
 9 Click on the album cover. You will find it in the square in the upper left corner of the Edit Album Information window. An explorer window will open.
 - If no cover has been added to the album yet, the square will be empty and a pencil icon will appear in the lower-left corner of the window.
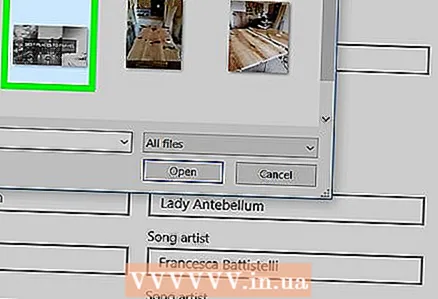 10 Select an image. Click on a downloaded cover or cover that you already had.
 - If a folder is opened in Explorer that does not contain covers, click on the desired folder on the left side of the window.
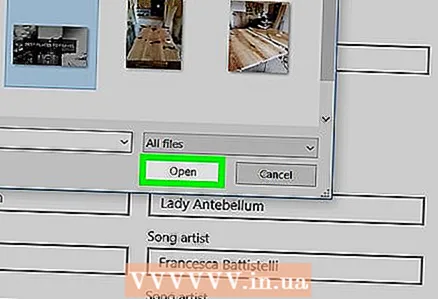 11 Click on Open. It's in the lower-right corner of the window. The cover art will be added to the album.
  12 Click on Save. It's at the bottom of the Edit Album Information window.
Method 2 of 5: How to add a cover art to Windows Media Player on the network
 1 Make sure you buy music. Typically, Window Media Player does not automatically update album art if the music has not been purchased.
 - If you have not purchased the songs included in the album, add the cover manually.
 2 Connect your computer to the internet. This is required for Windows Media Player to search for album art. If you were able to open any web page, Windows Media Player will connect to the network database.
  3 Open the start menu
  . Click on the Windows logo in the lower left corner of the screen.
  4 Enter windows media player. First, click on the search bar at the bottom of the Start menu if it doesn't have a cursor.
  5 Click on Windows Media Player. This blue, orange and white Play button is located at the top of the Start menu. Windows Media Player starts up.
 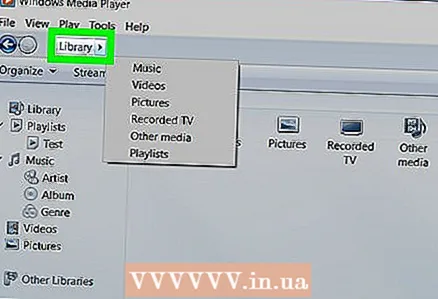 6 Click on Mediathek. You will find this tab in the upper left corner of the window.
  7 Go to the tab Music. You will find it on the left in the window.
 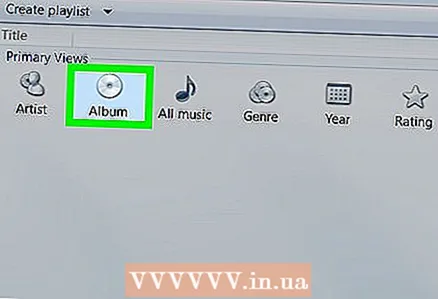 8 Find the album you want. To do this, scroll down the page.
 - If the album does not have a cover, it will display a musical note on a gray background.
 9 Right click on the album cover. You will find it to the left of the song list. A menu will open.
 - If the mouse does not have a right button, click on the right side of the mouse or click with two fingers.
- If your computer has a trackpad (not a mouse), tap it with two fingers, or press the lower-right portion of the trackpad.
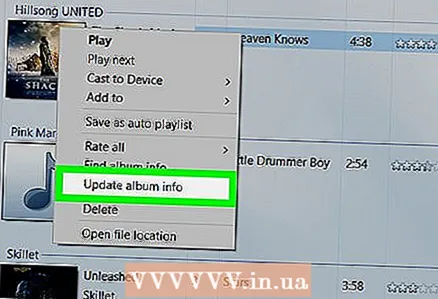 10 Click on Find album information. You will find this option in the middle of the menu. The search for the cover will start on the Internet; if a cover is available, it will be added to the selected album.
 - If no cover is found, add it manually.
- It will take a few minutes to find the cover; you may need to restart Windows Media Player after this.
Method 3 of 5: How to manually add skin to Windows Media Player
 1 Find and download album art. Open a web browser, search for the album name and the words "album cover" (for example, "beatles album cover"), find the cover you want, right-click on it and select "Save" from the menu.
 - In some web browsers and / or search engines, click on the "Pictures" tab at the top of the page to view the covers.
- You may need to specify a folder to download the cover. In this case, click "Desktop" in the left pane of the window.
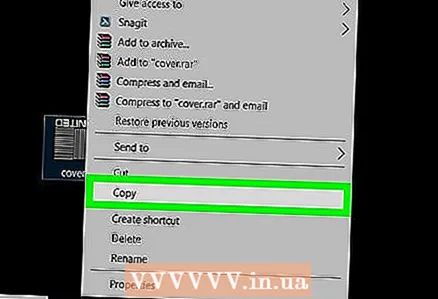 2 Copy the downloaded cover. Open the cover folder (for example, the Downloads folder), click on the cover and click Ctrl+C.
 - Alternatively, you can right-click on the cover and click Copy from the menu.
 3 Open the start menu . Click on the Windows logo in the lower left corner of the screen.
  4 Enter windows media player. First, click on the search bar at the bottom of the Start menu if it doesn't have a cursor.
 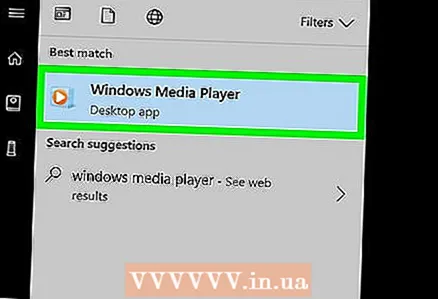 5 Click on Windows Media Player. This blue, orange and white Play button is located at the top of the Start menu. Windows Media Player starts up.
  6 Click on Mediathek. You will find this tab in the upper left corner of the window.
 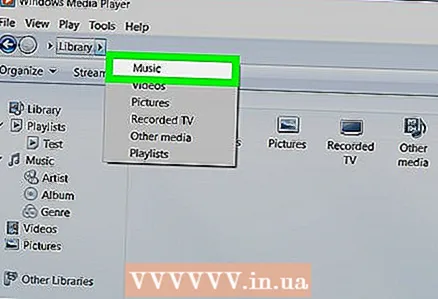 7 Go to the tab Music. You will find it on the left in the window.
  8 Find the album you want. To do this, scroll down the page.
 - If the album does not have a cover, it will display a musical note on a gray background.
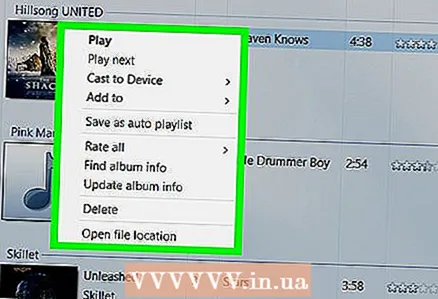 9 Right click on the album cover. You will find it to the left of the song list. A menu will open.
 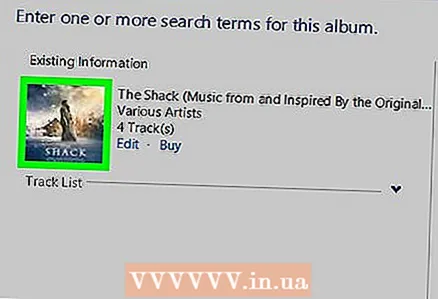 10 Click on Insert album cover. You will find this option in the middle of the menu. The cover art will be added to the selected album.
 - It will take a few seconds for the cover to update.
- If there is no Insert Album Cover option, download and copy a smaller cover.
Method 4 of 5: How to Edit Tags with MP3Tag
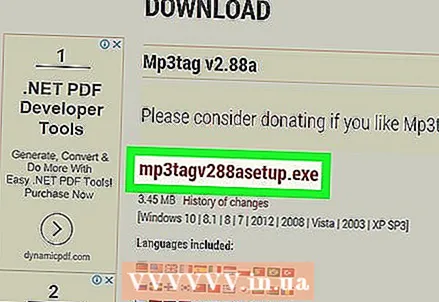 1 Download and install MP3Tag. MP3Tag is a free program that lets you edit tags for MP3 files, including covers. To download and install MP3Tag, follow these steps:
 - go to https://www.mp3tag.de/en/download.html in your computer's web browser;
- click on the link "mp3tagv287asetup.exe" in the middle of the page;
- double click on the MP3Tag installation file;
- follow the instructions on the screen to install MP3Tag.
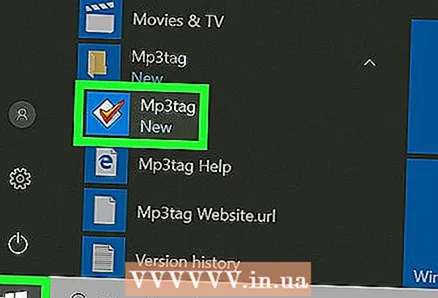 2 Open MP3Tag. Double-click the diamond-shaped checkmark icon.
  3 Add music to MP3Tag. MP3Tag will automatically scan your computer for MP3 files. Alternatively, you can simply drag the songs you want into the MP3Tag window.
 - To open a song in MP3Tag, right-click on it and then choose “Mp3tag” from the menu.
 4 Choose a song. In the main window, click on the name of the song whose tags you want to edit.
 - To select multiple songs at once, hold Ctrl and click on each song you want.
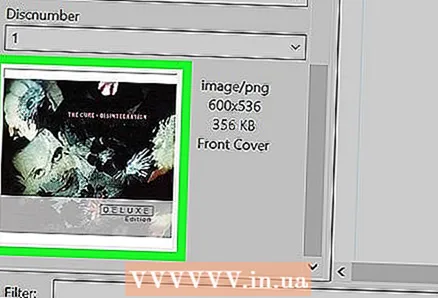
- 5 Right click on the cover. It will appear as a square at the bottom left of the window. A menu will open.
- If the selected song (s) does not have a cover art, the square will be empty.
- If the mouse does not have a right button, click on the right side of the mouse or click with two fingers.
- If your computer has a trackpad (not a mouse), tap it with two fingers, or press the lower-right portion of the trackpad.
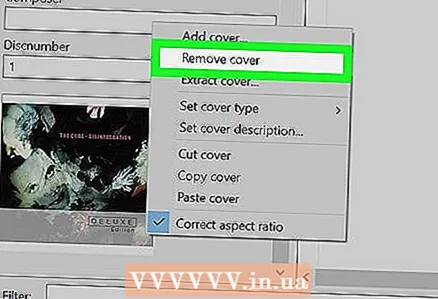 6 Click on Remove cover. It's near the top of the menu. The current cover will be deleted.
 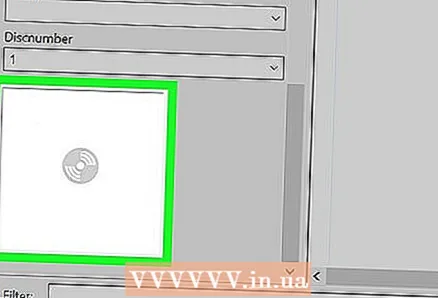 7 Right-click on the empty square where the removed cover was. A menu will open.
 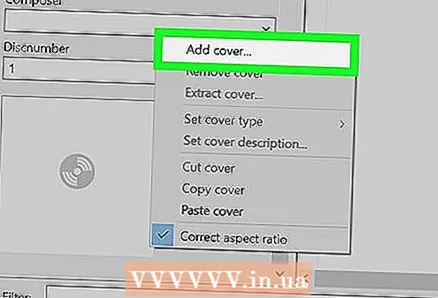 8 Click on Add cover. It's at the bottom of the menu. The Explorer window will open.
 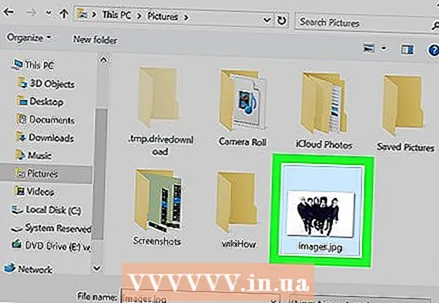 9 Choose a cover. Open the folder with the desired image and then click on it.
 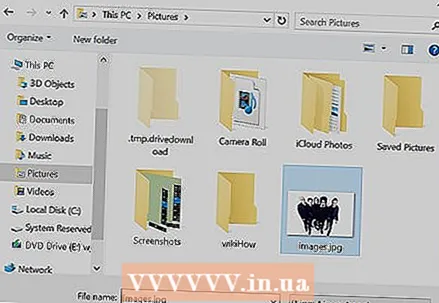 10 Click on Open. It's in the lower-right corner of the window. The image will be added to the selected song as cover art.
 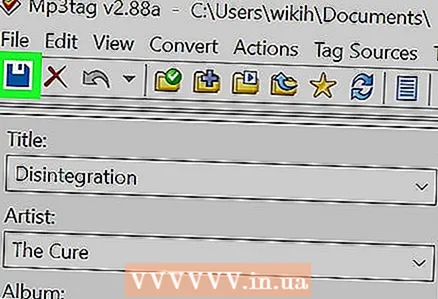 11 Click on the "Save" icon. It looks like a floppy disk and is in the upper left corner of the window. A message appears stating that the MP3 file will use the selected cover art.
Method 5 of 5: How to add a persistent tag
- 1 Understand how this method works. To make your song cover appear in different media players like VLC, use an online converter to add images to MP3 files.
- In some media players, such as VLC, the tags of this converter take precedence over other tags (such as Groove or MP3Tag).
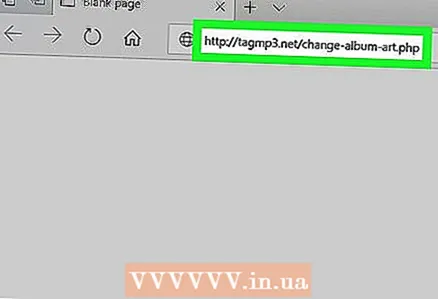 2 Open the TagMP3 converter website. Go to http://tagmp3.net/change-album-art.php in a computer web browser. This converter adds the image to the MP3 file's metadata, which means that the artwork will display in almost any media player.
 - If you add cover art to a song using the TagMP3 converter, trying to change cover art in any other tag editor may fail.
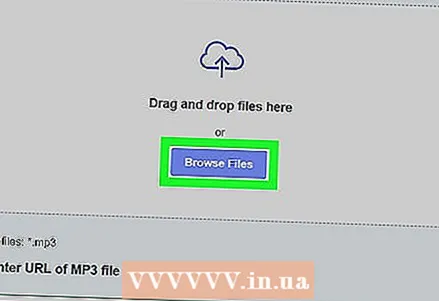 3 Click on Browse Files (Overview). You will find this button in the middle of the window. The Explorer window will open.
 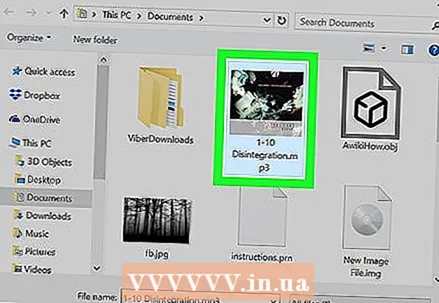 4 Choose a song. Open the folder with the desired MP3 file and then click on it.
 - To edit tags of several different songs, hold Ctrl and click on each desired song.
 5 Click on Open. It's in the lower-right corner of the window. The selected songs will be uploaded to the website.
  6 Click on Choose file (Select a file). You will find this button under the current cover image (or under an empty photo field) in the "Album Art" section.
 - Repeat this and the next two steps for each desired MP3 file.
 7 Select an image. Open the folder with the image you want to use as the cover, and then click on the image to select it.
  8 Click on Open. It's in the lower-right corner of the window. The image will be added to TagMP3, but it will not appear in the cover preview.
 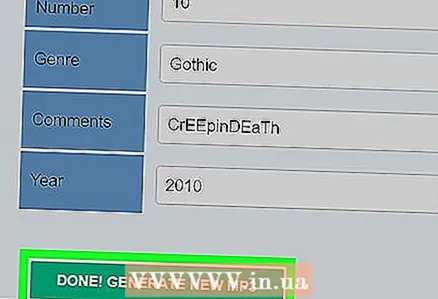 9 Add the image to the MP3 file. Scroll down the page and click “Done! Generate new mp3 ”.
 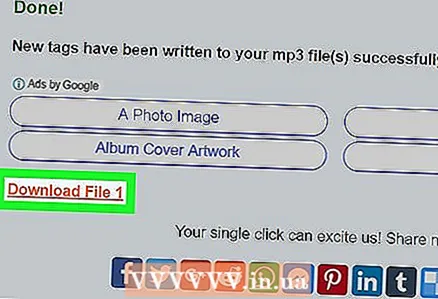 10 Download the MP3 file. Click “Download File 1” to download the created MP3 file to your computer.
 - Note that the file name is a random string of letters and numbers; however, playing the MP3 file in Windows Media Players, iTunes, Groove, and VLC will display the correct song information.
- If you've converted multiple files at once, click Upload File 2 and so on.
Tips
- The described methods can be applied to Windows Media Player in Windows 7.
Warnings
- Windows Media Player is no longer supported by Microsoft, so not every album will be able to update artwork online.


