Author:
Virginia Floyd
Date Of Creation:
14 August 2021
Update Date:
1 July 2024
Content
AirDrop lets you quickly transfer files (including pictures, contacts, documents, and more) from one Apple device to another. At the same time, you do not need to connect to one network - AirDrop will create its own network, which will be closed as soon as the transfer process is completed. Take advantage of this fast, easy and secure file transfer method.
Steps
Part 1 of 2: How to troubleshoot AirDrop issues
Getting AirDrop up and running is tricky, so here are some troubleshooting tips at the beginning of this article. To learn how to use AirDrop, go to the next section.
 1 Place the devices next to each other. AirDrop doesn't use your regular wireless network to transfer files, so both devices need to be close to each other. For optimal performance, devices should be within 10 meters of each other.
  2 Make sure the devices are compatible. AirDrop allows you to transfer files between iOS devices and macOS computers, but they must meet some minimum requirements.
 - IOS devices: iPhone 5 or later, iPad mini, iPad 4th generation or later, iPod Touch 5th generation or later. Must have iOS 7 or later and iOS 8 if you intend to use AirDrop between iPhone and Mac.
- Mac computers: OS X Yosemite (10.10) or later to transfer files between your iOS device and your computer. MacBooks from 2012 or newer and iMacs from late 2012 or newer will work.
 3 Check your visibility settings. If AirDrop visibility is turned off, other devices won't be able to find you.
 - iOS - Open Control Center and tap AirDrop. Select "For All" for maximum compatibility. Don't worry about security as you will have to confirm every file transfer.
- macOS - Open a Finder window and choose AirDrop from the left pane. From the Allow My Discovery menu, select Everyone. Don't worry about security as you will have to confirm every file transfer. Leave the AirDrop window open when connecting to another device.
 4 Turn Bluetooth off and on again. Do this to troubleshoot connection problems.
 - iOS - Swipe up from the bottom of the screen to open Control Center, then tap Bluetooth.
- macOS - Open the Bluetooth menu, turn Bluetooth off and on again.
 5 Make sure Bluetooth and Wi-Fi are turned on. AirDrop uses a combination of these networks to create its own network. Check Control Center on your iOS device and the menu bar on your Mac to make sure both networks are turned on.
 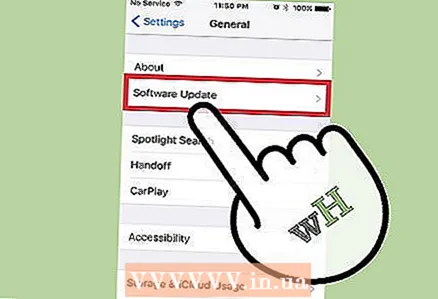 6 Try updating all involved devices. Sometimes problems with AirDrop can be fixed by updating your software. It will take some time to update iOS and macOS.
 - iOS - Launch the Settings app and select General. Click "Software Update" and follow the instructions on the screen to install any available updates. This usually takes about 30 minutes. Read this article to learn how to update your iOS.
- macOS - Open the Apple menu and choose App Store. Find the latest version of macOS, which is usually found on the front page of the store. Download the update (it can be quite large) and follow the instructions to install it.
 7 Try signing out and then signing back in to iCloud (on a Mac). If you can't connect to your Mac, sign out of iCloud on your computer, and then sign in again.
 - Open the Apple menu and choose System Preferences. Click iCloud> Sign Out. When the sign out process is complete, sign in with your Apple ID.
 8 Check your Apple ID (iOS 8.1 and older). If you are using iOS 8.1, there is a bug with Apple ID that can cause connection problems.Open the iCloud section in the Settings app. If your Apple ID has uppercase letters, it may cause connection problems. Sign out and then sign back in with the same Apple ID, but enter your email address only in lowercase. This bug has reportedly been fixed in iOS 8.2.
Part 2 of 2: How to use AirDrop
 1 Turn on Wi-Fi and Bluetooth on your iOS device. You will need both of these networks to use AirDrop.
 - To turn on Wi-Fi and Bluetooth, swipe up from the bottom of the screen to open Control Center, and then tap Wi-Fi and Bluetooth.
- If you want to transfer files between your iOS device and your Mac, turn on Bluetooth and Wi-Fi on your computer as well.
 2 Swipe up from the bottom of the screen to open Control Center. Do this to enable AirDrop.
 - 3 Press and hold the connection sliders. It's a slider for Wi-Fi, Cellular, Airplane Mode, and Bluetooth. A number of other sliders will open, including tethering and AirDrop sliders.
 4 Click "AirDrop" to choose a privacy option. Tap one of the following options:
 - Reception Off — AirDrop will be turned off.
- "Only to contacts" - your device will be visible only to those users who are in your contacts. To do this, you need an Apple ID account.
- “For everyone” - any device that is nearby can find your device.
 5 Open the AirDrop folder on your Mac. If you're transferring files to your Mac, open a Finder window and select the AirDrop option in the left pane.
  6 Open the item you want to transfer. Do this in the appropriate application. For example, to AirDrop a photo, open it in the Photos app.
  7 Click Share. This option is indicated by a square icon with an upward pointing arrow.
  8 Tap the name of the person you want to share the file with via AirDrop. A list of people using AirDrop appears at the top of the Share panel. Click on the person's photo to send him the file.
 - With AirDrop, you can quickly share files, photos, URLs with friends and contacts in your vicinity.
 9 Wait for the other person to accept your file. To do this, he must confirm his decision.


