Author:
Eric Farmer
Date Of Creation:
4 March 2021
Update Date:
1 July 2024

Content
- Steps
- Method 1 of 3: How to Connect to a Router
- Method 2 of 3: How to set up a wired connection in Windows
- Method 3 of 3: How to set up a wired connection in Mac OS X
- Tips
- Warnings
This article will show you how to connect your computer directly to your router using an Ethernet cable, and how to set up such a wired connection in Windows and Mac OS X.
Steps
Method 1 of 3: How to Connect to a Router
 1 Buy an Ethernet cable. Each end of this cable (this is an RJ-45, CAT5, or CAT6 cable) has a square plug. An Ethernet cable is used to connect a computer to the router.
 - The cable that connects the modem to the router is also an Ethernet cable, however don't use it: you need it wherever it is.
 2 Make sure the router is connected to the network. The router must be connected to a modem, which in turn must be connected to the network (the internet). In this case, the LEDs on the router and / or modem should be on.
 - If you just have a modem (no router), make sure it's connected to the network (internet).
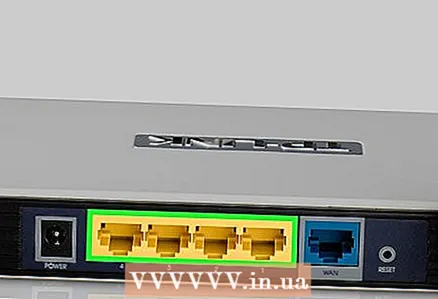 3 Find Ethernet ports on your computer and router. They are square in shape and are marked with a row of squares.
 - On routers, Ethernet ports are usually labeled “LAN” (Local Area Network).
- If you are connecting to a modem, the correct port will be marked as "Internet" or "WAN".
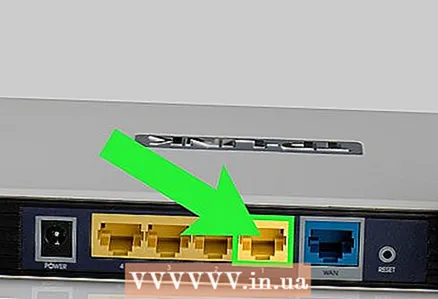 4 Connect the Ethernet cable to your computer and router. If the router is connected to a network, the computer will instantly have access to the Internet.
Method 2 of 3: How to set up a wired connection in Windows
 1 Open the start menu. To do this, click on the Windows logo in the lower left corner of the screen or press the key ⊞ Win.
 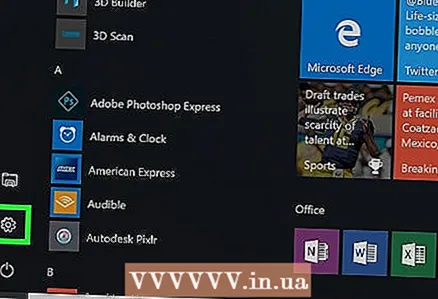 2 Push ⚙️. This icon is in the lower-left side of the Start menu.
 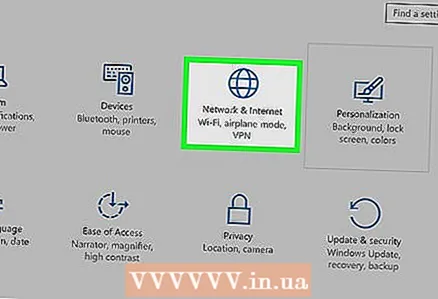 3 Click on Network and Internet. It's in the top row of options.
 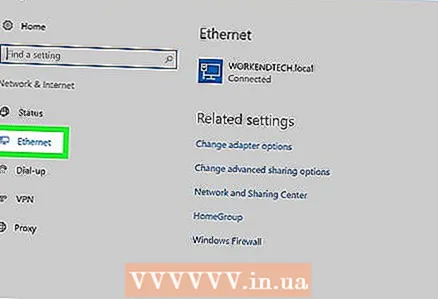 4 Click on The local network. It's on the left side of the window.
  5 Make sure the wired connection is working. The network name and the word "Connected" should be displayed at the top of the page; this indicates that the Ethernet connection is working.
 - If the wired connection does not work, use a different port on your router or a different Ethernet cable.
Method 3 of 3: How to set up a wired connection in Mac OS X
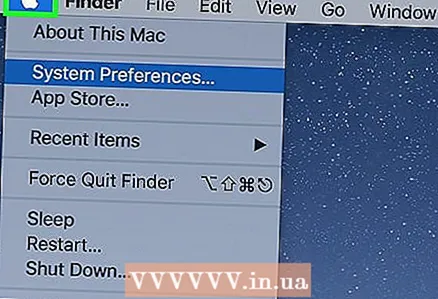 1 Open the Apple menu. To do this, click on the apple-shaped icon in the upper left corner of the screen.
 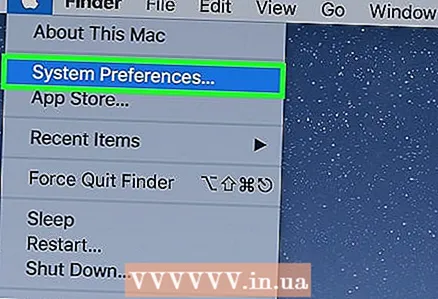 2 Click on System settings. You will find this option in the menu.
  3 Click on Network. The "Network" window will open.
  4 Select "Local network". It's in the left pane.
 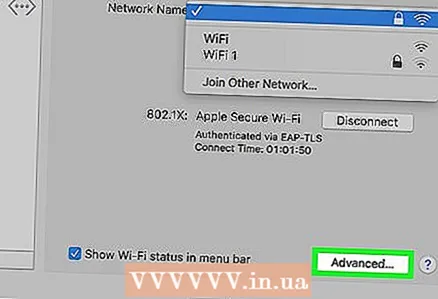 5 Click on Additionally. It's an option at the bottom right of the window.
 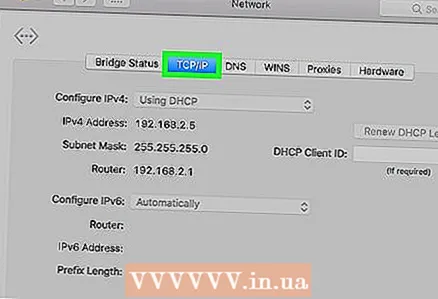 6 Click on the tab TCP / IP. This tab is at the top of the Advanced window.
 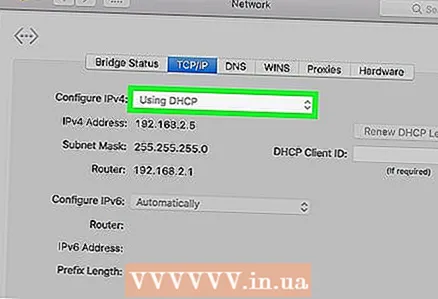 7 Make sure Using DHCP is selected in the Configure IPv4 menu. If not, select the Configure IPv4 checkbox at the top of the screen and then select Using DHCP.
 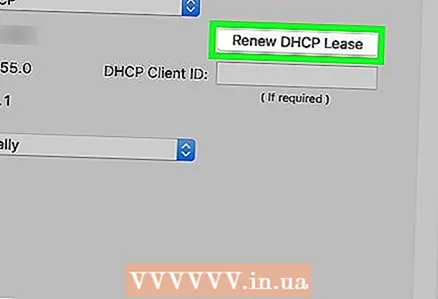 8 Click on Request DHCP address. It's an option on the right side of the page. The computer will now access the internet when connected via an Ethernet cable.
  9 Click on OK. It's an option in the lower right corner of the screen. This will activate the Ethernet connection.
Tips
- Use a USB / C to Ethernet adapter to connect an Ethernet cable to your Mac if it doesn't have an Ethernet port.
Warnings
- If you are going to use an Ethernet connection as your primary Internet connection, the computer must be in a stationary position (that is, it cannot be moved from place to place).


