Author:
Janice Evans
Date Of Creation:
27 July 2021
Update Date:
1 July 2024

Content
- Steps
- Method 1 of 5: Come up with your drawing
- Method 2 of 5: Create a digital drawing
- Method 3 of 5: Bringing Your Drawing Through a Mesh Screen
- Method 4 of 5: Stencil Drawing
- Method 5 of 5: Apply Your Pattern with Whitening
- Tips
Designing your T-shirts can be fun and entertaining, or even profitable if you decide to sell your creations. Whether you want to print a design on a T-shirt yourself or entrust it to professionals, you can create a design for your T-shirt from the comfort of your home.
Steps
Method 1 of 5: Come up with your drawing
 1 Consider your drawing. You may be promoting your cleaning products company, your rock band, or your favorite sports team. Perhaps you will use your own drawing. Decide what pattern you want to see on your shirt.
 - If you're advertising for a firm, group, sports team, or some brand, chances are you'll have to focus on the logo. For example, the Nike swoosh logo is pretty straightforward but effective. A jersey with a sports team logo may display the colors or the team mascot. Your band's artwork may include a photograph of the band or a graphic depicting the band's style or song.
- If you are making a T-shirt to showcase your pictures or designs, you should pay attention to how they will look on the T-shirt. Think about how original the drawing is and how its colors are combined.
- You can use photography in your drawing. Use a photo that you took yourself or a photo from the Internet that is in the public domain. You can also buy a copyright free photo.
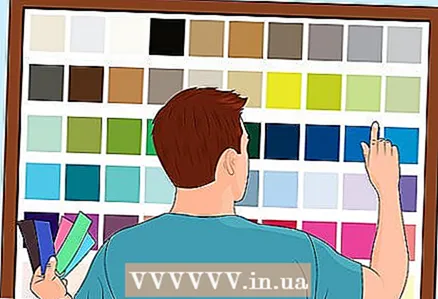 2 Choose a color scheme. When designing a T-shirt, it's important to think about color contrast. That is, how paints of certain colors will look on a light or darker T-shirt. Inks of certain colors on a light or dark T-shirt look more impressive on a computer screen than they will when printed.
 - When using lighter colors, try to avoid pastels such as yellow, pale blue, or light pink. These colors will be noticeable on T-shirts, but won't show up clearly from a distance. And if you are making a logo T-shirt, you need to make sure that the logo is visible from afar!
- If you choose to use pastel colors, darken the outlines to emphasize the text and make it easier to read.
- T-shirts in darker colors work well with lighter colors such as pastel colors. But be careful when using dark colors on darker t-shirts such as crimson (deep red), reddish brown, or olive.These colors may look great on a computer or drawing, but after printing, the color of the T-shirt sometimes distorts the color of the paint. As a result, the T-shirt may appear more brownish or tarnished.
- If you decide to use Adobe Illustrator (a graphics processing program) to create your drawing, look for the Global Colors option in the settings - it will help you when choosing a color scheme.
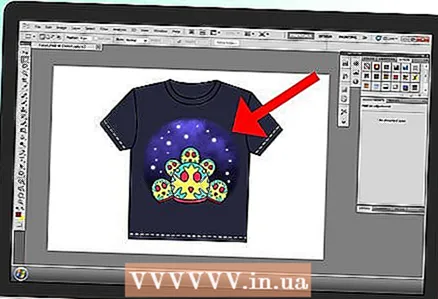
 3 Give the drawing volume. Once you have decided what color the picture will be, it is worth considering that a volumetric image looks better than a flat one. To emphasize a specific area of the drawing, choose a color that will shade it slightly. Then the drawing will become brighter and more voluminous.
 - If you plan on using powerful image processing programs (such as Adobe Photoshop, InDesign, Gimp, Adobe Illustrator, or Paint Shop Pro), you can take a standard image and fundamentally modify it if necessary.
- Create an image using the vector graphics editor Inkscape - then, if necessary, you can resize the photo.
 4 Think over the design. This means connecting all the elements into one whole. How you do this depends on the composition of your drawing. You may have many small elements in your drawing, such as stars, plants, or animals. Or maybe this is one large drawing with the main drawing or image.
 - Think about how to give the drawing a cohesiveness so that all of its parts or elements look good together. A harmonious image will immediately grab the attention of others.
- 5 Decide on the location of the design on the T-shirt. Will your design look better in the center, top left, or is it better to stretch it over the entire t-shirt?
- If you are creating a T-shirt with a graphic from a brand or company, the easiest and most effective way is to place it in the center.
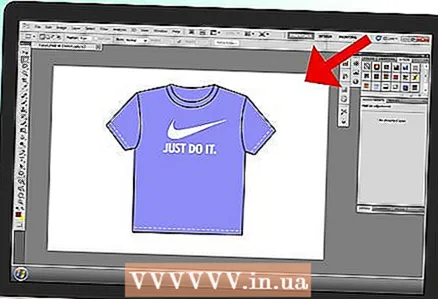
- Don't forget that you can also use the back of the T-shirt for a promotional slogan (“Just Do It” is Nike's advertising slogan). Or words from a song by a band whose photo you are printing on a T-shirt.
 6 Finish the final layout of the drawing. It's best to jot down your ideas on paper before printing them onto a T-shirt. Don't forget about color contrast and volume. Make sure the drawing looks harmonious and holistic.
 - When in doubt, ask others for their opinion. Ask friends, family, or coworkers what colors they like the most.
Method 2 of 5: Create a digital drawing
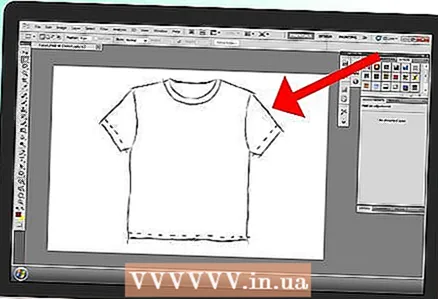 1 Use Adobe Photoshop to touch up your paper sketches. If your paper sketches are not of the highest quality or are not clearly drawn, this option may not work for you. If your sketch is in high quality:
 - Scan sketches and save them to your computer. Then touch up them with Photoshop.
- Correct the lines. Use filters, colors, brightness, contrast, saturation and other effects that are at your disposal.
- Add lines, curls, splashes, and other decorations that can make your drawing more dynamic and harmonious (if appropriate).
- Make sure the layout of the picture is consistent by checking the proportions, consistency and harmony of colors.
 2 Use computer programs to create the drawing. If you are not satisfied with the quality of your paper sketches, use line art programs like Photoshop.
 - If you have a graphics tablet for entering drawings into your computer, you can draw directly in Photoshop or another similar program.
 3 Add text to the picture if desired. Find a typeface that is in harmony with the overall design, but will not distract all attention to itself. The typeface should look good with the drawing (s) to maintain balance.
 - Take a look at the fonts that are used in many famous logos, or in pictures. The typeface should resemble the overall style of the firm or brand.For example, Nike's slogan "Just Do It" is written in bold plain type, as is their bold and simple checkmark on the logo. However, the typeface used to write the names of sports teams or garage rock bands can be more intricate or florid.
- Make sure the filters you are using to create the picture are also suitable for the font. If you're working with layers in Photoshop, you'll have to drag the text layer below the photo effects layer.
- Use free fonts from sites like defont.com. You can use free brush drawings at brusheezy.com.
- If necessary, you can download the fonts to your computer or add them to Illustrator or Photoshop.
- If you want to make an original design, you can create your own font.
 4 Make a layout. The easiest way to do this is to print the design and iron it onto the T-shirt. But if you want to make a high-quality drawing, you can contact the printing industry and provide the production of the layout to professionals.
 - 5 Release the T-shirt (s). For small scale production, you can continue ironing the designs.
- If you want to produce T-shirts in large quantities, you can make them in the printing industry for money.
- If you want to produce T-shirts in large quantities, you can make them in the printing industry for money.
Method 3 of 5: Bringing Your Drawing Through a Mesh Screen
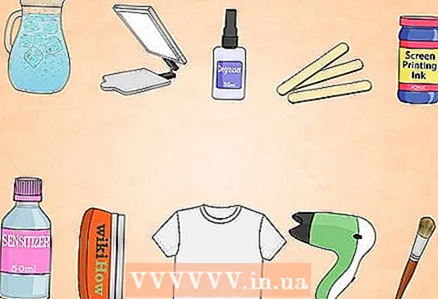 1 Take the materials you need to work. To draw a drawing through a mesh screen at home, you will need:
 - Blank T-shirt
- 50 ml bottle of degreaser (can be found at your local art store)
- 1 liter of cold water
- Large brush
- 50 ml emulsion
- Small bottle of sensitizer
- Screen printing ink bottle
- Roller or scraper with rubber attachment
- Small wooden stick
- Hair dryer
- Transparencies
- Stencil grid
- You can buy stencils from your local art supply store. Or do it yourself by purchasing a mesh screen and stretcher. Stretch the mesh horizontally and fasten it to the stretcher with staples at the corners to keep it tight. For standard patterns on a regular T-shirt, a 110-195 cm mesh is best. For delicate designs with many colors, use a 156-230 cm mesh.
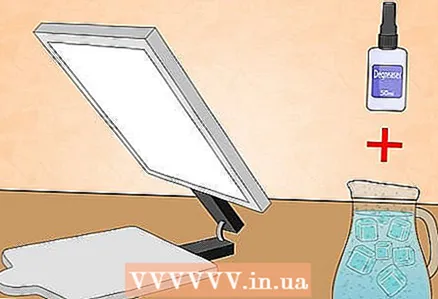 2 Prepare your stencil mesh. Dissolve the degreaser in cold water. Dip a brush into the mixture, then apply the mixture to the mesh.
 - Be sure to brush across both sides of the screen. Do not apply too much pressure to the brush or be afraid that you have applied too much mixture to the mesh.
- Let the screen dry.
 3 Mix emulsion with sensitizer. Pour 20 ml of water into the sensitizer bottle. Shake the contents of the vial thoroughly for a minute to mix the sensitizer with water.
 - Mix sensitizer with emulsion.
- Use a small wooden stick to mix the sensitizer with the emulsion.
- The color of the emulsion should change from blue to green. Small bubbles will also appear in the emulsion.
- Place the lid on the emulsion bottle and put it in a dark place or room for an hour. After an hour, there should be no small bubbles in the emulsion.
- If they have not disappeared after an hour, let the emulsion sit for another hour until they disappear.
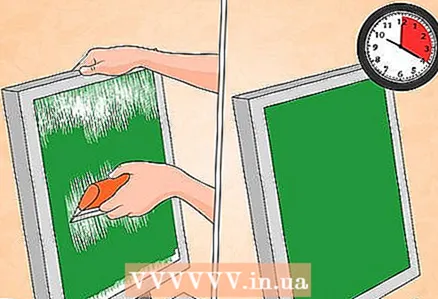 4 Apply emulsion to the screen. In a semi-dark room or in a room with dim red lighting, apply a drop of emulsion to the mesh and smear it with a rubber-tipped scraper.
 - The emulsion will flow through the mesh, so be sure to scrub it on both sides with a scraper.
- You can also use a roller to apply the emulsion to the mesh. Place the net on a clean towel and tilt it slightly away from you. Place a roller on the bottom of the screen and gently pour the emulsion onto the screen using the roller.
- Let the emulsion dry in a completely dark room for twenty minutes. Use a hair dryer to dry the mesh.
 5 Place the transparency on the wire mesh. Now you can burn your drawing on the emulsion.To do this, place the mesh on a flat surface, place the transparent film on it, placing a piece of glass on top of it so that it does not move.
  6 It's time to burn the drawing on the emulsion. A 500-watt light bulb will burn the pattern onto the emulsion in about fifteen minutes.
 - The exact time depends on the bulb and emulsion you are using.
- Specific instructions as to which lamp should be used should be listed on the packaging of the emulsion you purchased.
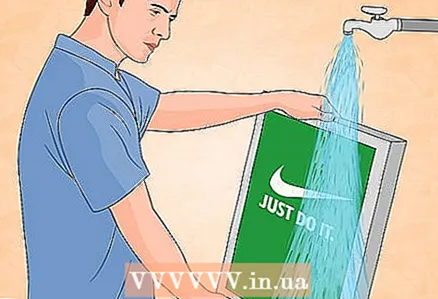 7 Rinse the mesh screen. Soak the mesh under a thin layer of water for about a couple of minutes. Then rinse off excess emulsion with a hose or shower.
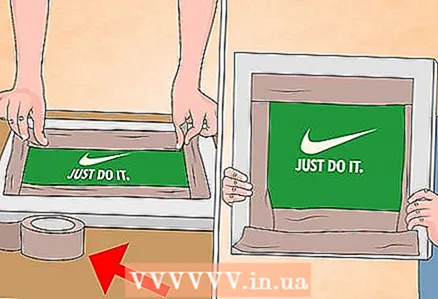
 - 8 Attach the waterproof foil to the corners of the inner side of the net. The side edge of the mesh will be on the front of the shirt, and the front will be ink.
- To make sure paint hasn't leaked over the frame, use a waterproof film to protect the corners where the mesh is stretched over the frame.
- To make sure paint hasn't leaked over the frame, use a waterproof film to protect the corners where the mesh is stretched over the frame.
 9 Lay the shirt on a flat surface. Make sure there are no wrinkles on it. Place the screen on the T-shirt where you want your drawing to be. Lay the net on top, making sure the net is in line with the pattern.
 - Place the shirt under a hard piece of cardboard. This way, it stays flat and wrinkle-free. It will also make it easier for you to do the next task, because then you will have to place the shirt in a safe place to dry it.
- If possible, get a friend to hold the screen while you smear the ink.
 10 Pour a tablespoon of screen printing ink into the top of the mesh. Using a scraper, apply ink to the mesh from top to bottom.
 - Since the mesh is quite strong, it shouldn't be difficult for you.
- Press very gently to prevent ink from leaking through the screen.
 11 Sweep over the mesh with a scraper. By covering the mesh with ink, you can apply the design to the T-shirt.
 - Hold the squeegee with both hands at a 45 degree angle so that the pressure is even. If possible, ask a friend to hold the screen.
- Remove excess ink from the drawing on the grid.
 12 Let the ink dry. Using a hair dryer, you will dry your drawing in a few minutes.
 - Allow the ink to dry before applying another layer of colorful designs to the screen.
- If you use the right screen printing technology, you can easily machine wash your T-shirt.
 13 Rinse the mesh after you finish making the shirts. Place it in cold water and rinse off the ink with a sponge. Leave the mesh to air dry.
Method 4 of 5: Stencil Drawing
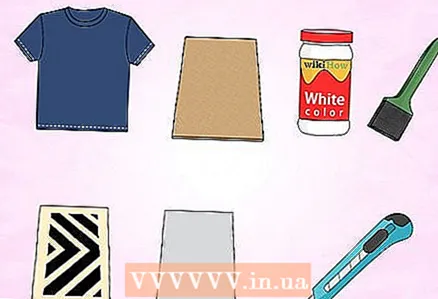 1 Take the materials you need to work. To stencil your design onto a T-shirt, you will need:
 - Your drawing, printed in black and white. It is very important to print it in black and white so that the lines are seen more clearly.
- Photo paper or transparencies
- Carving knife or utility knife
- Blank T-shirt
- A piece of cardboard to place on the front of the shirt
 2 Print your design onto a sheet of photo paper. Photo paper is the blank paper used to wrap books. She has one side normal, and the other is sticky, which peels off. You should secure your paper to the sticky side so that the design is visible through the front side of the photo paper (not the sticky side).
 - You can also use a piece of transparency or a blank sheet of paper. Use duct tape to glue it to your printout.
 3 Use a sharp utility knife to cut out the black parts of the design. Place the attached sheets on a flat surface, such as a table.
 - Trace the lines with a carving knife or utility knife. Remember that the parts you cut out are the parts of the design that will be filled with paint.
 4 Peel off the sticky part from the photo paper. Peel off also the plain paper with the highlighted design for photo paper. Place the sticky stencil on the T-shirt, and be sure to remove any wrinkles.
 - If you are using transparencies or a blank sheet of paper instead of photo paper, use tape to tape the transparencies to the T-shirt.
 5 Place a piece of cardboard inside your shirt. This will separate the front and back sections to prevent ink from seeping to the other side.
  6 Use a sponge brush to work over the fabric. Only paint the areas on the T-shirt that have been cut from the photo paper - those that will be painted dark.
 - Let the paint dry. Check it by lightly touching the painted areas. If there is paint on your finger, it is not dry yet.
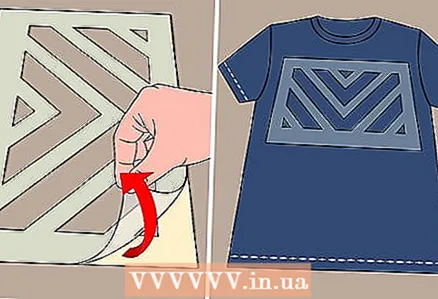
 7 Remove the photo paper from the T-shirt when the ink is dry. Now you have a stencil drawing on your T-shirt.
 - If you want to make some more T-shirts, you can use this stencil to make them.
Method 5 of 5: Apply Your Pattern with Whitening
 1 Whitening is a fairly safe method. Bleaching print is a fun, easy, and inexpensive way to print a print on a T-shirt, especially if it contains text. But remember that bleach is toxic and should be kept out of the reach of children.
 - Your eyes, clothing, and exposed body parts should always be protected when handling bleach.
- If you have sensitive skin, you should wear thin kitchen gloves when bleaching.
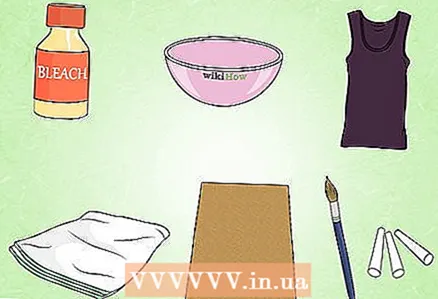 2 Take the materials you need to work. You will need:
 - Safe homemade fabric bleach
- Artificial paint brush (choose the cheaper one as you will still be using bleach!)
- Glass or ceramic cup
- White towel or rag
- White chalk
- Piece of cardboard
- Dark cotton T-shirt
- You can use this method on light-colored T-shirts, but bleached patterns will work better on darker T-shirts.
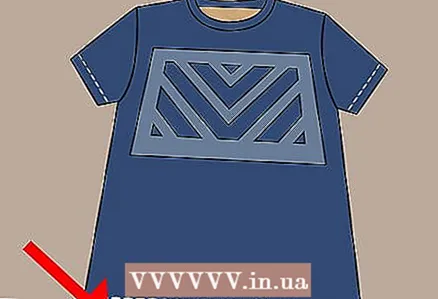
 3 Lay your shirt down on a flat surface. Then tuck a piece of cardboard into your shirt. After all, in order to apply your drawing, you need a flat surface. This will also prevent bleach from leaking out.
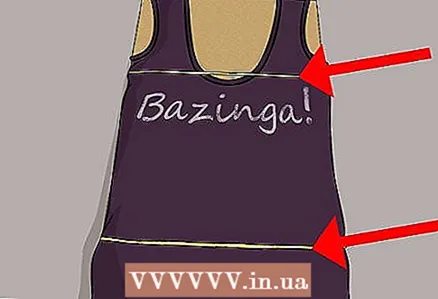
  4 Draw your design on the T-shirt with white chalk. This could be your favorite expression ("Bugagashenka!", "Bring it on!"), Your band name, or your brand logo.
 - Don't worry if you have to erase what you chalked up and paint over again. The chalk will be washed off as soon as you bleach the design.
 5 Tuck the edges of the shirt under the cardboard. Attach the shirt to the cardboard using small rubber clips. Now the cardboard will not slip out during bleaching.
 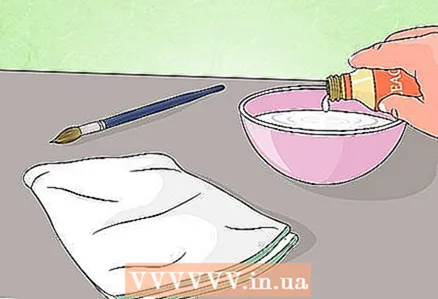 6 Have your bleach ready. Pour several lids of bleach into a glass or ceramic cup. Wipe off any stains with a towel. Otherwise, drops of bleach may spill onto your clothing.
 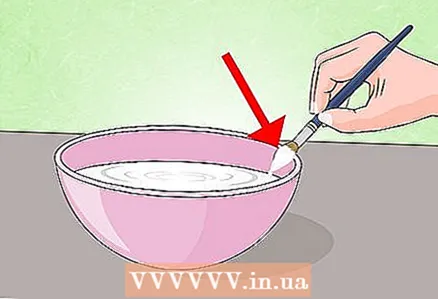 7 Dip your brush in bleach. Tap the rim of the cup with it to drain the extra drops.
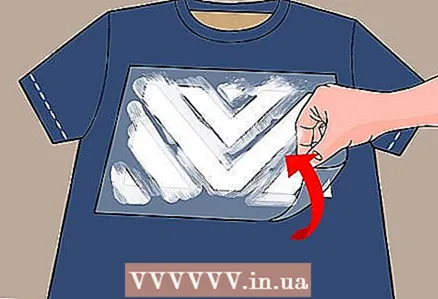
 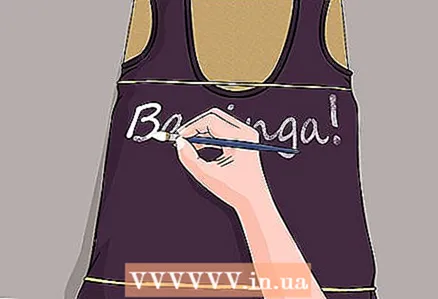 8 Trace your chalk drawing with even strokes. For crisp strokes, dip the brush into the bleach every five centimeters. The fabric absorbs liquid quickly, so work quickly but take your time.
  9 You are done tracing the drawing. Now take a break to allow the bleach to react with the fabric of the shirt.
 - Examine the T-shirt. Are there fuzzy spots or light areas on it? If this is the case, brush around the design again with the bleach brush.
 10 Hang the shirt in the sun for at least an hour. This will stimulate the bleaching process and the T-shirt will become lighter.
 - Depending on the cotton content of your shirt, the color of your print can range from dark red to orange, pink, or even white.
 11 Rinse and wash your shirt. Hang it up to dry. Admire your new permanent pattern made with bleach.
 - You can wash your shirt with other colors. The chalk should be washed off and only the bleached pattern will remain on the T-shirt.
Tips
- Remember, digital printing is the easiest way to quickly make a large batch of T-shirts. Mesh screens, screen printing, or bleaching are not bad methods to use at home, but not on a large scale.
- If you have a digital image of your drawing, you can always contact the printing industry and entrust this business to professionals.


