Author:
Florence Bailey
Date Of Creation:
28 March 2021
Update Date:
1 July 2024
Content
- Steps
- Method 1 of 3: The Easy Way
- Method 2 of 3: Constructing a regular polygon
- Method 3 of 3: Drawing a polygon using a protractor
- What do you need
Want to draw a polygon with many sides? Polygons are shapes made up of straight line segments whose ends are connected to each other. There are many different types of polygons, but they all have sides and vertices (corners).
Steps
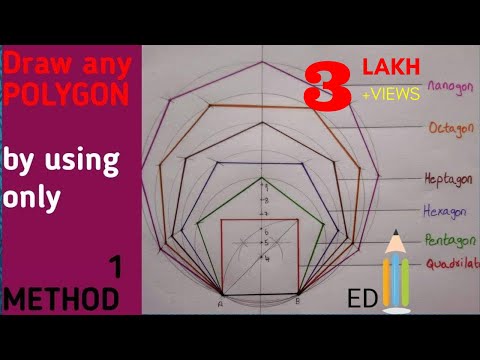
 1 Decide which polygon you want to draw. There are many varieties of them. Typically, polygons are distinguished by the number of sides they contain. For example, a pentagon has five sides, a hexagon has six, an octagon has eight, and so on. Mathematicians use the term "n-gon", where "n" is the number of sides. The number of sides that a polygon can have can be arbitrarily large; a polygon can be convex, which means that each of its diagonal lies inside it, or star-shaped if the last condition is not met.
  2 Let's say you decide to build a regular convex polygon. A regular polygon is one in which all angles are equal, and all sides have the same length. Although most people, hearing about the polygon, imagine this type of polygons, not all of them are correct. It is much more difficult to draw a regular polygon than any other.
Method 1 of 3: The Easy Way
 1 If you want, you can make it easier for yourself. The polygon doesn't have to be right at all.If you don't want to complicate the drawing process, take a ruler and pencil and draw several straight lines so that they form a closed shape. It really is a polygon!
 - Although most people, hearing the terms "hexagon", "octagon" and so on, imagine regular polygons, these terms do not at all imply that these polygons should be so. The word "hexagon" only means that a figure has six sides, while a "regular hexagon" must have six sides of the same length, with equal angles between them.
 2 Always build a closed shape. Whether you are drawing a convex or star polygon, its segments must form a closed shape, otherwise it will not be a polygon, but a polyline. Close the segments, draw them as straight lines, and you have a polygon!
 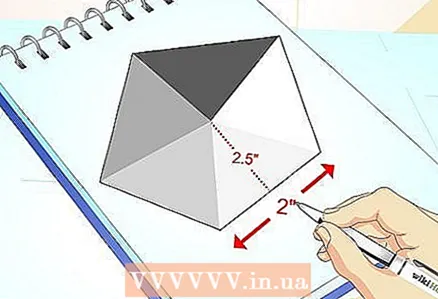 3 If you want, you can have fun with calculations. If you want to know more about polygons, find the perimeter and area of the polygon you built.
Method 2 of 3: Constructing a regular polygon
 1 Understand why a polygon is called "regular". In such a polygon, all sides and all angles are equal. The simplest examples of regular polygons are an equilateral triangle (in which all three sides are the same length, and each angle is 60 degrees) and a square (in which all four sides are equal, and each angle is 90 degrees). But you can build more complex polygons too!
  2 Decide which polygon you will draw. In the case of regular polygons (just like any other type of polygon), you have a lot to choose from. For example:
 - You can draw a polygon enclosed by a circle.
- You can draw a square.
- You can draw a regular pentagon with five equal sides and angles.
- You can draw a regular hexagon with six equal sides and angles.
- You can draw a regular octagon with eight equal sides and angles.
- You can draw a polygon with as many sides as you like! To do this, read the next section.
Method 3 of 3: Drawing a polygon using a protractor
 1 Draw a circle on the paper, outlining the rounded part of the protractor. Since the protractor has a semicircle, you will have to line up the two semicircles, while marking their ends and the center of the circle. First draw one semicircle, outlining the arc of the protractor, then unfold the protractor, align its center and edges with the center and extreme points of the drawn arc, and again circle the edge of the protractor.
  2 Decide how many sides (corners) you want the polygon to have.
 3 Calculate the angles between the lines drawn from the center of the circle to two adjacent vertices of the polygon. A full circle encloses an angle of 360 degrees, so you need to divide 360 by the number of sides of the polygon equal to the number of its vertices. This will give you the angle between the radii of the circle drawn to any two adjacent vertices of the polygon.
 - For example, if you are plotting a hexagon, this angle will be 60 degrees.
 4 Using a protractor, draw points on the circles at the distances corresponding to each corner. In other words, set the starting point, then measure the calculated angle from it and set the next point, and so go along the entire circle, putting points on it corresponding to each increment of the angle.
 - For example, if you are drawing a hexagon, place a starting point anywhere on the circle, then measure an angle of 60 degrees from it and place a second point on the circle, and so on, until you have traversed the entire circle. As a result, you get 6 points.
 5 Connect pairs of adjacent points with straight lines. For this you need a ruler; make sure that the lines do not cross. Better to draw thin lines so that in case of error or intersection, you can easily erase them.
  6 Erase construction lines and circle. You have drawn a polygon! If you want to make sure that your polygon is really correct, measure the length of its sides and make sure that it is really the same length.
What do you need
- Pencil
- Ruler
- Protractor - required to build a regular polygon
- Paper


