Author:
Florence Bailey
Date Of Creation:
27 March 2021
Update Date:
27 June 2024
Content
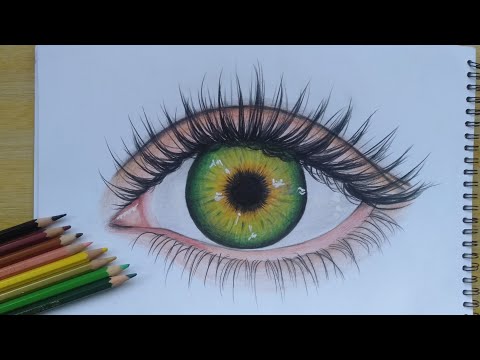
Do you want to draw a human eye with colored pencils? Drawing eyes is very interesting, and it doesn't matter if you are just sketching or trying to create the most realistic drawing. Once you practice the skill and learn how to sketch the eye with a simple pencil, you can experiment and color the drawing.
Steps
 1 Choose a brand of colored pencils before starting your drawing. You can use absolutely any colored pencils, but softer ones will be easier to shade. For example, Koh-I-Noor, Faber Castell and Lyra are considered good pencil brands.
 - 2 Find a photo to paint from. It will be much easier for you to choose the right colors, draw the shape and convey chiaroscuro if you have a photograph.
- You can take a photo of your own eye or find a photo of the human eye on the Internet.
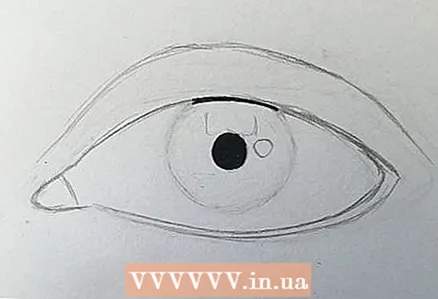
 3 Sketch the eye with a simple pencil. Pay special attention to the size of the tear duct and the inner part of the eyelids, as the appearance of these parts of the eye will affect the realistic drawing. Also mark the places where the glare will be: these places need to be circled so as not to accidentally paint over them with any color. If you want to work out the light parts at the very end with something like a white gel pen, then circle only the larger highlights.
  4 Using a black felt-tip pen or pen, paint black over the pupil and other darkest parts of the eye, such as the top of the iris.
- Don't paint the eyelashes at this stage - you will add them later.
 5 Choose the colors you will use. Be sure to try them out on a draft before you start drawing to see if they match the colors in the reference photo.
 - A white pencil will help you to highlight the places where you went wrong.
- Do not sharpen your pencils too sharply, as a point that is too sharp is more likely to break.
 6 Use an eraser to make the contour of the iris less visible. This is to prevent the dark graphite of a simple pencil from mixing with the color of colored pencils.
  7 Use the lightest color you choose to paint over the highlights in the photo. In this case, you do not need to touch the places that you circled at the very beginning (highlights).
 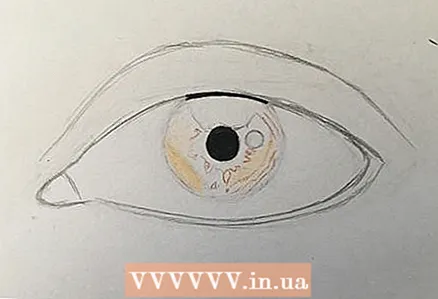 8 Continue painting over the lightest parts of the picture, gradually adding darker parts and details. Remember, it's always easier to darken the color the lighter it is.
 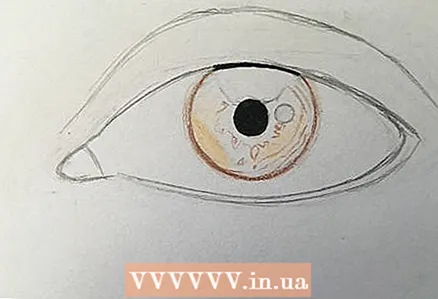 9 Outline the iris with a darker color.
 10 Color in the darkest parts of the iris. Most likely, one of these places will be the upper part of the iris under the upper eyelid, as well as some details inside the iris.
 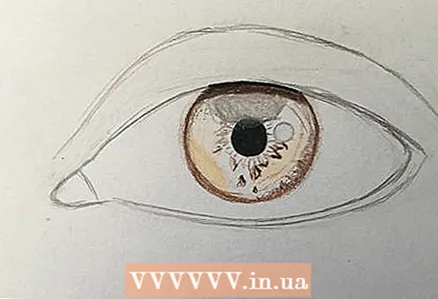 11 If some of the highlights in your photo are not pure white, paint them in the appropriate color.
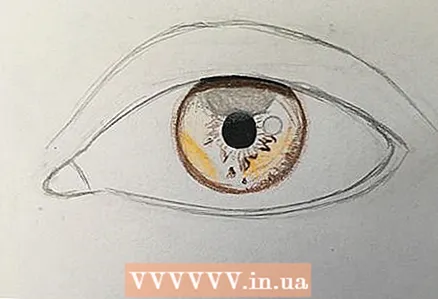 12 Start adding brighter colors (if needed), but don't overdo it. It's easier to add brightness to the colors later than to lighten them.
 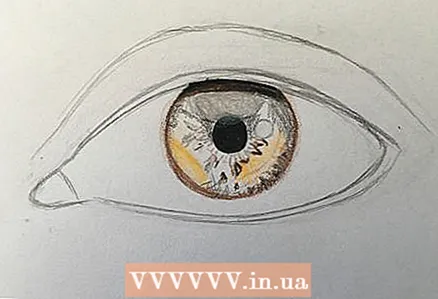 13 Lightly traverse the deeper areas of the iris with a black pencil. Thanks to this, you can easily find them later.
 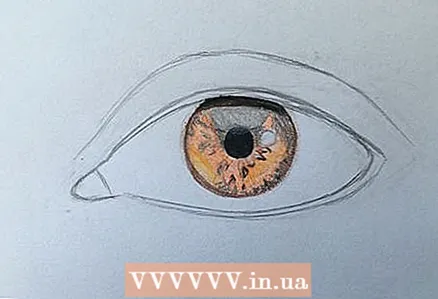 14 Shade the iris with its foreground color. This will be the hue that dominates the color of the iris, such as orange, light brown, or blue. Try not to use a dark shade.
  15 Add shading with a more saturated color to complement your base color. In the case of orange, it can be a lighter shade of orange, or even red if used with care.
  16 Add shadows around the iris, paying most attention to the upper part under the eyelid.
 17 Add white in the center of the iris - like a ring around the pupil. This will make the drawing look more voluminous.
  18 Use a medium-saturation pencil to work on the darkest areas of the eyelid.
 19 Continue adding colors, gradually moving towards the darkest.
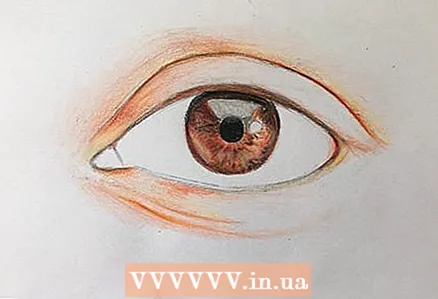 20 Darken the crease of the eyelid and other parts of the drawing that are shaded the most.
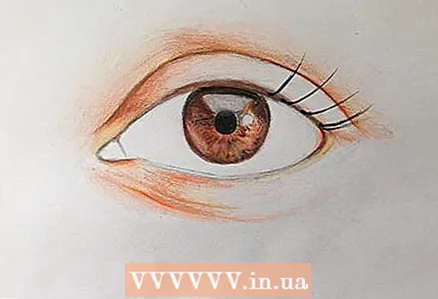 21 Start drawing your eyelashes. It will be easier to do this with a black felt-tip pen or pen, but you can also use a black pencil. Draw the lashes curved rather than straight up. Take a look at the reference photo to see how they should curve from the outer edge of the eyelid border.
 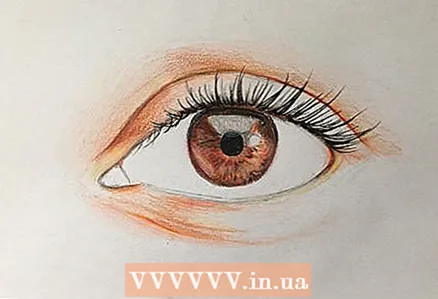 22 Finish painting the upper lashes. Make sure your eyelashes are at the correct angle, taking into account the angle from which the photo and your drawing were taken, and that they vary in length.
 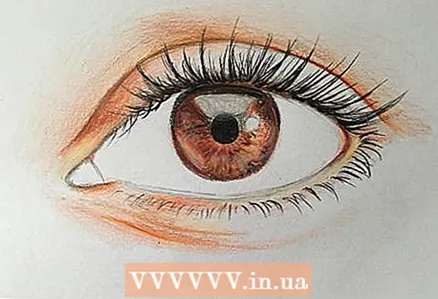 23 Draw the lower lashes. Make sure that each eyelash starts from the outer edge of the eyelid border (a strip of skin should be visible between the lash line and the eyeball).
  24 Start shading the inner corner of the white eye. If the light in the photo is cold, then you will need to use gray, and if it is warmer, then choose pinkish shades.
  25 Color the lacrimal canal, transferring all the shadows and lines from the photo to the drawing, which will help to make it more realistic.
 26 Continue to tint the white of the eye. You can paint highlights or eyelash shadows.
 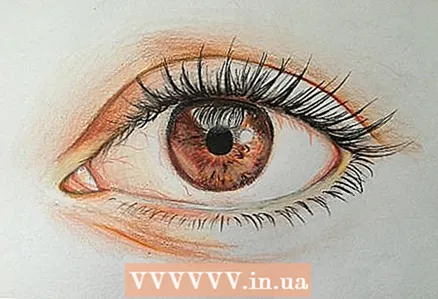 27 In dark red or purple, without pressing the pencil, draw veins on the squirrel. Don't make them too noticeable or the eye will look fake. Note where the veins are best visible in the reference photograph.
 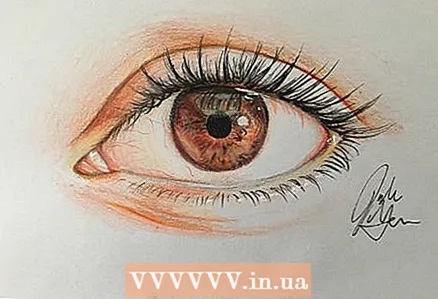 28 Add finishing touches such as extra highlights and your signature.
Tips
- If you accidentally paint over an area with the wrong color, apply a layer of white on top to correct the mistake.
- Do not apply many shades at once. Add them in layers gradually.


