Author:
William Ramirez
Date Of Creation:
22 September 2021
Update Date:
1 July 2024
![How to Plan a VtM Chronicle [Part 1: Setting] | Vampire: The Masquerade Chronicle](https://i.ytimg.com/vi/QN_TEXFibSE/hqdefault.jpg)
Content
- Steps
- Method 1 of 3: Explore the topic
- Method 2 of 3: Create a foundation
- Method 3 of 3: Complete the Timeline
- Tips
Chronicle (timeline) is nothing more than a visual display of events. A timeline helps you better understand a story, story, process, or any other form of sequence of events. With the help of the chronicle, you can highlight a variety of topics, therefore it is very often used in scientific projects. Plus, it's pretty easy to create. To do this, research your chosen topic, make a plan and arrange events in chronological order.
Steps
Method 1 of 3: Explore the topic
 1 Gather information on a chosen or given topic. As you read and gather information, start flagging which events to include in your timeline. You will need to provide a comprehensive history of your topic, so be sure to use multiple sources of information.
 - Do your internet research, read books from the library, or visit a museum or history site that is somewhat related to your topic.
- Try to use multiple websites, books, articles, and maybe even documentaries. Strive to have at least three different sources.
 2 List the events to add to your chronicle. Include not only major events, but also other relevant and interesting events on your topic. Of course, the timeline does not need to deviate from the main course, but it is important that the information engages the viewer / audience and shows your understanding of the topic. Try not to specify more than twenty events in the chronicle and add at least five events inside it. Here's what you can enable:
 - personal data (for example, birthdays and deaths, as well as other important dates);
- historical events that influenced the topic of the chronicle;
- important events that shaped the theme.
 3 Use the chronicle to tell the story. Despite the different format, the chronicle, like the story, should flow smoothly and be fun and interesting to read. A person should strive to learn about the next event in the same way as when reading a novel, from which it is difficult to break away!
Method 2 of 3: Create a foundation
 1 Study the examples of the chronicle. To get an idea of what a timeline usually looks like, search the Internet for the relevant query. Review several results to clearly understand how to proceed with the project.
  2 Draw a timeline. Sketch with a pencil, then trace around it with a dark pen or marker. Indicate the name of the project and limit the scale to years.
 - Use the ruler if you are drawing the timeline by hand.
- If you're creating a timeline electronically, choose a template.
 3 Select the start and end points. Set the boundaries of your timeline. They are for researching a topic, so start and end your timeline with enough space to cover all events.
 - It is not necessary to start with the date of birth or end with the date of death of the person. A chronicle is simply a series of related events, which is not always a biography.
- Study the topic and narrow it down to choose the correct start and end points.
 4 Decide how you will display events. There are many ways to display events, depending on your preference. You will need to create a description for each event, and they will all need to fit on the timeline.
 - If you do it manually, write down all the events on a separate piece of paper before adding them to the timeline to find out how much space each description will take.
- Alternatively, you can create each description electronically, then print, cut and attach to the timeline.
- If you are doing everything electronically, create a slide for each event.
- Add blueprints or images to add visual interest to your timeline.
 5 Select time periods. Depending on the time span you are working with, you can choose periods in decades, years, months, or even days. Determine what's right for your theme and the number of events you're adding. Create an appropriate number of evenly spaced lines perpendicular to the main timeline between the start and end dates.
 - These time periods are not years of events. They represent evenly spaced intervals such as 5 years, 10 years, or 20 years. For example, you can mark 1920, 1930, 1940 and 1950 even if the events take place in 1923, 1928, 1938 and 1943.
 6 Place the most important dates on the timeline. Move along the line and mark the places where the events will take place. Draw a line perpendicular to the main timeline to indicate the years in which the events occurred, and write a short description of each one.
 - Organize your dates consistently. Events on the timeline should be arranged in chronological order, not in order of importance or interest. For example, events listed within one year must start in January and end in December.
Method 3 of 3: Complete the Timeline
 1 Give a name to your project. Choose an engaging headline that tells the viewer what your timeline is about. Make sure the title reflects everything you've included in your project, not just the theme. For example, don't call your work "NASA". Better the title "NASA: Search for the Moon." Here are examples of headers:
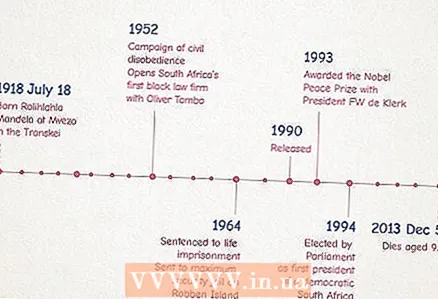
 - The life and history of Nelson Mandela
- Beverly Hills 90210: Current History
- Jerome David Salinger's legendary career
- Ancient sequoias of California
- One day in the life of a praying mantis
 2 Add details and important information about each event. For each signature, write a short explanation of what happened, including facts about the participants, the impact of the event, and any relevant numbers, such as the number of people killed in the war. Fill in details that will help you provide a comprehensive account of the chronicle.
  3 Write clearly and concisely. Your words should be easy to read, so write clearly. Alternatively, print the captions, cut them out, and glue them onto the timeline. Use as few words as possible when explaining events, so as not to take up too much space with one of them.
 - If you are creating a timeline electronically, print the signatures.
 4 Add images. Add visual interest to your timeline with a few images that match the specified events. Find pictures online, copy them from books, or get creative and draw them yourself.
Tips
- Alternate locations as needed when placing events. Write one event above the line and the next below it.
- Try to write in small letters.
- Be sure to cite sources correctly.
- Plan ahead of time what you are going to place on the timeline because it will be very difficult to erase any mistakes or add forgotten events.
- Get creative and draw paths around elements in the timeline to make your visuals even better. For an organized, business-like look, strict contours, such as a rectangle, are suitable.


