Author:
Virginia Floyd
Date Of Creation:
5 August 2021
Update Date:
1 July 2024

Content
- Steps
- Part 1 of 2: Preparing to Wrap a Dislocated Shoulder
- Part 2 of 2: Bandaging the Adjusted Shoulder
- Tips
- Additional articles
Dislocation of the shoulder is a rather painful injury in which the ball-shaped head of the shoulder joint comes out of the joint capsule located in the shoulder girdle.In the event of a displacement of the shoulder joint, it must be secured with a strong bandage of adhesive tape or medical tape, which will reduce pain, provide support and accelerate the healing of stretched ligaments and tendons. In addition to bandaging a dislocated shoulder joint, it can also be used to prevent such injuries, which is why athletes often bandage their shoulders.
Steps
Part 1 of 2: Preparing to Wrap a Dislocated Shoulder
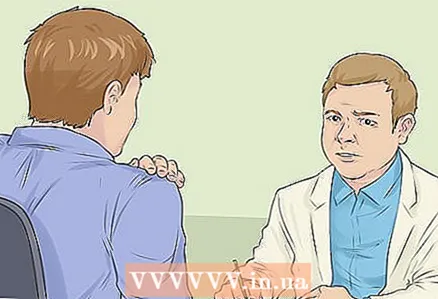 1 If you suspect you have a dislocated shoulder, see your doctor. As a rule, a dislocated shoulder occurs when playing sports or as a result of a fall on an outstretched arm. Symptoms of a dislocated shoulder are: acute shoulder pain, inability to move the shoulder, immediate swelling and / or bruising, noticeable shoulder displacement (for example, it may sink lower than the normal shoulder). If you suspect that you have dislocated your shoulder as a result, seek immediate help from a qualified professional (general practitioner, chiropractor, sports doctor).
 - To make an accurate diagnosis and to make sure that no bone is broken, your doctor may refer you for an x-ray.
- To reduce the acute pain caused by the dislocation, your doctor will recommend that you take a pain reliever and, if necessary, write a prescription.
- Remember that a dislocated shoulder is not the same as a dislocated collarbone. The latter, also called acromioclavicular joint dislocation, is an injury to the ligaments of the joint that connects the clavicle to the anterior part of the shoulder girdle, in which the hinge joint remains in place.
 2 Straighten the dislocated shoulder joint. Before applying a bandage on the shoulder, the joint should be adjusted by returning the ball-shaped head to the corresponding articular bag of the shoulder girdle. This procedure, called closed joint repositioning, involves gentle stretching (stretching) and rotation of the forearm to bring the head of the joint back into place. However, you may need a local injection or strong pain reliever tablets to relieve acute pain.
 - Never ask someone who does not have the necessary experience (a relative, friend, or the first person they meet) to set your shoulder back - this can lead to moreOmore damage.
- Straightening your shoulder will give you immediate relief.
- To reduce pain and inflammation, apply an ice pack to the joint for 20 minutes immediately after repositioning the joint. Be sure to wrap the ice in plastic wrap or a thin cloth before applying ice to your skin.
- Never bandage a joint that is not in place.
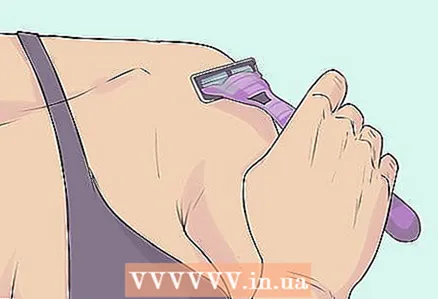 3 Prepare your shoulder for bandaging by washing and shaving. Once the shoulder joint has been flattened and the pain is relieved, prepare the shoulder for the bandaging. To keep the band-aid or medical tape firmly on your shoulder, wash and shave it. Gently wash your shoulder with soap and water, apply shaving cream to your skin, and gently shave your hair with a safety razor.
 - After shaving your skin, let it dry and wait at least a few hours for the irritation after shaving to go away. Then, apply a sticky aerosol to your skin to help the bandage hold on tightly before you apply the band-aid or medical tape.
- Hair not only weakens the adhesion between the dressing and the skin, but also causes pain when the dressing is later removed.
- If your skin is quite thick with hair, shave not only the shoulder itself, but also the shoulder blade, nipple and bottom of the neck.
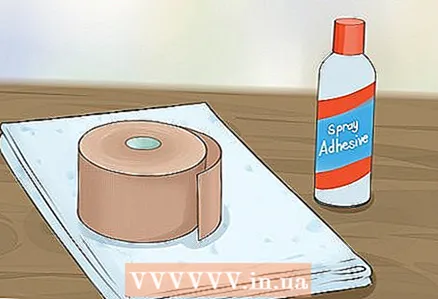 4 Stock up on everything you need. Collect (or purchase from your nearest pharmacy) everything you need to properly bandage your dislocated shoulder. In addition to the sticky spray, you will need an orthopedic pad or foam to cover the sensitive nipple, a sturdy medical tape (38mm tape is best), and an elastic bandage (a 75mm tape works well).Keep in mind that you will most likely need someone's help when applying a shoulder strap, even if you have the necessary experience.
 - In the office of an orthopedist, physiotherapist, sports trainer or doctor, you will surely have everything you need to bandage your shoulder. However, your family doctor, nurse, general practitioner, or chiropractor may not have anything, so bring all the supplies you need with you.
- You will be able to straighten your shoulder joint at the emergency room, but it is not the duty of the staff at these offices to apply a bandage. Instead, they can tie a simple sling around you to support your injured arm.
- By bandaging a dislocated shoulder, you can speed up healing or even prevent a dislocation, but the bandage is not considered medically necessary, so bandaging the injured shoulder is not a necessary medical measure.
Part 2 of 2: Bandaging the Adjusted Shoulder
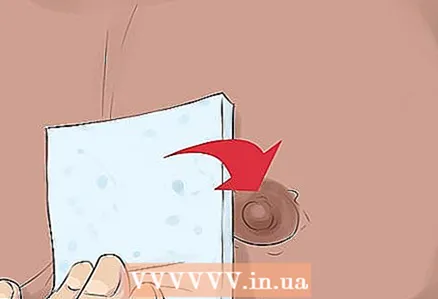 1 Place an orthopedic pad or foam on your skin. After washing, shaving and applying a sticky spray to your shoulder, cover sensitive areas (nipple, pimples, boils, wounds that have not completely healed, etc.) with a thin pad or foam. This will relieve pain and skin irritation when you remove the dressing later.
 - To save material and time, cut the pad into small pieces and apply them to the nipple and other sensitive skin areas. The gasket material will adhere to the previously applied tacky spray for at least a short time.
- Keep in mind that although the arm sling is usually worn over your underwear and shirt, the sling is worn under your clothing, over your bare shoulder.
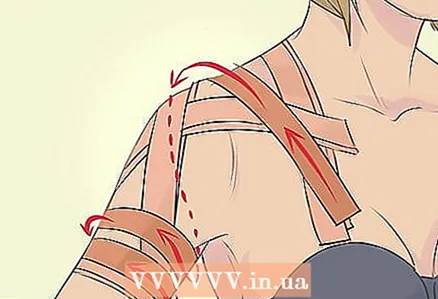
 2 Apply support strips. Begin the dressing by placing support straps over the shoulder and biceps muscles located in the front of the forearm. Pull the tape from the base of the nipple up to and around your shoulder, about the middle of your shoulder blade. For strength, add one or two more layers over the first tape. After that, tie the middle of the bicep with two or three strips of tape.
 - After completing the previous step, stretch the support strip from the nipple to the upper back, and wrap another strip around the bicep.
- Do not overlap the second strip so that it will not obstruct circulation in your hand. If you tighten the tape too much, you will feel tingling and numbness in your hand.
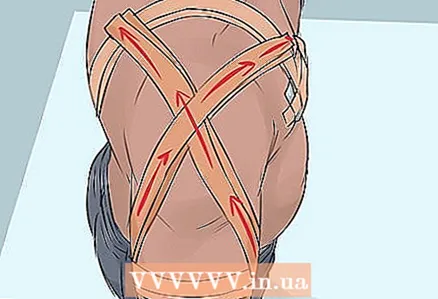 3 Wrap an “X” around your shoulder. Secure the shoulder by placing two or four stripes on it at intersecting diagonals, connecting the support bandages. As a result, you will have a sling in the shape of the letter "X", or cross, the center point (where the bands intersect) which will be located on the lateral muscles of the forearm, called the deltoid muscle. You need to apply at least two strips, but the bandage will be more secure if you make four strips.
 - When bandaging your shoulder, pull on the band, but not too tightly so that the bandage is comfortable. If the dressing hurts you, remove and reapply.
- While many injuries use breathable tape for bandaging, a thicker, stronger material is required to fix a dislocated shoulder.
 4 Connect the ribcage to the bicep by tying the tape in a "corkscrew" shape. Pull the tape from the outside edge of the nipple to the top of your shoulder and down along your forearm under your biceps. In essence, this way you will reconnect both support strips, but this time from the front, and not from the side, as last time. The bandage will take on a corkscrew (spiral) shape when you lower the band along your arm and wrap it around your forearm two or three times.
 - When applying a bandage around the forearm, it is best to use two or three separate strips so that the “corkscrew” is not too tight and does not obstruct circulation.
- After completing this step, reinforce the bandage again by placing an extra strip over the original support straps (see above). In general, the more tape you apply, the tighter the bandage will hold.
- Remember that this method is also used to prevent injury or trauma to the shoulder, especially in contact sports such as hockey or rugby.
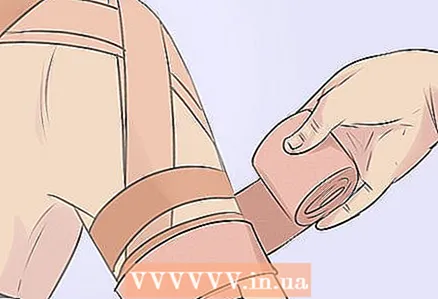 5 Secure the tape with an elastic bandage. After bandaging the shoulder with medical tape, pull the elastic bandage over it. Stretch the bandage from your ribcage to the top of the injured shoulder and then lower it under the biceps. After that, passing the bandage along the upper back, stretch it under the armpit of the intact arm and return along the front side of the chest to the injured shoulder, placing the bandage under it. If the bandage is enough for you, make another turn for security, then use a metal clip or a safety pin to attach the free end of the bandage to the bottom layer.
 - The main purpose of the elastic bandage is to cover the medical tape and keep it from falling off the skin. In addition, the bandage provides additional support to the injured shoulder.
- When treating with cold, you can always unwind an elastic bandage, apply ice over the tape to the damaged area and reapply the bandage on top.
- So, create two support strips and join them on the side with tape, placing it in the form of the letter "X", then apply the tape in the form of a "corkscrew", and finally cover it with an elastic bandage, pulling it across the back and chest.
Tips
- Although injuries and injuries heal differently from person to person, it usually takes one to three months for a dislocated shoulder to heal.
- Straightening your shoulder and applying a bandage right away will help speed up the healing process.
- To reduce the effect of gravity stretching the injured shoulder joint, you can wear your arm in a sling after you straighten and bandage your shoulder.
- You can remove the old bandage about once a week and replace it with a fresh one.
- You may need physical therapy to fully repair your injured shoulder. 2-3 weeks after applying the bandage, your doctor may refer you to a physical therapist who teaches you exercises to help strengthen your shoulder and recommends stretching.
Additional articles
 How to grow up
  How to get higher naturally
 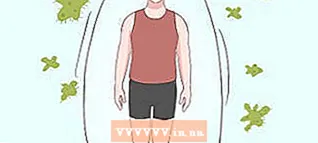 How to be healthy
  How to lower your ALT level
  How to radically change your life
  How to get rid of milia
  How to get the most out of your workout
  How to increase your red blood cell count
  How to heal bruised toes
  How to heal wet wounds
 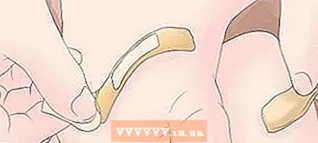 How to get the glass out of your leg
 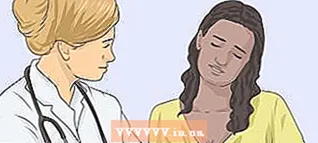 How to heal deep cuts
 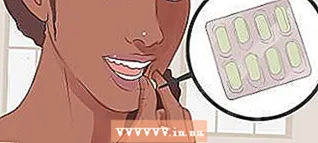 How to check if a wound is inflamed
  How to determine if a cut needs stitches


