Author:
Randy Alexander
Date Of Creation:
1 April 2021
Update Date:
1 July 2024

Content
Fryers used at home or in restaurants often have a lot of grease and food residues, making them difficult to clean. While oven cleaning takes longer than dishwashing, if done before stubborn dirt accumulates, it can save a lot of effort.
Steps
Method 1 of 2: Clean the fryer
Clean the fryer as needed. If you use the fryer regularly, changing the oil and cleaning it after a few days of use will help prevent accumulation of hard-to-handle dirt. If you use your fryer every few weeks, or use it infrequently, you should clean it after each use.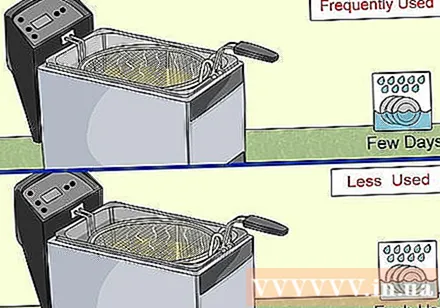
- Do not place the fryer in the sink or dishwasher. Immersion in water can interrupt the circuit and damage the fryer.

Disconnect fryer and let cool completely. Do not clean the fryer without unplugging the power plug. You should let the oil in the oven cool completely to avoid burns. Do not add water to the hot oil tank as the oil-water mixture may ignite.
Drain the oil. If you want to reuse the oil, you can pour the oil into a container that meets food hygiene standards and has a tight lid, then store it in a cool place. If not, try to use oil or simply put it in a bottle with a lid and throw it away.
- Do not pour oil into the sink as it can clog the drain.

Remove the frying basket and place it in the sink. Put 2-3 drops of dish soap into the basket for later washing.
Wipe off excess oil from the pan and on the lid. You can use a wet (squeezed) paper towel to wipe excess oil and food residue from the fryer. If oil is in the pan, use a razor or knife to scrape it off. Take care to avoid scratching the oven. Some fryers have a pot lid that can be removed and easily cleaned. You can remove any excess oil from the lid after removing it.
- Hard plastic tools can scrape oil out without scratching the fryer.

If necessary, clean the oven heat conductor. Most fryers have a heat conductor consisting of 2 paired metal rods. If the heater gets oiled, you can wipe it with a paper towel. Be careful not to bend or damage any parts while cleaning, especially for metal bars that are too thin.- The heat conductor of some fryers can be removed and cleaned easily or attached to a hinge that can be pulled up close to the oven surface. You can check the model manual to see if the fryer in use has this feature.
Use a soft sponge and dish soap to scrub the oven. You can place 4 drops of dish soap on the bottom of the oven and 4 drops around the side of the oven. Start scrubbing from the bottom of the oven and rub in circles to create lather. Continue rubbing in a circular motion up the oven wall.
Fill the fryer with hot water. You can place the fryer in a pot, then place it under the tap water to prevent the water from contacting the electrical part of the oven. The water level poured into the oven should be higher than the normal oil level, but not too full. Leave hot water in the oven for about 30 minutes. In the meantime, you can take the next step to cleaning other parts of the oven.
- If tap water is not hot enough, you can boil water in a jar or pour cold water into a fryer, plug in the power plug and let the soio water directly in the oven. You should be on the lookout for the water to boil and drain. Unplug the power plug and wait for 30 minutes for the water to cool. Boil for a few more minutes if excess oil sticks to the oven.
Pour warm water over the frying basket and rub it over and over. You can use a scrub brush (or toothbrush) to remove food residue from the basket.
- After scrubbing, wash off any remaining soap residue on the basket, dry the water with a paper towel and dry on the cupboard or dry with a towel.
Clean or replace the dirty filter on the fryer lid. You should check the oven manual to see if the filter can be removed and cleaned. The foam filter is washable with hot soapy water and allows to dry. The charcoal odor filter is not washable and needs to be replaced when it becomes dirty or clogged.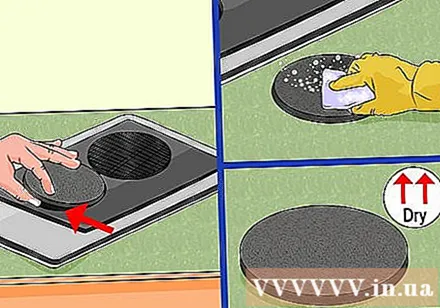
- As for the non-removable filter, do not immerse the oven lid in water. Instead, wipe with a wet cloth with a little soap and then use another wet towel to wipe off excess soap and oil.
Go back to cleaning fryer and wash one last time. After 30 minutes the water in the fryer has cooled down, you can pour half of the water out of the pan. Use a sponge or rag to wipe the sides and bottom of the pot with the remaining water, then empty the sink.
- If there is too much oil in the water, fill the bottle with water and throw it away instead of directly in the sink.
Use baking soda if it's still oily. For a sticky, stubborn layer of oil, you can mix a little baking soda in warm water to create a cleaning solution. Place the mixture on a sponge, then scrub the area with the oil in a circular motion until the residue disappears.
- Using chemical or abrasive cleaners to scrub the fryer is always a good idea. If using oven cleaner or other cleaning product, rinse the oven with soapy water afterwards and rinse with water several times to remove chemical residue before cooking.
Wash the fryer. Fill the saucepan with clean, soapy water and use your hands to stir to remove any soap residue from the sides and bottom of the pot. Pour the water out and continue the same process until the oven clears the soap.
- If there is still grease (you can feel the grease on the surface with bare hands), rinse with diluted vinegar. Mix 1:10 vinegar with water (110 ml vinegar per liter of water) and use it to wash the pot.
Let the oven dry completely (blot out the water with a paper towel to dry it faster). You should dry the oven with a towel, but let it dry naturally on the inside of the fryer. Wait for the fryer to dry completely before plugging it back in to prevent water from entering and getting stuck in the electrical system. advertisement
Method 2 of 2: Keep fryer clean
Clean regularly. Follow the oven cleaning instructions above to keep it clean. The frequency of cleaning depends on the level and use of the fryer. However, the more often you clean it, the easier it will be to remove oil residue and food residue.
- Fryers purchased from the outside are usually larger and deeper, so use a long-handle and soft-bristled brush to scrub the pot instead of a sponge.
Filter and change the oil regularly, especially after frying foods like fish and meat (sausages, etc.). Restaurant fryers are often used with a high frequency, so it is necessary to filter the oil 1-2 times per day. You can filter the oil for reuse using a coffee filter or cheesecloth. However, restaurants need to use a special filter to quickly filter high-temperature oil. The oil should be completely replaced if it becomes dark, smokes at low temperatures, and smells badly.
- The oil can be stored longer at 191ºC or lower (in the absence of direct salt added to the oil).
Clean the heat-conducting metal bar after each oil. Before adding new oil or refining the fryer, you should use a long handle brush to remove any food residue from the heat rod. This step helps the metal rod to conduct heat more efficiently and prevents food crumbling in the oil.

Wipe the outside of the oven. Wipe the edges and exterior of the fryer, although it does not prolong the life of the oven, it can prevent the accumulation of dirt and limit oil spilling onto cooking floors or surfaces and causing slippery. Try to clean it at the end of the day or use degreaser on the outside of the oven whenever you see a build up of oil. You should let the degreaser sit for 10 minutes before wiping it off with a wet towel. The outside of the oven can be dried with another clean cloth.
Every 3-6 months, "boil" water to rinse the oven once. To clean the fryer, pour warm water into the fryer, then let the water boil slowly. You can add a dedicated "boil" product according to the manufacturer's instructions to maintain a slight boil of water for 20 minutes. Wear rubber gloves, be careful where boiling water spills over your body and causes burns, use a soft bristle brush and long handle to scrub any residue on the inside. Drain the fryer, scrub and rinse as usual.- In the next wash, you can mix water and vinegar in a 1:10 ratio to neutralize and remove the chemical detergent.
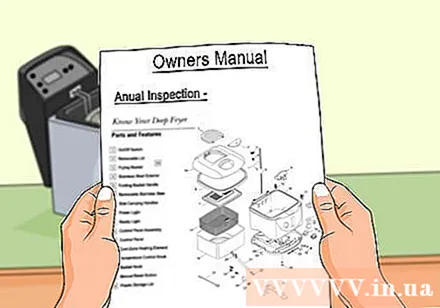
Follow the manufacturer's instructions for annual oven inspection. The manufacturer of the fryer generally provides instructions for annual oven testing to make sure the oven components have not loosened and are still working properly. If a problem arises and a specific solution cannot be found in the manual, you must call an electrician or repairer. advertisement
Advice
- There are different ways to clean the fryer, depending on the model you are using. You should read the instruction manual before cleaning the fryer.
- If necessary, you should remove both filters from the fryer before cleaning the lid.
Warning
- Do not wash the fryer by soaking it in water.
- Do not leave the power plug in the fryer during cleaning.
- Do not pour oil directly down the sink drain. You should pour used oil into a large tin or coffee can, cover it, then give it away or throw it away.
What you need
- Tissue
- Plastic / silicone knife or razor
- Soft sponge
- Containers with sealed lids for handling or storing oil
- Country
- Dishwasher liquid (do not use dishwasher detergent)
- Vinegar
- Towel or dishcloth
- Hygienic boiled products (used for cleaning the fryer)
- Degreasing products (used for cleaning fryers)


