Author:
Peter Berry
Date Of Creation:
16 February 2021
Update Date:
28 June 2024
![How to Create Apple ID / iCloud Account [3 Methods]](https://i.ytimg.com/vi/1TjeiIFLkmU/hqdefault.jpg)
Content
This article guides you to create an iCloud account by registering an Apple ID on an iPhone or iPad, on a Mac computer or through iCloud.com. When you sign up for an Apple ID, you'll also get a free iCloud account; all you need to do after that is login.
Steps
Method 1 of 3: Use an iPhone or iPad
Open the device's Settings. It's an app with a gray gear icon (⚙️) and is typically found on the home screen.

Touch Sign in to your (device) (Sign in (your device)) at the top of the menu.- If using an older version of iOS, you will tap icloud and choose Create a new Apple ID (Create a new Apple ID).
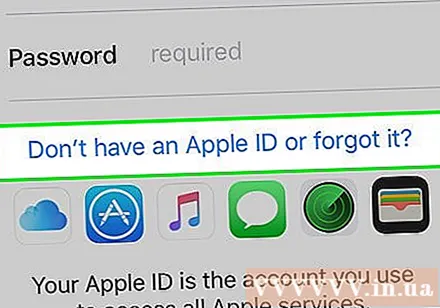
Touch Don't have an Apple ID or forgot it? (No Apple ID or forgotten?) below the password field.
Touch Create Apple ID (Create Apple ID) at the top of the pop-up menu.
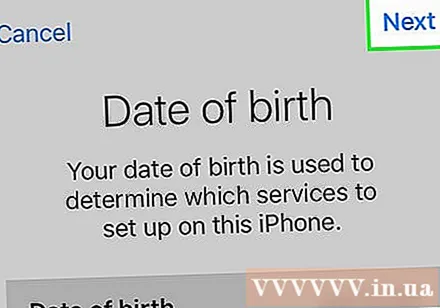
Enter your date of birth. Slide up or down the sections month (month), day (date) and year (year) to enter your date of birth, then select next (Continue) in the upper right corner.
Enter First name and Last name, then select next.
Enter an existing email address or create a new iCloud email address. This email address will become the Apple ID you use to sign into iCloud.
- Choose next.
Enter the password and select next.
Enter your phone number. Select verify phone number by Text Message (Message) or Phone Call (Call) and then select Next.
Enter the verification code, then select next.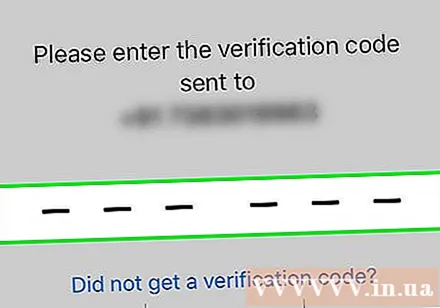
Choose Agree (Agree) in the lower-right corner of the Terms and Conditions page, then select Agree (Agree) in the selection list.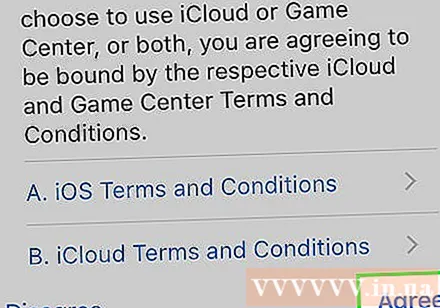
Enter your device's passcode. That is the screen unlock code generated when you set up the phone.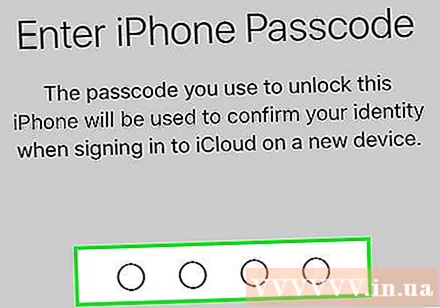
- The screen will display the message "Signing into iCloud" to be able to access your data.
Combine data. If you want to merge data such as calendar, reminders, contacts and notes into your new iCloud account, choose Merge (Merge); otherwise, choose Don and Merge (Not included).
- You will be logged into your newly created iCloud account. Now, you can set up iCloud on your iPhone or iPad with your new iCloud account.
Method 2 of 3: Use a Mac computer
Click the Apple menu with the apple icon in the top left corner of the screen.
Click System Preferences (System Preferences) in the second part of the drop-down list.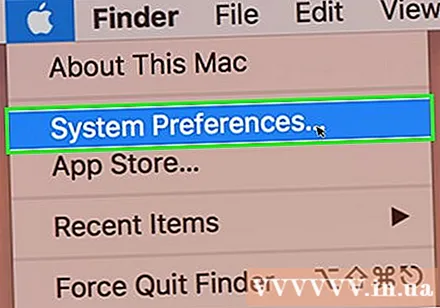
Click icloud in the left part of the window.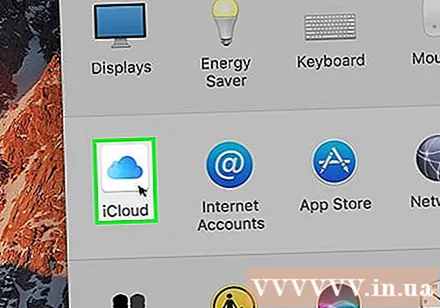
Click Create Apple ID ... (Create Apple ID…) below the "Apple ID" field in the dialog box.
Enter your date of birth. Use the selection box in the dialog box to do this.

Click next (Continue) in the lower-right corner of the dialog box.
Enter First name and Last name in the fields above the dialog box.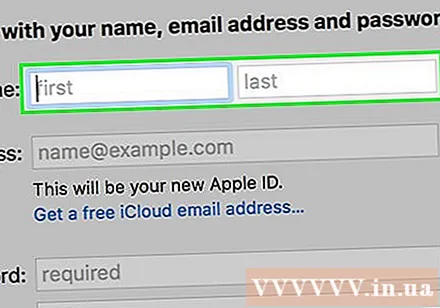

Enter your email address. This email address will become the Apple ID for you to use with your iCloud login.- If you prefer email addresses with @ iCloud.com, click Get a free iCloud email address ... (Create a free iCloud email address ...) below the password field.

Enter your password and confirm it in the fields near the bottom of the dialog box.- Your password must contain at least 8 characters that contain no spaces (including numbers, capital letters and lower case letters). Also, the password cannot contain three consecutive identical characters (222), your Apple ID, or an old password that was used one year ago.
Click next in the lower-right corner of the dialog box.
Create three security questions. Use the three selection boxes in the dialog box to select your security question, and then enter your answer in the field below the question.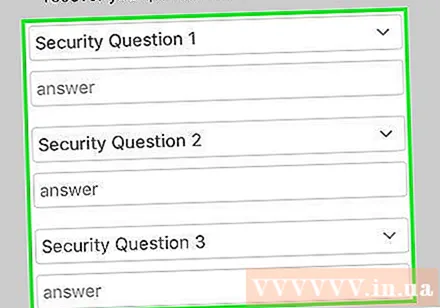
- Choose the question for which you will easily remember the answer.
- Responses are case sensitive.

Click next in the lower-right corner of the dialog box.
Check the box next to the text "I have read and agree….’ (I have read and agree) in the lower left corner of the dialog box.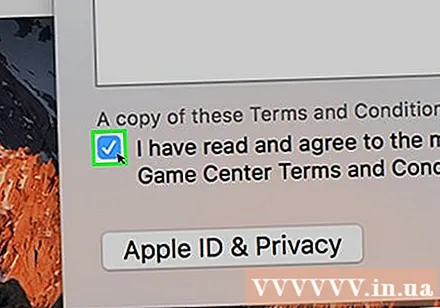

Click Agree (Agree) in the lower-right corner of the dialog box.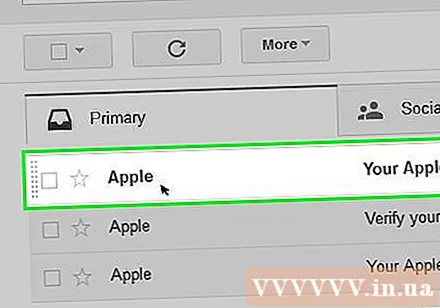
Check email. You need to find the email sent from the email address entered to create an Apple ID.
Open an email from Apple titled "Verify your Apple ID".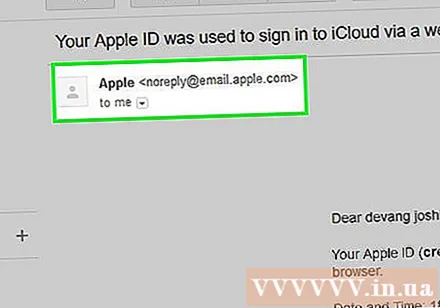

Click on the link Verify now> (Verify now>) in email body.
Enter password. Type the password you want to create for your Apple ID in the "Password" field in the browser window.
Click tiếp tục (Continue) near the middle of the bottom of the browser window.- You will see the message "Email address verified" on the screen.
- Follow the onscreen instructions to set up iCloud on your Mac.
Access iCloud site from any browser.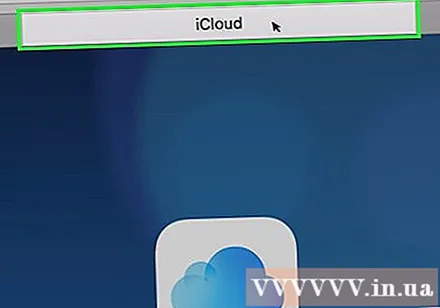
Enter your Apple ID and password.
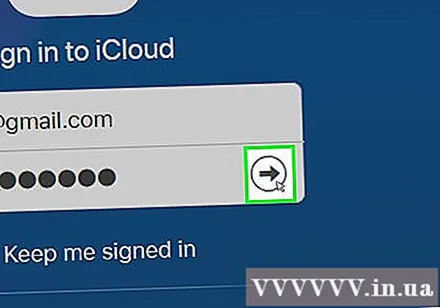
Click ➲ to the right of the password field. Now you can use your iCloud account. advertisement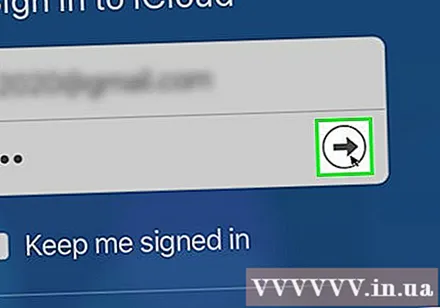
Method 3 of 3: Use iCloud.com
Access www.icloud.com from any browser, including a Windows computer or Chromebook.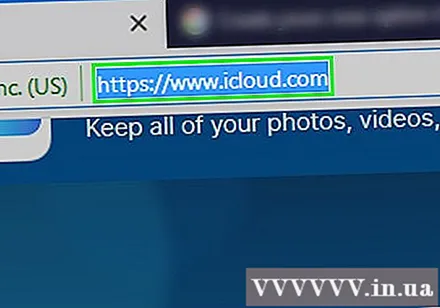
Click Create yours now. (Create an account now) at the bottom of the Apple ID and password field to the right of the "Don't have an Apple ID?"(No Apple ID?).
Enter your email address. This email address will become the Apple ID you use to sign into iCloud.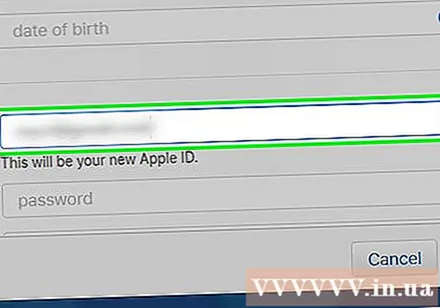
Enter your password and confirm it in the fields near the bottom of the dialog box.- Your password must contain at least 8 characters that contain no spaces (including numbers, capital letters and lower case letters). Also, the password cannot contain three consecutive identical characters (222), your Apple ID, or an old password that was used one year ago.
Enter First name and Last name in the field near the middle of the dialog box.
Enter your date of birth in the field near the middle of the dialog box.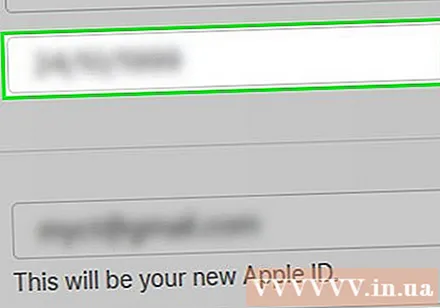
Scroll down and create three security questions. Use the three selection boxes in the dialog box to select the security question, and then type your answer in the field below the question.
- Choose a question where you can easily remember the answer.
- Responses are case sensitive.
Scroll down and select your country in the selection box.
Scroll down and tick or unmark the notification box from Apple. Marking means you'll receive email updates and notifications from Apple.
Scroll down and enter the untidy characters in the field below the dialog to prove you're not a robot.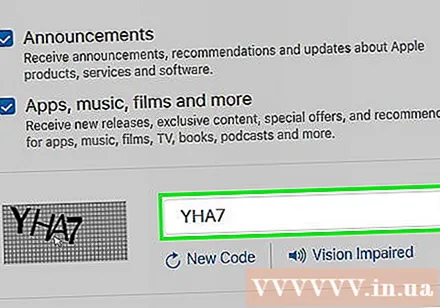
Click tiếp tục (Continue) in the lower-right corner of the dialog box.
Check email. You need to find the email sent from the email address entered to create an Apple ID.
Open the email sent from Apple with the subject "Verify your Apple ID".
Insert code. Type the 6-digit code in the email into the boxes displayed on the screen.
Click tiếp tục in the lower-right corner of the dialog box.
Check the box next to the text "I have read and agree….’ (I have read and agree) near the bottom of the dialog box.
Click Agree (Agree) in the lower-right corner of the dialog box.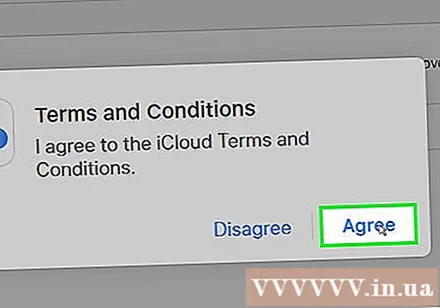

Access iCloud site from any browser.
Enter your Apple ID and password.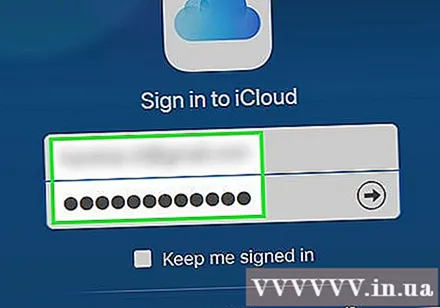
Click ➲ to the right of the password field. Now you can use your iCloud account. advertisement


")