Author:
Frank Hunt
Date Of Creation:
18 March 2021
Update Date:
1 July 2024
Content
Excel has some really useful functions, if you know where to find them. The easiest to learn uses are grouping and overview, which can minimize large amounts of data and make it easier to deal with complex spreadsheets. Take the following steps to take advantage of data grouping in both newer and old versions of Excel.
To step
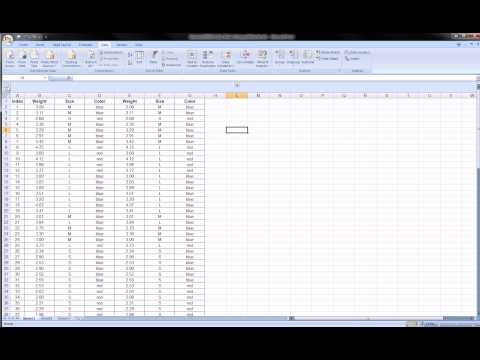
 Open the file you want to work with. Grouping is very useful for making large tables more manageable in terms of size and presentation, but for simplicity, we're using a small spreadsheet for this demonstration.
  Go to data. In newer versions of Excel this is part of the ribbon. If you have an older version, click on it Data drop-down menu.
Method 1 of 2: Automatic overview
 Go to data > Grouping > Auto overview. In older versions of Excel, go to Data> Overview> AutoOverview.
 - Excel searches for data that is in logical units when grouping (e.g. headings at the beginning and formula totals at the end), selects them and gives you the option to minimize them. If Excel indicates that an automatic overview could not be created, this is because there are no formulas in the spreadsheet. In that case, you have to group the data manually (see Manually grouping data).
 View the automatic overview of your spreadsheet. Depending on the complexity and layout of your spreadsheet, you will find that the individual parts of your data are divided into groups, indicated by square brackets at the top and left of your range of cells. The sample worksheet is very simple and grouped in one place only.
 - In the example overview, the data between the first row (the header) and the last two rows (which contain both formulas) is automatically grouped. Cell B7, for example, contains a SUM formula.
- Click the [-] button to minimize a data group .
- Look at the data that remains. This is usually important information that gives the user of the spreadsheet the option of whether or not to go deeper into the details, making the spreadsheet easier to oversee.
- In the example overview, the data between the first row (the header) and the last two rows (which contain both formulas) is automatically grouped. Cell B7, for example, contains a SUM formula.
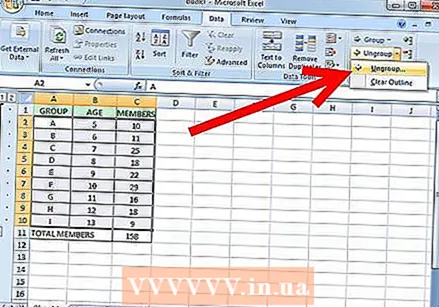
 Delete the automatic overview if you want. If Excel has misinterpreted certain data and you are not happy with the results, you can delete the overview again by going to data > Ungroup (or Overview) and then Clear overview to select; From this point on you can manually group and ungroup data (see method below). If the automatic overview only needs a few changes then you can save yourself time by making small adjustments.
Method 2 of 2: Manually group data
 Select the cells you want to minimize. In this case, we only want to show the headers and grand total after minimizing the data, so we select everything in between.
  Go to data > Grouping > Grouping . For older versions of Excel, go to Data > Overview > Grouping.
  When prompted, choose Rows or Columns. In this example we want to collapse the data vertically so we choose Rows.
 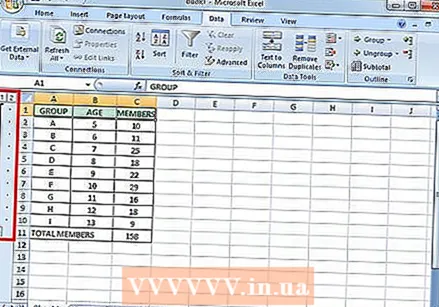 View the portion of the data that has been grouped. It is now marked with a square bracket along the left side or the top of the cells.
  Click the [-] button to minimize.
 Select and group other sections as desired. Expand the current selection if necessary (by pressing [+]), then repeat Steps 1 through 4 to create new groups. In this example, we are going to create a new subgroup within the first group, without the subtotals, so we select all cells between the headings and the subtotals.
 - Look at the portion of the data that is grouped.
- Minimize the new group and notice the difference in appearance.
- Look at the portion of the data that is grouped.
 To ungroup a section: select this section with the Shift key and go to data > Ungroup > Ungroup. In older versions of Excel, go to Data > Overview > Ungroup
 To ungroup everything, go to data > Ungroup (or Overview) > Ungroup.
Tips
- Often times, the AutoOverview feature doesn't work exactly as you'd like. Manual overview - that is, creating a series of groups - is sometimes simpler and more focused on the data in your spreadsheet.
- You cannot use this function if the worksheet is shared.
Warnings
- Use Grouping not if you want to save the Excel file as an html page.
- Use Grouping not if you want to secure the worksheet; the user will not be able to expand or collapse the rows!


