Author:
Randy Alexander
Date Of Creation:
27 April 2021
Update Date:
26 June 2024
Content
When your computer has problems but you cannot fix the problem, using System Restore is the most appropriate method. The System Restore function in Windows 7 allows you to return your computer to the point in time when an error occurred. You can use System Restore in the following situations: encountered an error installing a new operating system, a new hard drive, or software.
Steps
Method 1 of 2: Perform a System Restore
Learn how System Restore works. Any time you change a setting on your computer, Windows creates a System Restore point. It is basically a snapshot of the computer before making changes (installing or removing programs, updating hard drives, etc.). If something goes wrong when making a change, you can use a System Restore point to bring your computer back to where it was before the change without worrying about losing data.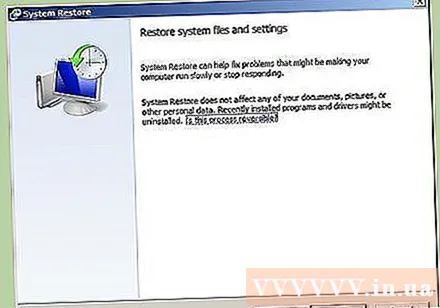
- System restore doesn't affect your personal files, but it doesn't lose anything if you do a file backup in case of a crash. Click here for instructions on how to quickly back up your important files.
- If the computer won't boot into Windows, read the Troubleshooting section.

Create a reset drive password (optional). It is recommended that if you change your password, recovering it may take back your old password. Refer to the article on how to create a reset drive password.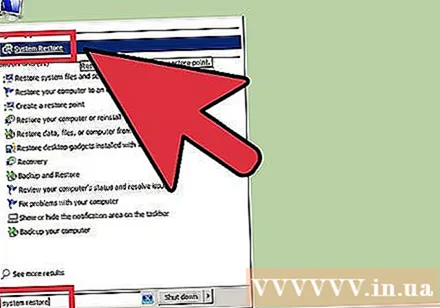
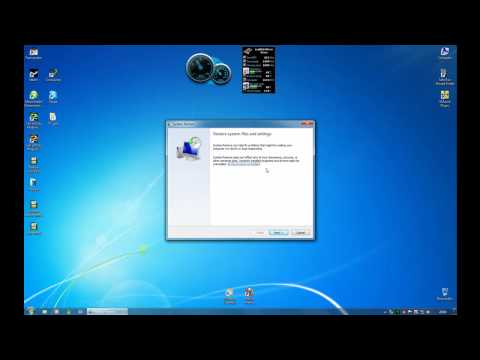
Click the Start menu and type "system restore". Select "System Restore" from the list of search results.
Select the restore point you want to use. Windows suggests the most recent restore point. If you need to select an older point, click the Next button> (Next).
- Check the "Show more restore points" dialog box to see all available restore points. There may not be a lot to choose from because Windows automatically deletes the restore point to make room for it.
- Each restore point will have a short description of the change that caused this point.
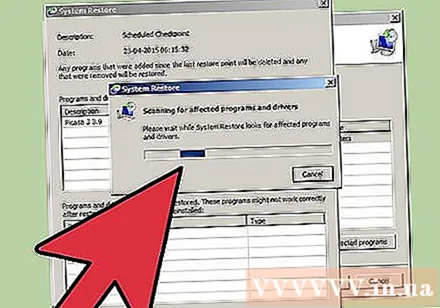
Click the button.Scan for affected programs (Scan affected program) after selecting a restore point. This will display all programs and hard drives that are reinstalled or removed when performing a system restore at this point.- Any programs installed after the restore point was created will be removed, while those that were removed will be reinstalled.
Preview the restore point before proceeding. Before proceeding with the system restore, let's preview changes one last time. Click the Finish button to begin the restore process.
Wait for the restore to complete. After confirming that you want to restore, your computer will reboot and begin the recovery process. This should take a few minutes.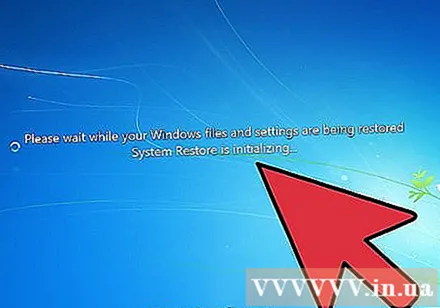
Confirm successful restore. Once the restore is complete, Windows will start and a message should appear when the restore was successful. Check your computer to see if the recovery process has fixed the error. If not, you can try an older restore point.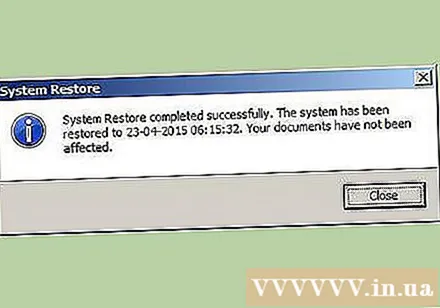
- If System Restore worsens your computer's condition or you want your computer to go back to when it was not restored, you can cancel the most recent restore by running the System Restore tool again and selecting "Undo System Restore". (Uninstall System Restore).
Troubleshoot
Make sure System Restore is activated. To use System Restore, you must have the feature enabled on your computer. If the feature is still not working, you should check to see if it is activated.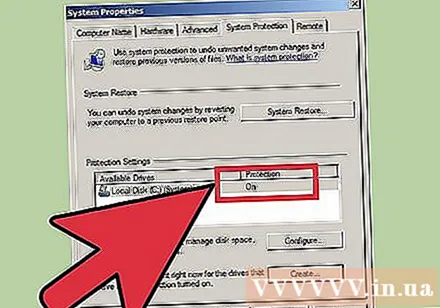
- Click the Start menu, right-click Computer and then select "Properties".
- Click the "System protection" link, then select the hard drive you want to run System Restore from.
- Click on Configure ... and remember to enable "Turn on system protection".
Run System Restore in the Command Prompt if Windows won't start. You can run the System Restore tool from the Command Panel if Windows cannot start an error.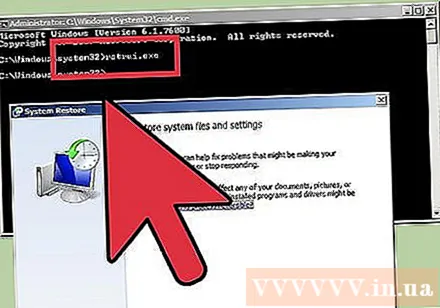
- Restart the computer and hold down the F8 key. This opens the Advanced Boot Options menu.
- Select "Safe Mode with Command Prompt" from the Advanced Boot Options menu. Windows will download important files and take you to the Command Panel.
- Type rstrui.exe and press Enter. This allows the System Restore utility to be started. Follow the instructions in the section above to restore your computer. When performing a system restore in Safe Mode, you cannot cancel it.
Turn on the Check Disk utility to check for problems with the hard drive. A faulty hard drive can stop System Restore. Disk Check is capable of fixing this problem.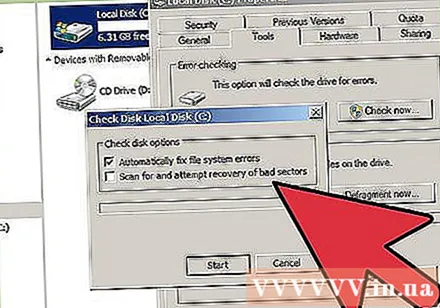
- Click Start, right-click on Command Prompt and select "Run as administrator".
- Type chkdisk / r and press Enter.
- Confirm restart of the machine. Check Disk will be active before Windows starts and scans for errors. It will try to fix any errors it finds.
Scan for viruses and malware. Viruses can get into the restore point, or disable System Restore. Antivirus is the only way to get this tool working again, almost like a complete Windows removal.
- Refer to the online anti-virus article for more details.
Consider reinstalling Windows if System Restore doesn't work. If everything doesn't work then the only fix is to reinstall the operating system. If you backed up important files, the reinstallation process doesn't take as long as you might think and improves your computer's performance.
- Refer to the article on reinstalling Windows 7 on the network for more details.
Method 2 of 2: Create a System Restore Point
Click the Start menu, right-click "Computer" then select "Properties". You can create a System Restore point yourself, which is beneficial if the system is working properly and you need a point of correlation to restore if something goes wrong.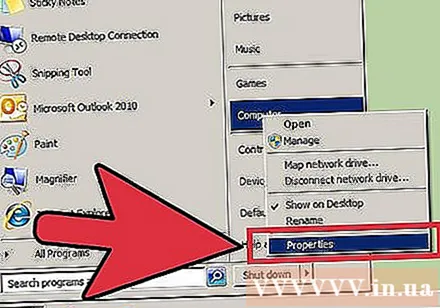
Select "System protection" from the left pane. This allows to open the System Properties window and access the System Protection tab.
Select the button.Create ... (Create). You are asked to enter a short description so that it can be easily identified later.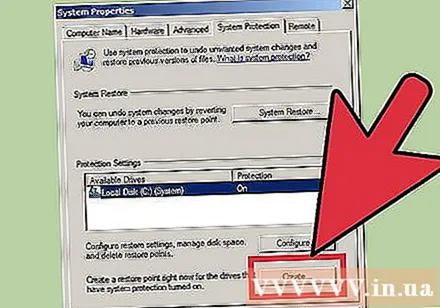
Wait for the restore point to be created. This may take a few minutes.
- Restore points come in many sizes, but by default Windows takes up 5% of your hard drive space. Older restore points are automatically deleted to make room for new ones.
Manually delete old restore points. If you want more free space or are worried about your restore point crashing, you can delete all the old restore points.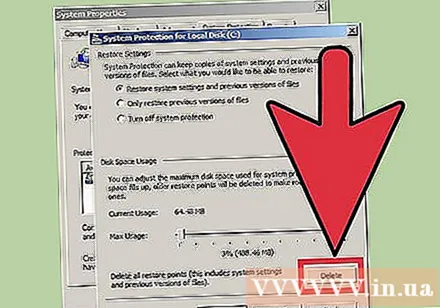
- Open the System Protection tab in the "System Properties" window (see Step 1 of this section).
- Click Configure ... and select Delete to delete all restore points. Note that all freed up space will also be used up when creating a new restore point.
Troubleshoot
Disable your antivirus if you can't create a restore point. This program may cause conflicts during restore point creation. If you cannot make a score then disabling your antivirus is the fastest way to fix the problem.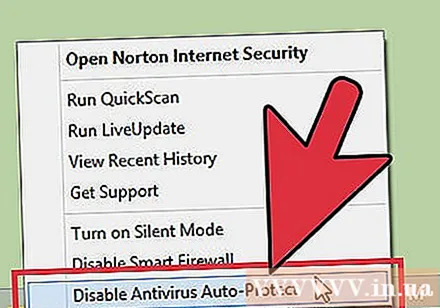
- You can disable the antivirus program by right-clicking the program icon in the System Tray and then selecting "Disable" or "Stop".
Try creating a restore point in Safe Mode. If something on Windows is causing the problem, you can fix it by creating a restore point in Safe Mode.
- To access Safe Mode, restart your computer and hold F8. Select "Safe Mode" in the Advanced Boot Options menu.
- Follow the steps above to create a restore point in Safe Mode.
Make sure there is enough space to create a restore point. If you don't have enough free disk space on your computer, you won't be able to create restore points. Windows will not create restore points on hard drives smaller than 1GB.
- Click Start then select "Computer".
- Right-click on the Windows installation hard drive (usually drive C :) and then select Properties.
- Make sure there is at least 300MB of free space available. Usually you should leave at least 2-3GB blank.
Try setting up the Windows Repository. Doing this may correct the problem of not creating a restore point.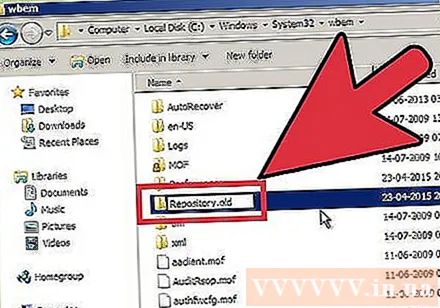
- Reboot the computer and hold F8. Select "Safe Mode" in the Advanced Boot Options menu.
- Select the Start menu, right-click on Command Prompt, then select "Run as administrator".
- Type net stop winmgmt and press Enter.
- Click Start then select "Computer". Navigate to C: Windows System32 wbem and rename repository Fort repositoryold.
- Reboot your computer and go to Windows as usual. Click the Start menu, right-click and select Command Prompt, then select "Run as administrator".
- Type net stop winmgmt then press Enter. Then type winmgmt / resetRepository and continue to press Enter.
- Restart your computer one last time and try creating a restore point.
Warning
- Remember to save open files and shut down all programs. Do not interrupt System Restore.


