Author:
Randy Alexander
Date Of Creation:
3 April 2021
Update Date:
26 June 2024

Content
Want to show off your favorite band picture on your sleeve or show off your skills from summer camp proudly with stickers on your backpack? Stickers are a great way to show off your personality - and are also helpful in case you want to hide torn or damaged areas on clothes and accessories. Learn how to prepare stickers, use iron to fix pictures and make sure the patch remains in place after washing.
Steps
Part 1 of 3: Preparing picture stickers
Find out what kind of sticker you have. Some types of stickers have adhesive on the back, others only have a cloth underneath. Take a close look at the patch and determine if you need any additional materials.
- Decorative embroidery stickers are usually thick, stiff, and have a plastic glue on the underside. These can be used to conceal torn or discolored fabric.
- The heat transfer sticker has a picture printed on one side of the paper, and the other side is non-glossy paper. This type cannot fix the tear, and the fabric underneath is often exposed if it is not a white fabric.
- The back sticker is only a fabric that can be attached with a laminated cloth.
- Stickers used to fix holes or stains designed to mix with fabric usually have a layer of paper behind and need to be removed before applying.
- Consider designing your own sticker if you can't find one you like.

Check the fabric of the garment or accessory. Materials such as denim and cotton often make a great base for iron stickers.The general rule of thumb is that the fabric should be at least as thick as the sticker.- Check the garment care label to see if the fabric is fine (if not, you will see a crossed out iron). If there is no label on the clothing, try to guess what it is.
- Be very careful with polyester fabrics, as applying high temperatures in stickers can burn the fabric or discolor the fabric.
- Silk and other delicate materials are not suitable subjects for iron-based stickers.
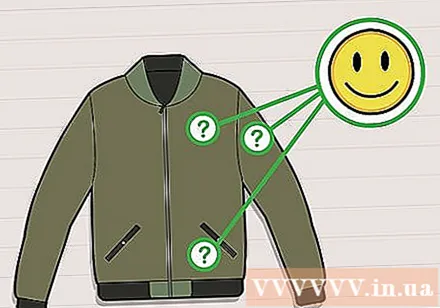
Consider the design and placement of the sticker. Before you heat up the iron, spread your shirt, sling, or backpack on the table and pinpoint where you want the patch to be placed.- If you're only going to stick with a single image, it's a good idea to place it in a nice and prominent position so that the sticker looks designed to be there.
- If you plan to add more stickers, like decorating the girls' crossbones or any other item, you need to plan ahead to make sure there is enough room for the stickers.
- If you are using self-printed stickers, remember that any asymmetric images will be printed backwards.
Part 2 of 3: Paste pictures
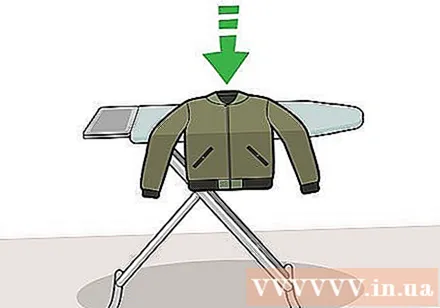
Spread the fabric you want to stick the picture to on a heat resistant surface. An iron table is great for clothes, but if you don't have one, you can also lay a towel in half on a sturdy table top.- To make sure there is a good surface to which you will be pressed, be the front plane. If you want to stick the picture on a backpack or something difficult, you should try to arrange it so that the part you want to paste is spread flat on a hard surface.
Place the sticker in the selected location. The adhesive side should be placed close to the base fabric. Make sure the patch is not wrinkled.
- Embroidery stickers have adhesive on the underside.
- With a heat transfer sticker, the sticky side is the side with the printed image. Place the print on the fabric. The paper behind the sticker will come off when you are on it.
- If you are using an adhesive cloth, the back of the fabric should be facing the fabric.
- If you are using a patch that blends into the fabric, you may need to press the sticker against the reverse side of the fabric. Follow the directions on the package.
Heat your iron. Leave irons at the hottest temperatures the fabric can tolerate. Be sure to turn off the "steam" mode and make sure there is no water in the iron.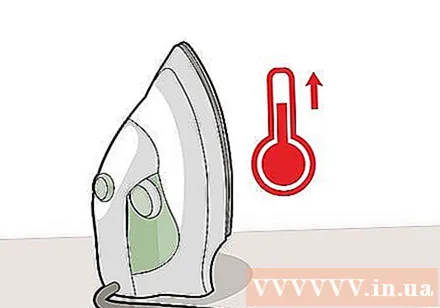
Spread a thin layer of towels over the sticker. Be careful not to move the patch position. The towel will protect the sticker and surrounding fabric.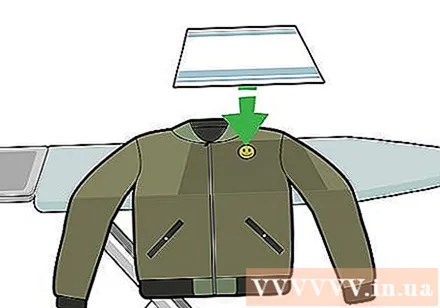
Place the hot iron on the sticker and press down. Hold for about 15 seconds. Press hard to apply as much pressure as possible.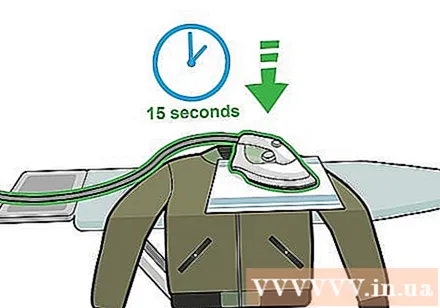
Remove the iron and let the patch cool. Remove the towel and check to see if the patch is firmly attached by gently rubbing the edge with one finger, trying to lift the sticker. If the patch lifts a little, spread the towel over the patch and press the iron for another 10 seconds.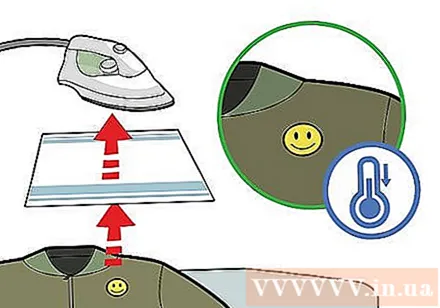
- If using a heat transfer print, wait for it to cool down (about 10 minutes), then carefully peel the paper off.
Part 3 of 3: Maintenance of the sticker
Consider sewing around the edge of the patch. In order for the patch to stick firmly to the fabric, use a sewing machine or needle to sew the patch onto the fabric. This step will greatly reduce the risk of the patch coming off.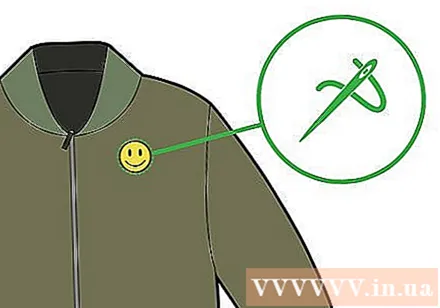
- Choose a sewing thread color that matches the fabric color.
- Unfortunately around the self-printed paper sticker.
Do not wash the photo if it is not needed. Iron stickers are designed to stick permanently but may still come off over time. Be careful not to get the sticker dirty, as washing can cause the sticker to come off.
- If you have to wash the item, wash it by hand in cold water. Dry naturally.
Advice
- Cut around the image on the heat transfer paper, but leave 2mm on the “white” portion of the paper around the image to make sure the sticker is firmly attached.
- Turn off the iron when not in use.


