Author:
John Stephens
Date Of Creation:
24 January 2021
Update Date:
1 July 2024

Content
No matter how you store fresh garlic, it will dry and spoil after a while. Well then, let the garlic soak for a longer shelf life. The pickled garlic will have a slightly different flavor than fresh garlic, but still retain the characteristic flavor of garlic. Whether you are a garlic addict or just want to use garlic to ward off the devil, there is a simple garlic soak outlined in this article.
Resources
Basic Materials
- 0.5 kg of dried garlic
- 300 ml white wine vinegar (can be substituted with apple cider vinegar)
- 170 ml of water
- 1 tablespoon of table salt or salt to soak (refined salt will make the broth turn cloudy)
- 4 chili (optional, use soaked as possible)
- Half a lemon
- 4 vials with a capacity of 500 ml
Ingredients for Soaking
- 2 tablespoons mustard seeds
- 1 tablespoon pepper
- 1 tablespoon cloves
- 1 tablespoon ground coriander seeds
- 4 thyme
- 4 laurel leaves
Steps
Part 1 of 2: Preparation of the Soak and Garlic Solution
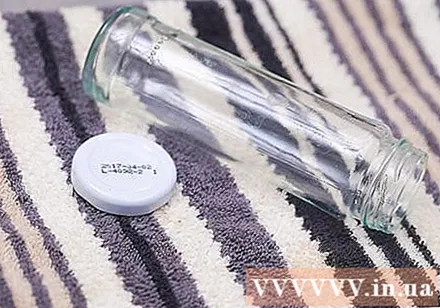
Before you start, you need to make sure the jar you use for soaking is clean. Just a small stain can ruin the whole soaked garlic, so you need to sterilize the bottle properly. After sterilization, place the bottles on a clean towel on the counter to dry.- Probably the easiest way to sterilize is to wash the jars and caps with a dishwasher in "sterilization" mode. If you do not have a dishwasher or dishwasher that does not have a sterilization function, place the jar and lid in boiling water for 10 minutes to sterilize it.
- You should use a clean clipper or a bottle picker so that, if necessary, sterilized bottles are needed. Because bacteria can get in when our hands touch the bottle and lid.
- You should not use old jars of jam or marshmallows as jars for dipping, as they cannot store food properly. Instead, choose a jar with an airtight lid. If you still want to use the old jam jars, you will always need to keep the soaked garlic in the refrigerator and use it for 3 months.
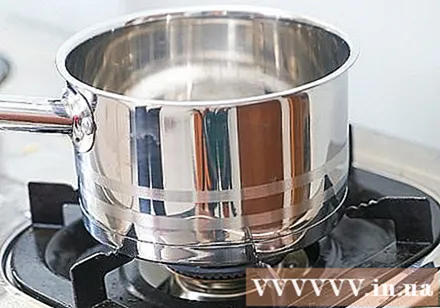
Place the clean jar in a pot and cook over low heat. You can wait for the jar to heat up while preparing the garlic and the soaking method.
Peel off the garlic. If you have to peel a large amount of garlic, you will feel depressed. You want to find a way to effectively peel the garlic? There are two basic ways to quickly peel lots of garlic at once:
- Shake the garlic vigorously. Split the garlic bulb into small cloves and place in a metal bowl. Turn another metal bowl of the same size upside down on the first bowl to seal. Then, hold tightly with both hands and shake vigorously for 30 seconds. Garlic peels will come off all!
- Blanch the garlic. Put the garlic cloves in boiling water to soak for 30 seconds. Remove the garlic and place it in cold water immediately to reduce the temperature. You will peel the garlic right in the water. The shell will now slide out easily after blanching.

Prepare a soak solution. You will mix water, vinegar and salt in a pot and simmer. Remember to stir the salt to dissolve.- It is recommended to use stainless steel, Teflon, porcelain or glass. Do not use a copper pot as too much copper in the water can cause the garlic to turn green or blue.
Part 2 of 2: Soak Garlic
Place the desired spices and cilantro into the jar. Four bottles with 500 ml airtight lids can hold 0.5 kg of garlic. In each jar, you will add 1/4 of the seasoning, along with a thyme and 1 bay leaf.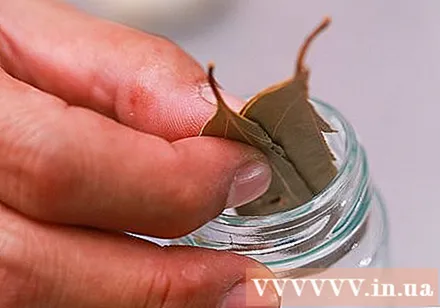
Divide the garlic evenly into the jar. Be careful not to overfill - all garlic needs to be fully submerged.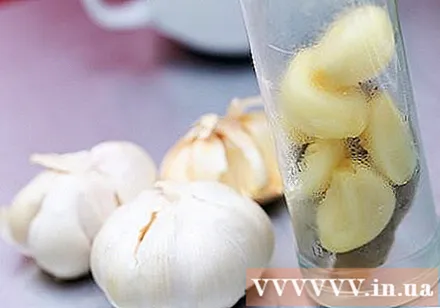
Add enough garlic soaking solution to each jar, then add a slice of lemon to your face to keep the garlic in the solution. Wipe off the soaking solution remaining on the top of the vial. Close the lid carefully, but do not close too tightly. The heating and cooling process will make the bottle airtight.
Boil a jar of garlic soaked. Increase the temperature of the boiling pot and let the water boil gradually. Place the jar of garlic soaked in the pot using a bottle picker.
- Add boiling water to the pot if necessary to increase the water level by 2.5 cm to the top of the bottle.
- Place the jar on a metal tray at the bottom of the kettle. Because the jar can break when receiving heat directly from the bottom of the pot.
Leave the jars in the pot and boil over low heat for about 15 minutes. The process of heating and then lowering the temperature creates a vacuum lock at the top of the jar, helping to preserve the garlic.
Remove the bottle from boiling water and reduce the temperature completely. Be careful not to tilt the jar when taking it out. Make sure the jar is properly closed with the following tips:
- After the vial has cooled, press the center of the vial cap to see if the cap is recessed. If so, it has not been properly sealed.
- Heat the unopened bottles of soaked garlic again if you can't eat them all right away. Use a new lid to fill the jar and continue cooking for another 15 minutes.
Advice
- Garlic can turn blue or green if it is not ripe or dry enough. Red skinned garlic varieties can also turn blue or green when soaked. The change in color does not mean that the garlic is spoiled and that the garlic is still edible.
Warning
- If, after you've boiled the jar of garlic and when you open the lid, you can't hear a hissing from the vacuum at the top of the jar, then should not eat the food is in the jar. This means that the food has not been soaked properly and can cause poisoning.


